Operation & setup
www.visioneng.com/support
12
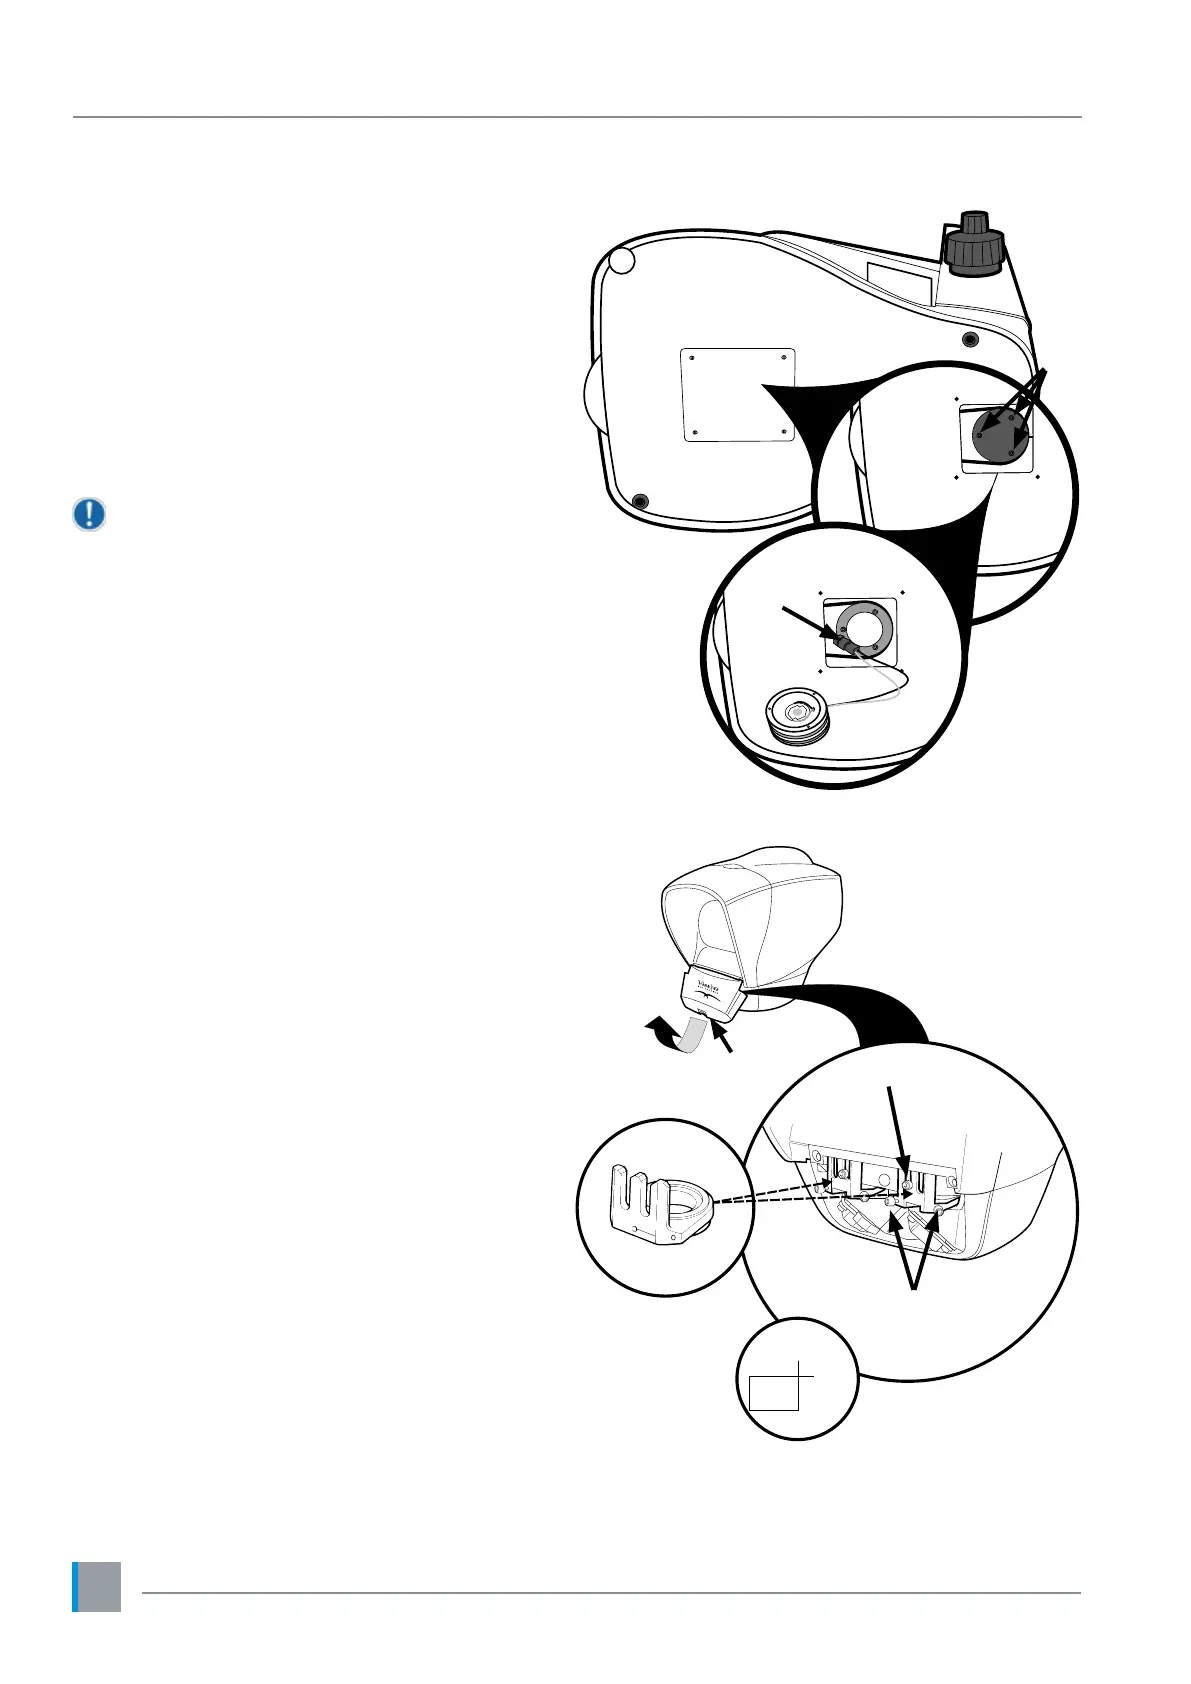
Substage illumination LED
replacement (all models)
` Disconnect the system’s power supply.
` Remove the head, stage and illuminators, carefully
place the unit on its side and remove the 4 LED
cover plate securing screws
u
.
` Remove the LED cover plate
v
.
` Remove the LED securing screws
w
and remove it
from the stand
` Disconnect its ying lead from the connector
x
.
To install a new LED, reverse of the removal
procedure.
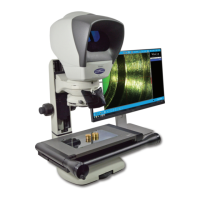
Graticule tting & adjustment
` Undo the securing clip
u
at the base of the front
cover and lift the cover off.
` Place the graticules
v
(2 off) into position and
secure them with the lock nuts and grubscrews
w
(2 per graticule) and the retaining bolts
x
.
` To focus and centralize each graticule, loosen the
appropriate retaining knob and move the graticule
up or down to focus. Re-tighten the retaining knob.
` To adjust the graticules, place a known 90º gauge
(slip gauge or crossline) on the stage and focus the
image. Close one eye and locate the crossline on
the corner of the gauge by unlocking and adjusting
the grubscrews. Once the image is located, lock the
grubscrews with the locking nuts.
` Repeat the procedure using the other eye. Make the
adjustment so that the graticules overlay each other.
Note: If the image is uncomfortable to the eyes,
repeat the above procedure.
u
u
w
v
x
u
u
u
v
w
x