24 25
Once in Calibration Mode, the unit will heat
continuously until the Calibration Switch is
pressed a second time.
IMPORTANT ________________________
The Calibration Switch should be pressed for
at least one (1) second.
Using a reliable temperature measuring device,
check the temperature at the Thermistor Pocket. The
unit should be allowed to reach the desired Set-
Temperature.
NOTE: It may be necessary to let the unit cool
down if the desired set point is lower than the unit’s
current temperature.
Thermistor Pocket
Thermistor Pocket Location
Following a correct calibration procedure, the
Tank temperature should be checked periodically
and be maintained within 5°F of the desired Set-
Point Temperature.
In the event of an incorrect calibration, use the
following steps:
If the Calibration Switch is pressed too early, the
temperature will be set lower than desired. To
resolve, repeat calibration steps.
If the Calibration Switch is pressed too late and the
Set-Temperature is too high, turn the unit OFF and
allow the Tank temperature to cool, then repeat
calibration steps.
Units Equipped with a Boiler
The minerals in water will cause the interior of the
Boiler to build up lime scale deposits over time.
The unit must be de-scaled to remove these
deposits. The frequency of de-scaling will depend
on the amount of minerals (hardness) in the water.
Descale the Boiler:
Unplug the Power Cord.
Turn OFF the water supply.
Allow unit to cool.
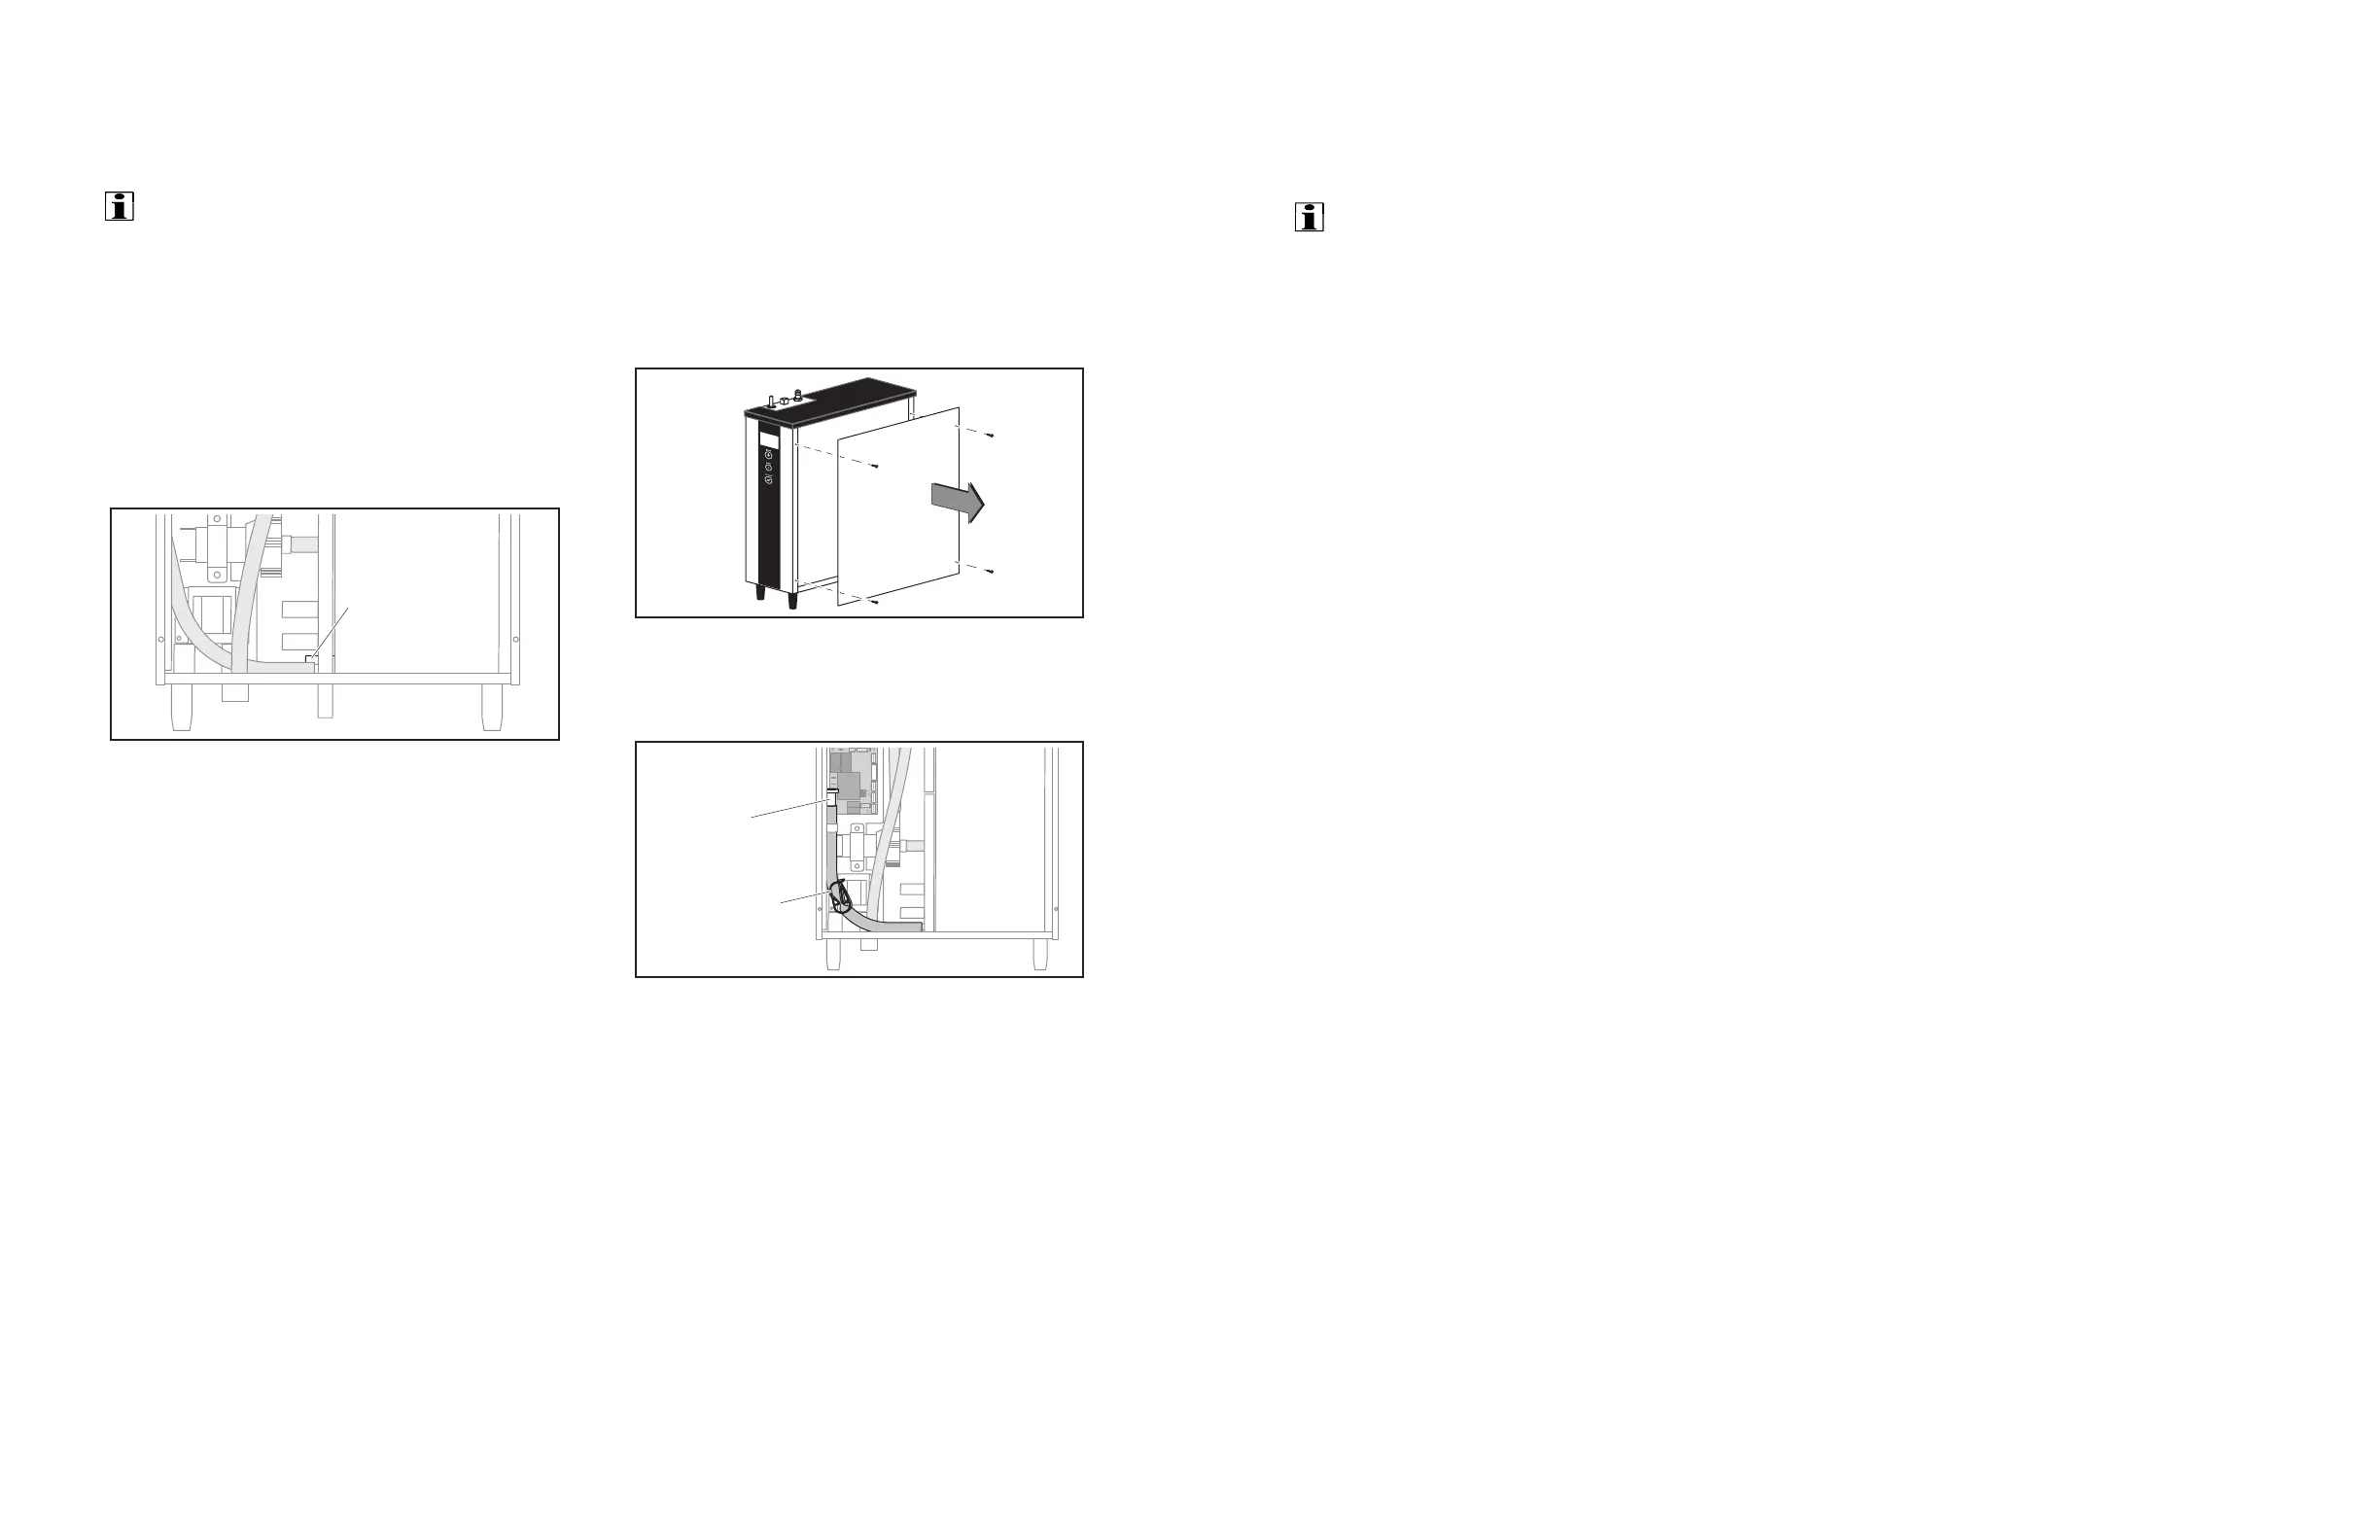
Remove Right Side Access Panel by unscrewing four
(4) screws.
Boiler Side Access Panel Removal
Remove End-Plug and open Pinch-Clamp from
drain hose.
Drain
End-Plug
Drain
Pinch-Clamp
End Plug Removal
Drain into existing drain or suitable container (2
gallon min.).
Drain as much water from the Tank as possible.
Remove the Top Panel and allow the unit to cool
completely.
Drain remaining water from the unit. Tip the unit if
needed.
Remove as much scale as possible by hand.
IMPORTANT ________________________
Take care not to damage Probes or Heating
Element.
Replace End-Plug and close Pinch-Clamp to
close drain.
Turn water supply back ON and plug in Power Cord.
Press the Power Button to start unit.
Add a De-scaling Solution. Follow instructions for
the chemicals being used.
After recommended soak time, drain Cylinder
completely.
Close drain.
Fill Cylinder with fresh water and drain at least
three (3) times to ush unit.
Rell Cylinder. Replace Access Panel.
Unit is ready for service.