22 23
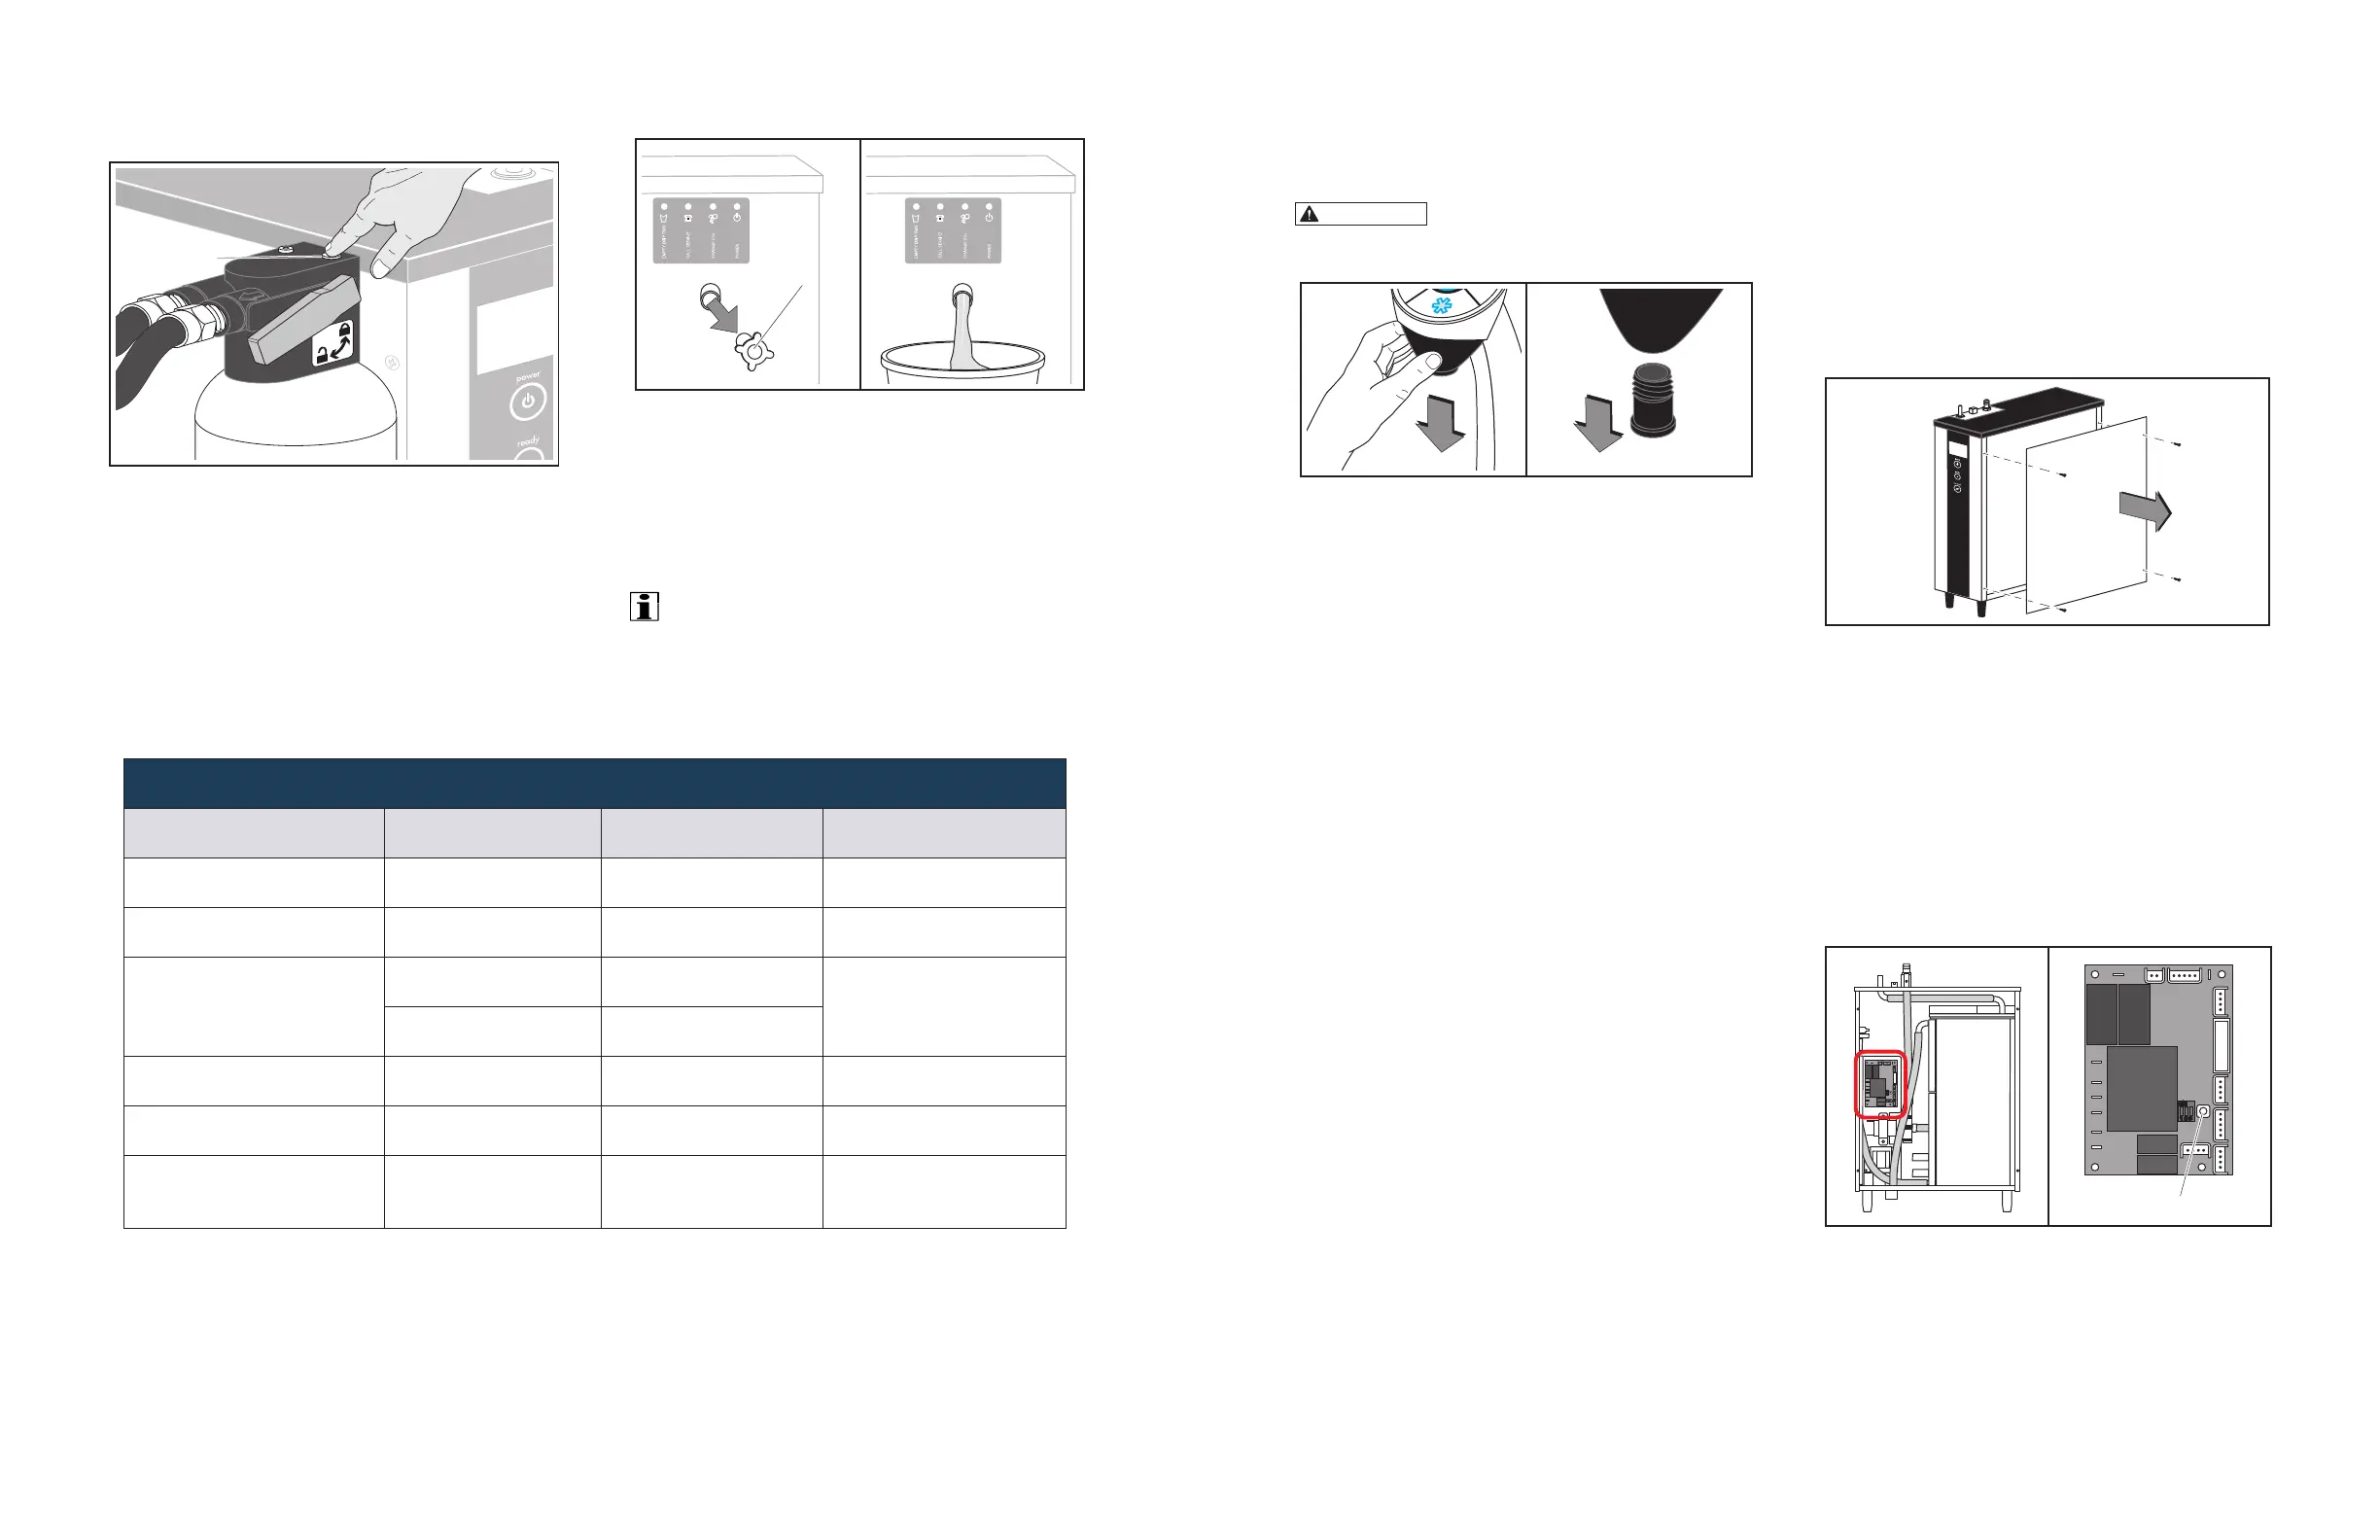
Press the Flush Button on the Filter Head to ush at
least 2-1/2 gallons of water.
Flush Button
Press the Flush Button
Remove the DO NOT USE Sign and carefully
inspect the system’s plumbing and ttings to
ensure there are not any leaks.
Remove the Overflow Drain Plug and check
that the Water Bath is FULL . Tilt the unit back if
necessary. A small amount of water should exit
the Overflow Tube. Top off with water if needed.
Remove
Overflow
Drain
Tube Plug
Checking Water Bath is FULL
Before putting the system back into service, taste
test both the Still and Sparkling Water. If any
residual taste, continue ushing and retest.
The Vivreau ViTAP Water Dispenser is now ready
for use.
IMPORTANT ________________________
Make sure to complete the Vivreau Service
Checklist recording all information required.
Cleaning Schedule
Component Task Frequency Personnel
Dispensing Head/Nozzle Cleaning & Sanitizing Daily End-User
Drip Tray Draining, Cleaning Daily End-User
CO
2
Cylinder
Fill Level Weekly
End- User
Replace As Needed
Chiller Condenser Grille Cleaning, Degreasing Weekly End-User
Chiller Exterior Cleaning Weekly End-User
Water Filter Replacement Twice Yearly
Authorized Service
Dealer
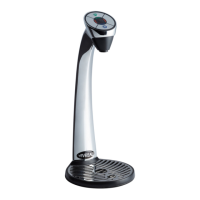
CLEANING NOZZLE & COVER
The Dispensing Head has a removable Nozzle for
ease of cleaning and sanitizing.
Wear protective gloves when
handling Sanitizing Solution.
Cleaning Nozzle and Cover
Fill a small container with Sanitizing Solution.
Remove Cover by pulling down.
Unscrew the Nozzle.
Submerge Nozzle and cover in Sanitizing Solution.
Soak for a minimum of 4 hours.
Remove parts from Sanitizing Solution and rinse
thoroughly.
Re-install Nozzle and Cover.
Wipe external surfaces of Dispensing Head, Drip
Tray and countertop with a clean cloth.
CALIBRATIONS & ADJUSTMENTS
The Boiler Controller can be adjusted to the desired
Set-Point Temperature. The default temperature is
set at 203°F.
Follow these steps if the Set-Point Temperature
needs to be modied.
Unplug the unit.
Access the Controller by removing the Boiler Side
Panel.
Access the Controller
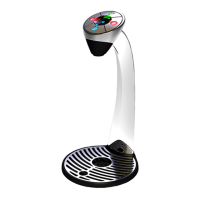
To Enter Calibration Mode:
Press and Hold the Calibration Switch on the
Controller.
While pressing the Calibration Switch, plug Power
Cord in to restore power to the unit.
All available LED’s on the front Panel will blink
continuously.
The unit is now in Calibration Mode.
Calibration Switch
Calibration Switch Location