For your own safety, do not ignore this important
checklist, otherwise serious accidents and injuries
may occur.
•
Always follow the instructions in the checklist
and observe the generally valid safety
measures.
Replacing the indicator lamp
Note and at the beginning of this
chapter
on page 228.
Checklist
To change lamps, always carry out the following
operations in the order → p. 229:
1.
As far as possible, position the vehicle on
level, firm ground at a safe distance from road
traffic, taking the necessary safety
precautions.
2.
Switch on the electronic parking brake → page
154.
3.
Turn off the lights → p. 90.
4.
Move the indicator lever to the basic position
→ page 89.
5.
If the gearbox is automatic, move the gear
lever to position P → p. 125.
6.
Switch off the engine and remove the key
from the ignition → page 119.
7.
If the gearbox is a manual gear, engage one gear
→ p. 123.
8.
Wait for the exterior orientation lighting to
switch off → p. 94.
9.
Wait for the lamp to cool down.
10.
Visually check for blown fuses → p. 230.
11.
Replace the lamp in question according to the
instructions → p. 229. Replace the lamps only
with new ones of the same type. The
corresponding designation can be found on the
lamp housing or on the glass bulb.
12.
As a general rule, do not touch the bulb with
your fingers. Fingerprints evaporate with the
heat of the burning lamp, are deposited on
the reflector and reduce the luminous
intensity of the headlamp.
13.
After replacing the lamp, check that it works. If
it does not work, this may be because it is not
mounted correctly, the connector is not fitted
correctly or, again, because the lamp is faulty.
14.
Whenever a lamp on the front of the vehicle is
replaced, always have a specialist workshop
check the adjustment of the headlamps.
To avoid damaging the paintwork or vehicle parts,
always remove and fit the lighting units carefully.
Note and at the beginning of this
chapter on
page 228.
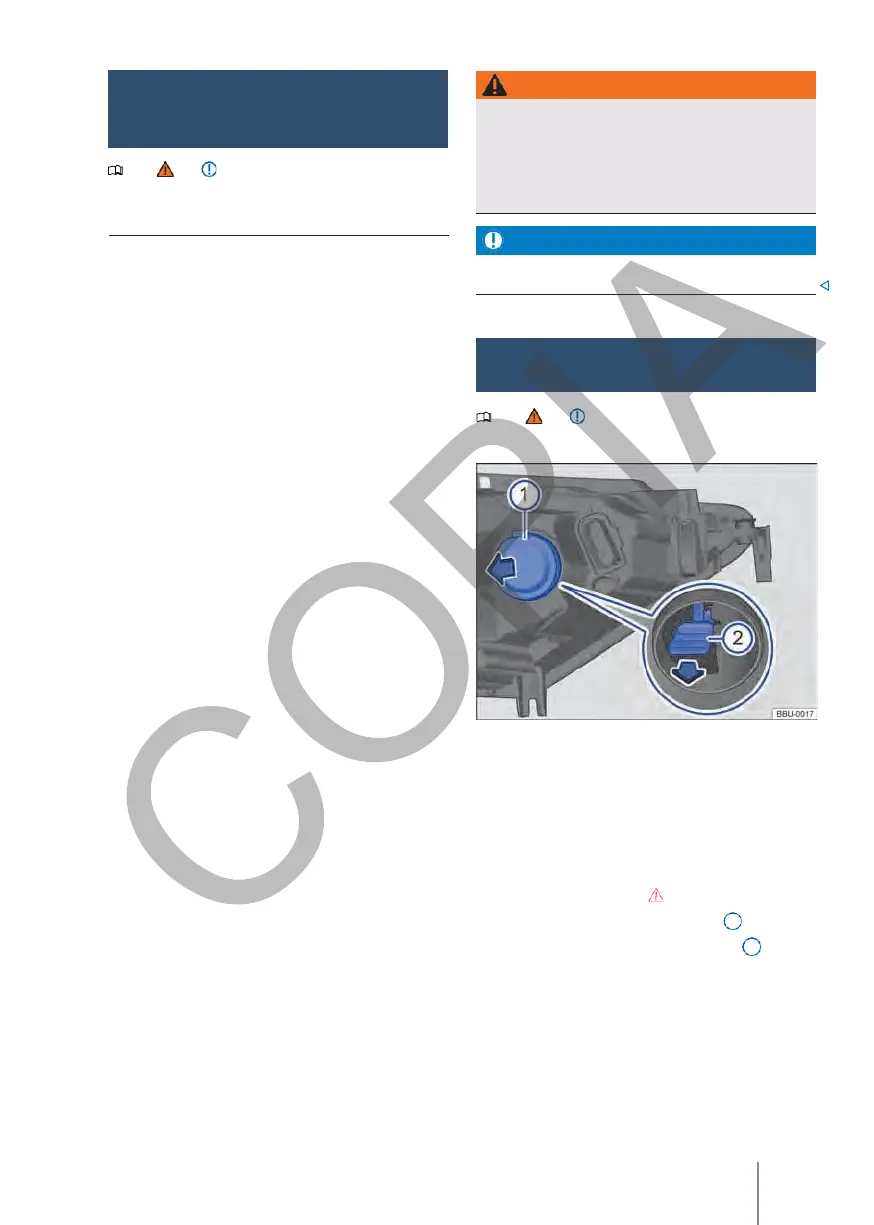
Fig. 154 On the right-hand side of the engine
compartment: part of the headlamp.
Perform the following operations only in the order
given:
1.
Please note the checklist and carry out the
operations described in it.
→ p. 229.
2.
Open the front bonnet → page 240.
3.
Remove the rubber cover → fig. 154 1 .
4.
Pull out the bulb holder → fig. 154 by the
handle in the direction of the arrow. To make
the operation easier, press the handle up and
down a little at the same time, alternately.
5.
Replace the defective lamp with a new one of
the same type.
Checklist "Information
concerning the change of foils
".

 Loading...