P
r
o
t
e
c
t
e
d
b
y
c
o
p
y
r
i
g
h
t
.
C
o
p
y
i
n
g
f
o
r
p
r
i
v
a
t
e
o
r
c
o
m
m
e
r
c
i
a
l
p
u
r
p
o
s
e
s
,
i
n
p
a
r
t
o
r
i
n
w
h
o
l
e
,
i
s
n
o
t
p
e
r
m
i
t
t
e
d
u
n
l
e
s
s
a
u
t
h
o
r
i
s
e
d
b
y
V
o
l
k
s
w
a
g
e
n
A
G
.
V
o
l
k
s
w
a
g
e
n
A
G
d
o
e
s
n
o
t
g
u
a
r
a
n
t
e
e
o
r
a
c
c
e
p
t
a
n
y
l
i
a
b
i
l
i
t
y
w
i
t
h
r
e
s
p
e
c
t
t
o
t
h
e
c
o
r
r
e
c
t
n
e
s
s
o
f
i
n
f
o
r
m
a
t
i
o
n
i
n
t
h
i
s
d
o
c
u
m
e
n
t
.
C
o
p
y
r
i
g
h
t
b
y
V
o
l
k
s
w
a
g
e
n
A
G
.
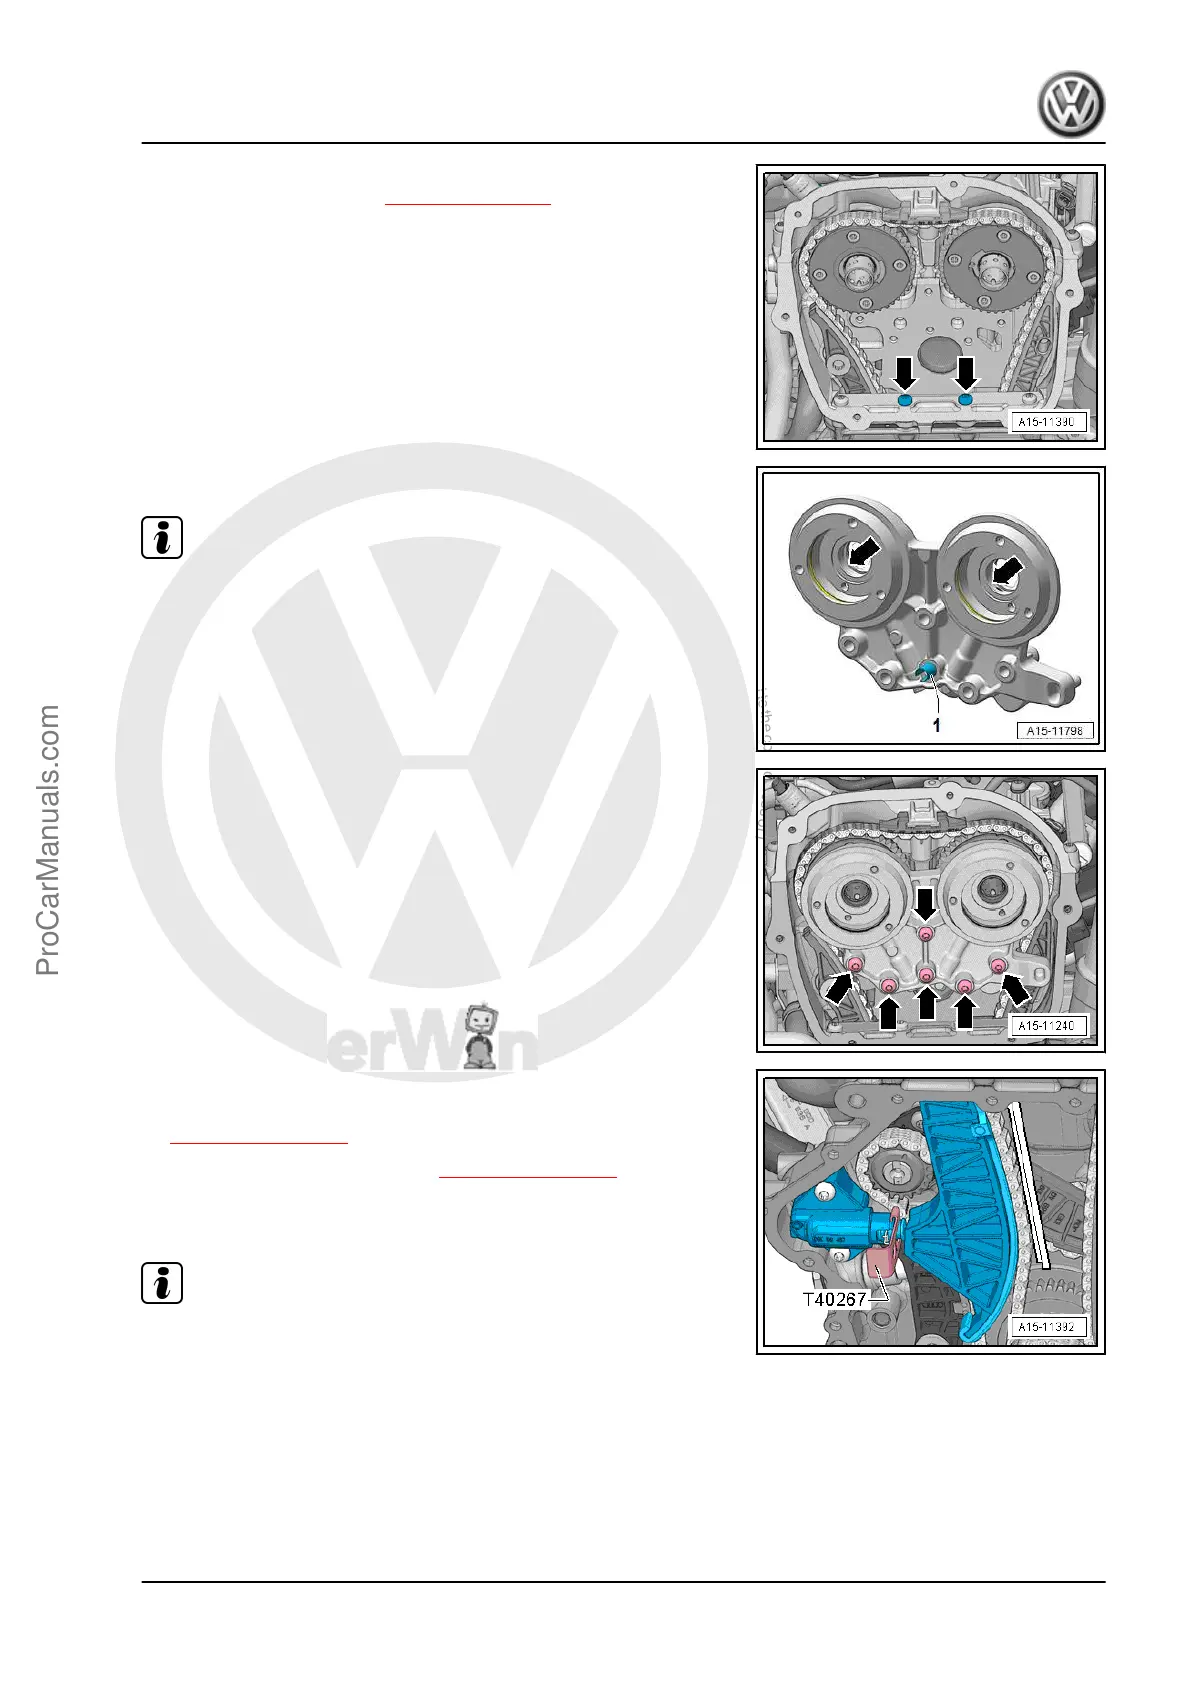
– Install the bolts -arrows- and tighten them. Tightening specifi‐
cation. Refer to -item 4- ⇒ Item 4 (page 91) .
– Lubricate the holes -arrows- with engine oil.
Note
Adapter sleeve -1- is not present on every bearing bracket.
– Attach the bearing mount. Do not tilt it when doing this. Hand-
tighten the bolts -arrows-.
– Remove the Tensioner Locking Tool - T40267- .
– Tighten the bearing bracket bolts -item 5-
⇒ Item 5 (page 115) .
– Install the pilot valves -item 6- ⇒ Item 7 (page 115) .
– Let the engine turn a second time in the direction of engine
rotation.
Note
Due to the ratio, the painted chain links no longer match up after
the engine has been turned.
Golf 2015 ➤ , Golf Variant 2015 ➤
Engine Mechanical, Fuel Injection and Ignition - Edition 04.2015
3. Chain Drive 129
ProCarManuals.com
 Loading...


