P
r
o
t
e
c
t
e
d
b
y
c
o
p
y
r
i
g
h
t
.
C
o
p
y
i
n
g
f
o
r
p
r
i
v
a
t
e
o
r
c
o
m
m
e
r
c
i
a
l
p
u
r
p
o
s
e
s
,
i
n
p
a
r
t
o
r
i
n
w
h
o
l
e
,
i
s
n
o
t
p
e
r
m
i
t
t
e
d
u
n
l
e
s
s
a
u
t
h
o
r
i
s
e
d
b
y
V
o
l
k
s
w
a
g
e
n
A
G
.
V
o
l
k
s
w
a
g
e
n
A
G
d
o
e
s
n
o
t
g
u
a
r
a
n
t
e
e
o
r
a
c
c
e
p
t
a
n
y
l
i
a
b
i
l
i
t
y
w
i
t
h
r
e
s
p
e
c
t
t
o
t
h
e
c
o
r
r
e
c
t
n
e
s
s
o
f
i
n
f
o
r
m
a
t
i
o
n
i
n
t
h
i
s
d
o
c
u
m
e
n
t
.
C
o
p
y
r
i
g
h
t
b
y
V
o
l
k
s
w
a
g
e
n
A
G
.
– Remove the battery tray. Refer to ⇒ Electrical Equipment;
Rep. Gr. 27 ; Battery; Battery Tray, Removing and Installing .
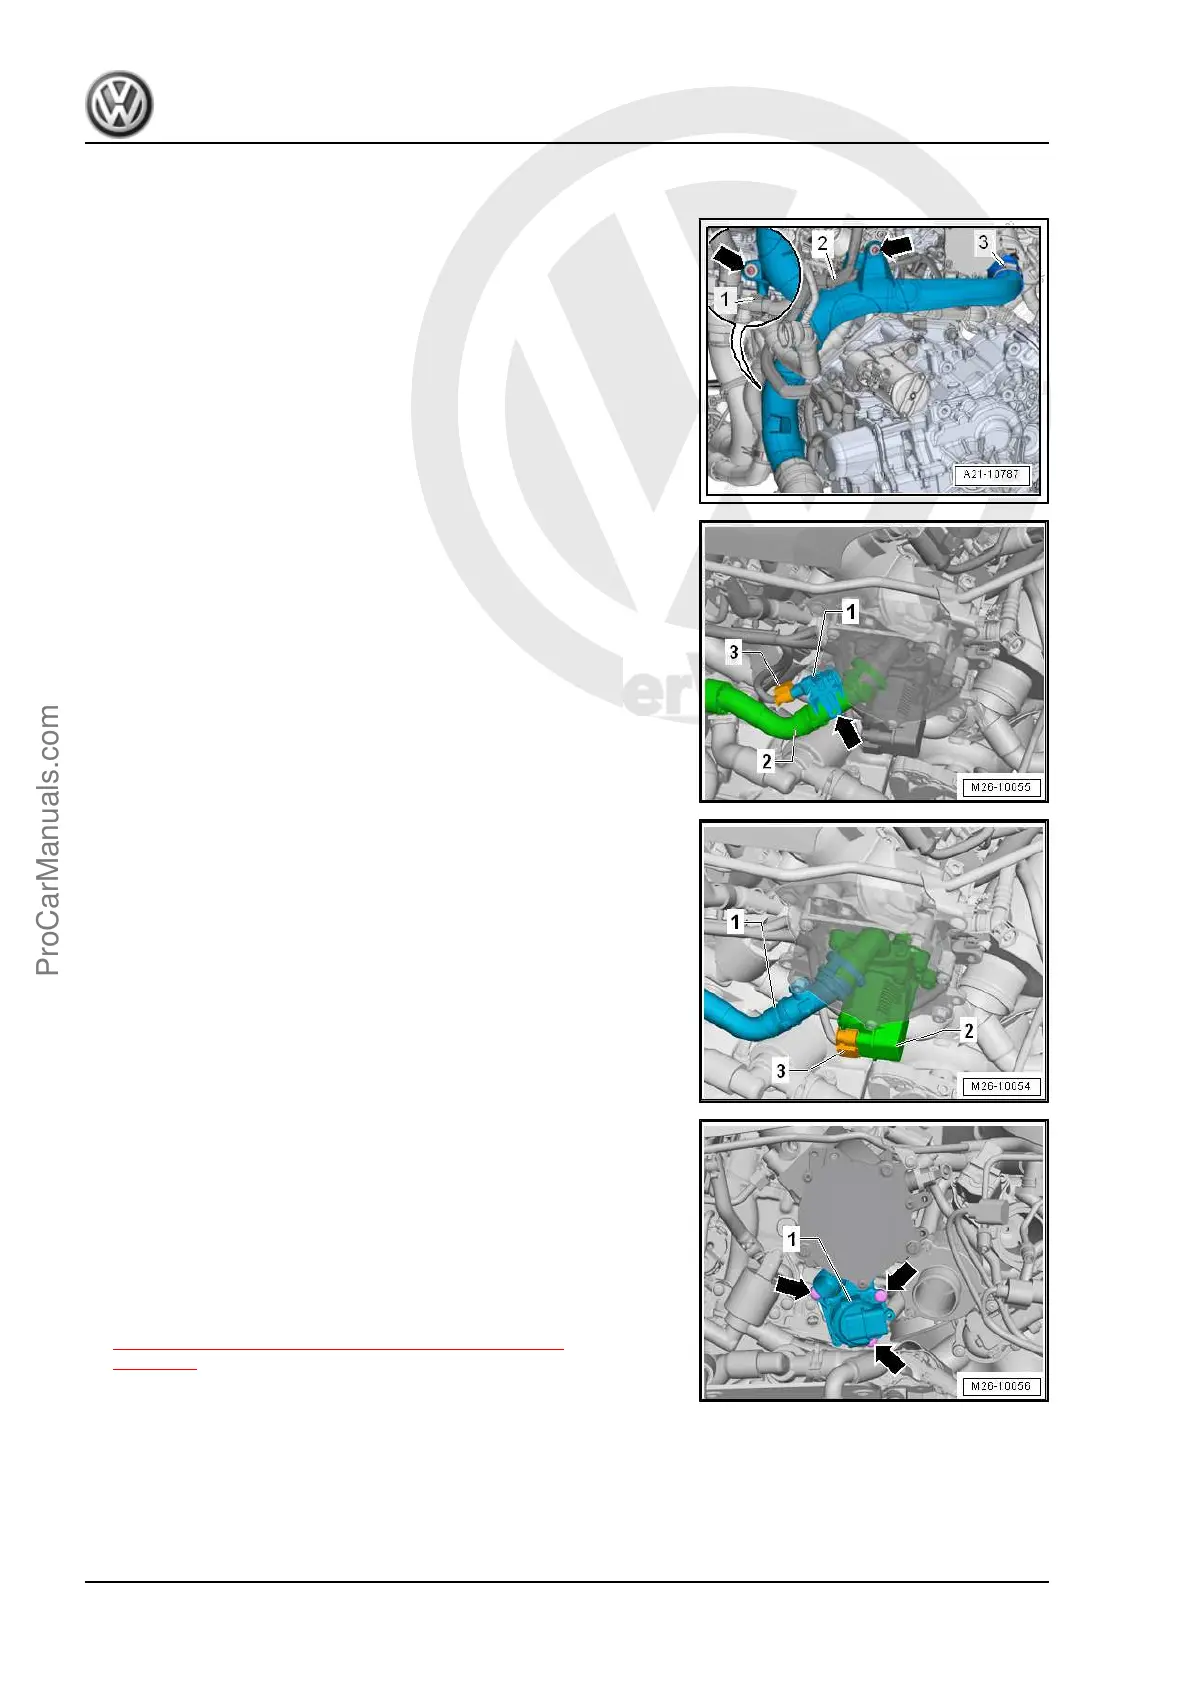
– Free up the wiring harness -1 and 2- from the air guide pipe.
– Loosen the screw-type clamp -3-.
– Remove the bolts -arrows- and remove the air guide pipe.
– Remove the connector -3- from the Secondary Air Injection
Sensor 1 - G609- -1- and unclip the sensor.
– Release both retaining tabs -arrow- from the Secondary Air
Injection Sensor 1 - G609- and Secondary Air Injection Sensor
1 - G609- -1- from the connecting line -2-.
– Remove the connector -3- from the Secondary Air Injection
Solenoid Valve - N112- -2-.
– Squeeze the locking ring on both sides and remove the con‐
necting pipe -1-.
– Remove the bolts -arrows- from the Secondary Air Injection
Solenoid Valve - N112- -1-.
– Remove the bolts -arrows- and the Secondary Air Injection
Solenoid Valve - N112- -1-.
Installing
Install in reverse order of removal. Note the following:
• Replace the seal. Refer to Parts Catalog.
Tightening Specifications
♦ Refer to
⇒ 3.1 Overview - Secondary Air Injection System,
page 352 .
Golf 2015 ➤ , Golf Variant 2015 ➤
Engine Mechanical, Fuel Injection and Ignition - Edition 04.2015
354 Rep. Gr.26 - Exhaust System, Emission Controls
ProCarManuals.com
 Loading...


