P
r
o
t
e
c
t
e
d
b
y
c
o
p
y
r
i
g
h
t
.
C
o
p
y
i
n
g
f
o
r
p
r
i
v
a
t
e
o
r
c
o
m
m
e
r
c
i
a
l
p
u
r
p
o
s
e
s
,
i
n
p
a
r
t
o
r
i
n
w
h
o
l
e
,
i
s
n
o
t
p
e
r
m
i
t
t
e
d
u
n
l
e
s
s
a
u
t
h
o
r
i
s
e
d
b
y
V
o
l
k
s
w
a
g
e
n
A
G
.
V
o
l
k
s
w
a
g
e
n
A
G
d
o
e
s
n
o
t
g
u
a
r
a
n
t
e
e
o
r
a
c
c
e
p
t
a
n
y
l
i
a
b
i
l
i
t
y
w
i
t
h
r
e
s
p
e
c
t
t
o
t
h
e
c
o
r
r
e
c
t
n
e
s
s
o
f
i
n
f
o
r
m
a
t
i
o
n
i
n
t
h
i
s
d
o
c
u
m
e
n
t
.
C
o
p
y
r
i
g
h
t
b
y
V
o
l
k
s
w
a
g
e
n
A
G
.
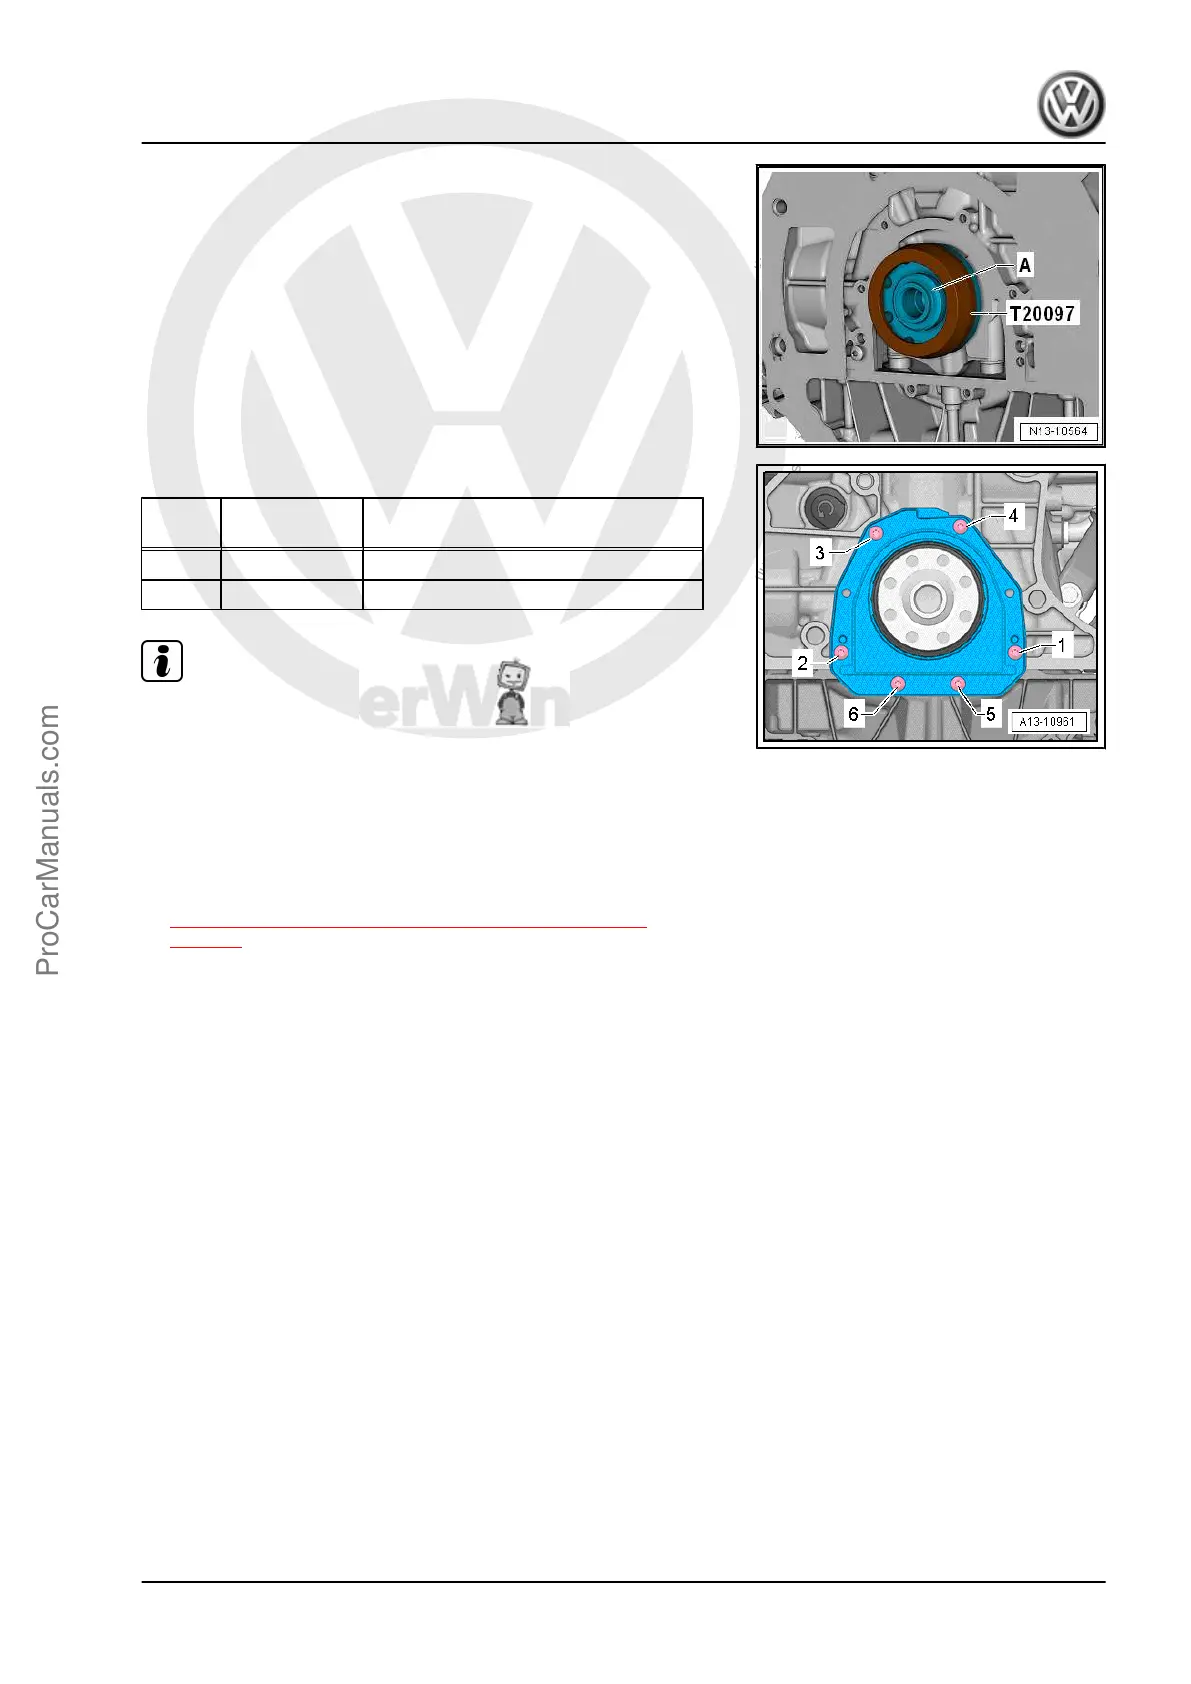
– Position the Seal Installer - Sealing Flange Guide Sleeve -
T20097- on the crankshaft pins -A-.
– Lightly coat the seal with engine oil.
– Slide the sealing flange onto the crankshaft pins with the Seal
Installer - Sealing Flange Guide Sleeve - T20097- .
– Tighten the new bolts in evenly in the sequence shown:
Step Bolts Tightening Specification/Additional
Turn
1. -1 to 6- Install all the way in by hand.
2. -1 to 6- 9 Nm
Note
♦
Only six bolts are installed, two bolt openings remain open.
♦
After installing sealing flange, the sealant must dry for approx‐
imately 30 minutes. Only after then may the engine oil be
replenished.
Assemble in reverse order of disassembly.
Tightening Specifications
♦ Refer to
⇒ 2.1 Overview - Cylinder Block, Transmission Side,
page 57 .
Golf 2015 ➤ , Golf Variant 2015 ➤
Engine Mechanical, Fuel Injection and Ignition - Edition 04.2015
2. Cylinder Block, Transmission Side 61
ProCarManuals.com
 Loading...


