S
Swing drive unit, checking oil level
Check the oil level every 250 hours (EW180E only).
NOTE!
Read the safety when servicing instructions before starting any
work.
A
R
N
I
N
G
Risk of burns.
Hot oil can cause severe burns to unprotected skin.
l
w
a
y
e
a
r
r
n
a
l
t
e
i
v
v
s
o
g
l
e
s
n
h
i
h
e
n
d
g
o
t
l
.
O
T
I
C
E
A
l
w
a
y
e
a
n
n
d
h
e
i
l
i
p
s
i
c
e
f
o
r
e
c
h
e
i
v
l
n
h
e
g
e
s
h
n
e
T
E
!
It is very important that the oil level is always correct and that it is
checked at working temperature.
o
o
i
t
t
l
may lead to insufficient lubrication of the swing drive
unit and cause costly damage.
o
o
i
l
may lead to oil foaming, and cause the swing drive
unit to overheat.
1 Place the machine in service position B, see page
247
.
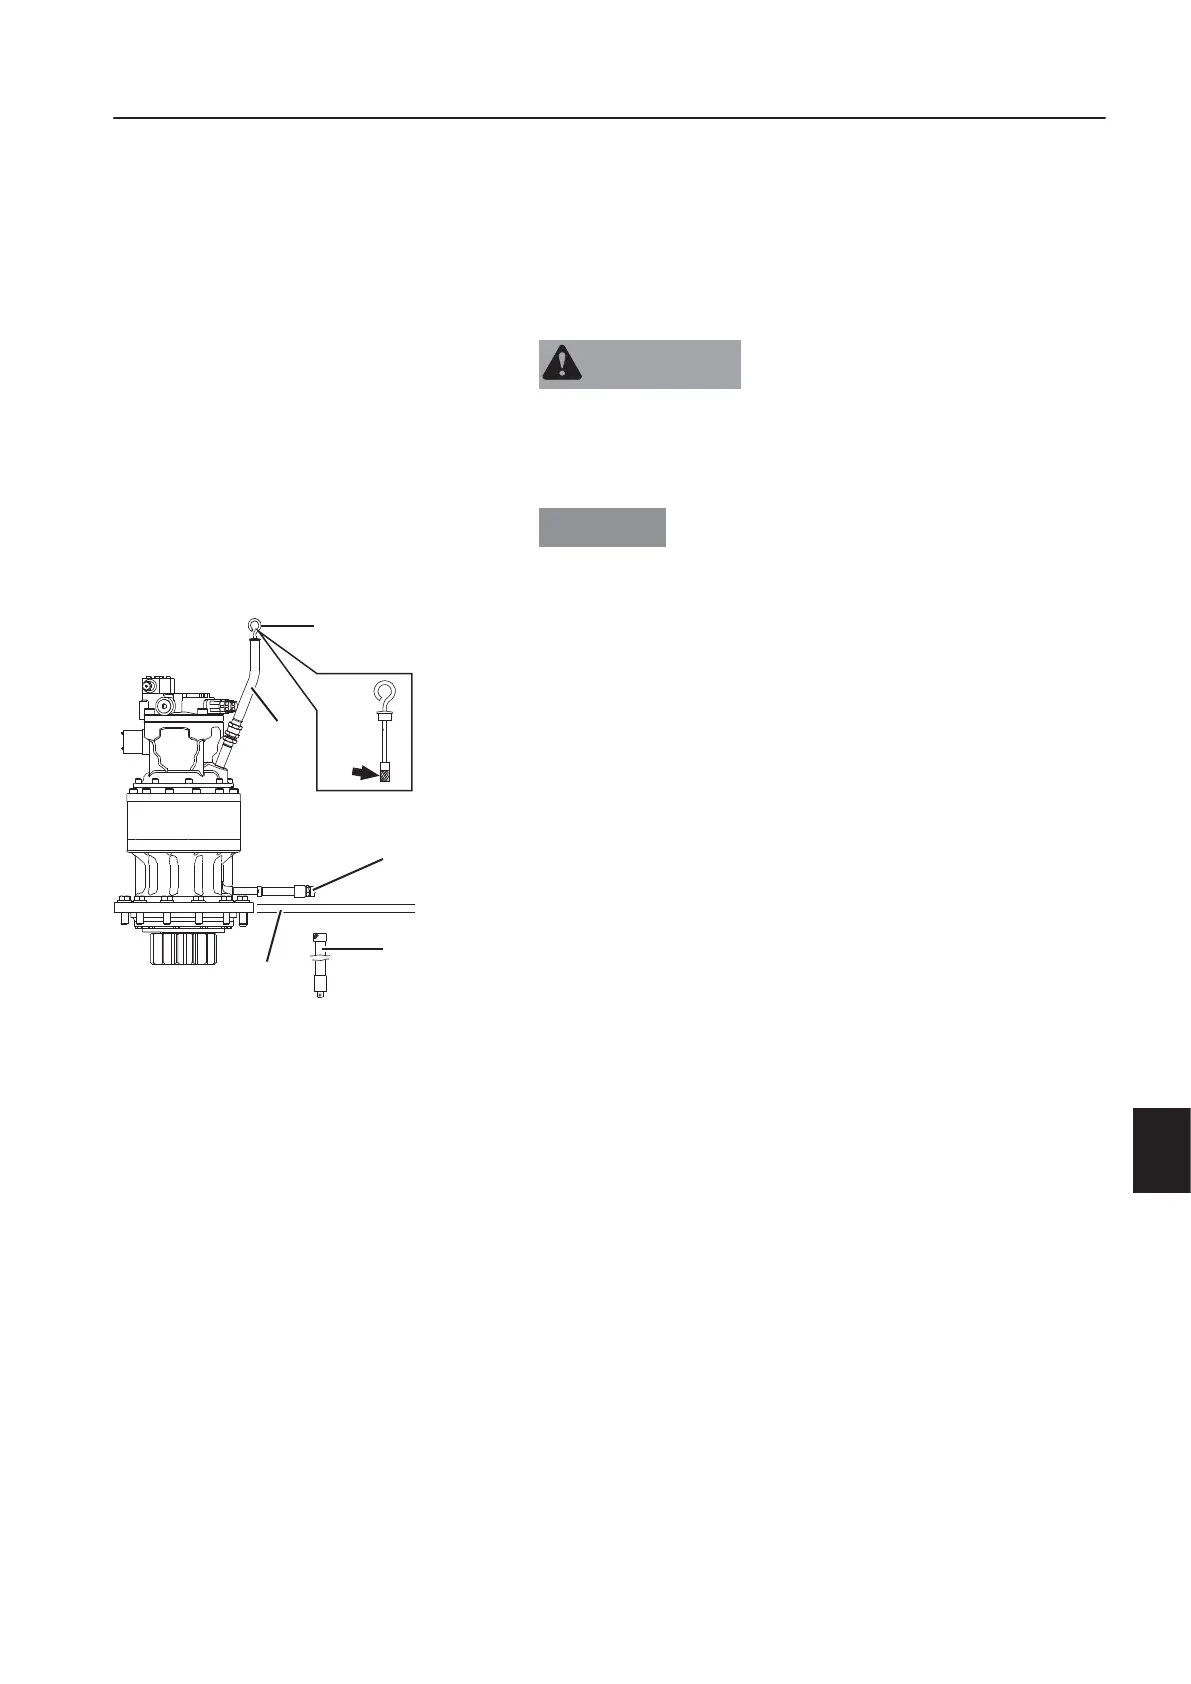
2 Pull out oil dipstick (A) and wipe it with a clean cloth.
3 Insert oil dipstick and pull it out again.
4 Check the oil level. If the level is in the center of "D", the level
is correct.
5 If the level is low, top up oil through oil filler hole (B) to correct
level.
6 If the level is high,
- Place the machine in service position F, see page
247
.
- Remove the under cover (C).
- Place a suitable sized container under the drain valve (E).
- Open the protection cap of drain valve (E).
- Attach the drain hose (F) and drain the oil to the correct level.
- Disconnect the drain hose.
- Close the protecting cap.
- Reinstall the under cover (C).
For oil specification, see page
327
.
a
i
n
t
e
n
a
n
c
a
i
n
t
e
n
a
n
c
r
v
c
,
v
r
y
5
0
o
u
r
s
9
1
 Loading...