W
Welding must only be done by a qualified service technician.
The following measures should be taken before starting electric
welding on the machine or attachments connected to the
machine.
1 Turn off the electric power with the battery disconnect switch.
2 Disconnect the batteries, both the plus and minus terminal.
3 Disconnect all electronic units. For further information, contact
an authorised dealer.
4 Connect the welding equipment's ground connection as close
to the welding point as possible and make sure that the current
does not pass across a bearing.
5 Ventilate well, specially if the welding is performed in a confine
space.
6 Remove all paint from an area of at least 10 cm (4 in) around
the welding point.
A
R
N
I
N
G
Risk of toxin inhalation.
Burning of painted, plastic or rubber parts produces gases that
could damage respiratory tracts.
v
u
r
a
i
n
e
d
b
e
r
r
s
r
l
a
s
i
O
T
I
C
E
A
i
r
x
i
n
g
i
s
e
r
e
a
s
l
y
c
s
l
e
u
n
g
l
l
d
i
r
T
E
!
The weld will be related with inferior quality and strength, never
weld directly on a painted surface.
a
d
l
g
h
t
s
d
j
u
s
g
The adjustment of the headlamps is very important to avoid
dazzling oncoming traffic.
1 Place the machine in service position C on level ground at right
angles to a wall or similar in distance (B), see page
247
.
N
O
T
E
The battery disconnect switch should be on.
2 Turn on the low beams.
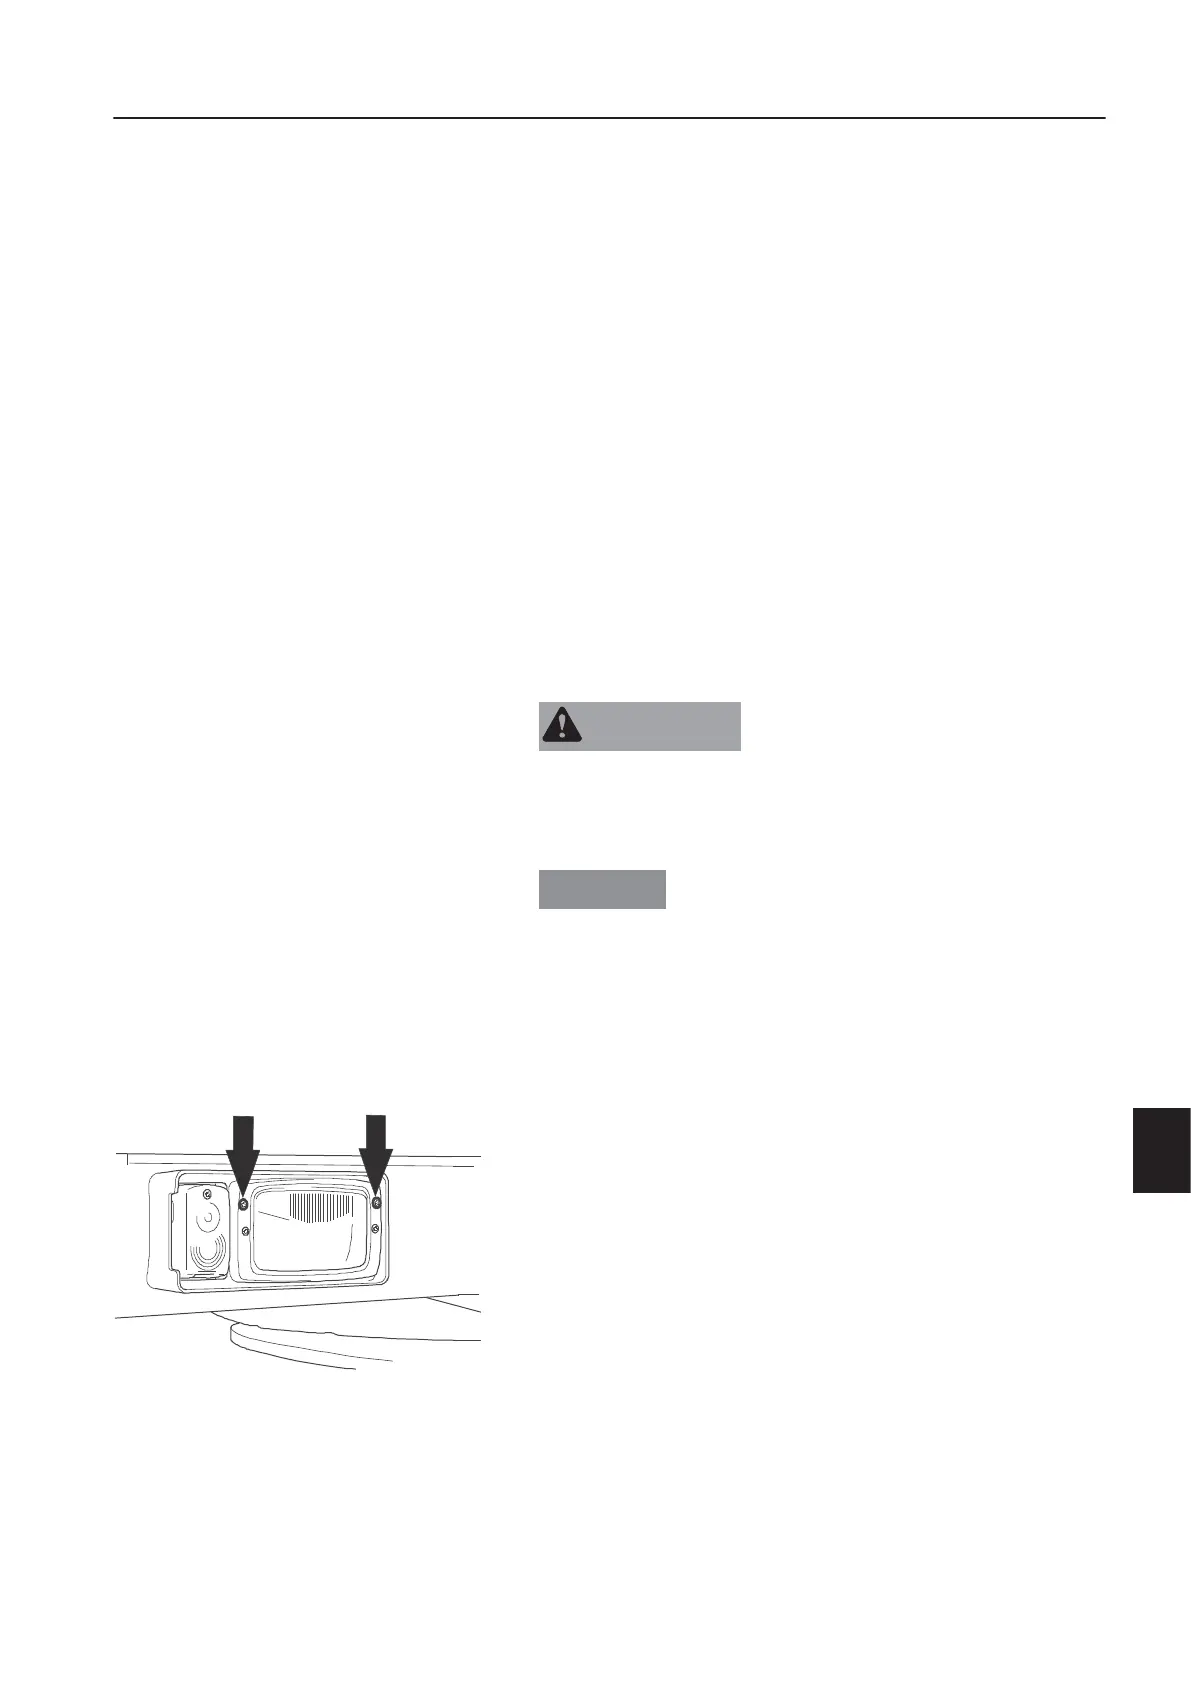
3 Adjust the upper boundary of the low beams at the height (A)
with the 2 adjusting screws on respective side.
Check the distance (C) between the centers of the low beams.
The distance should be the same as between the headlights
on the machine.
N
O
T
E
!
Adjusting measurements are shown in the table below.
4 Turn off the low beams.
V1048046
Adjustment screws
a
i
n
t
e
n
a
n
c
a
i
n
t
e
n
a
n
c
r
v
c
,
h
e
n
e
q
u
i
r
e
d
0
7



 To Next Page