Do you have a question about the Voxelab Aries and is the answer not in the manual?
Avoid modifications, dress properly, keep away from moving parts, do not touch hot components.
Operate in ventilated areas, avoid unstable environments, and ensure supervision for children.
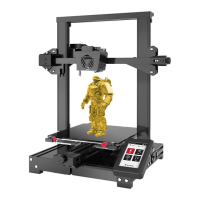
Insert filament into the intake and press the handle until resistance is felt.
Plug in the power cord and toggle the switch to turn on the printer.
Ensure the correct voltage (115/230V) is selected to prevent damage.
Place A4 paper, tap Control/Level, and adjust nozzle distance based on friction.
Repeat the friction test and adjustment process for the remaining leveling points.
Navigate to [Control] then [Load] to begin the filament loading process.
Extruder heats to target temperature; filament loads automatically after preheating.
Ensure build plate leveled, filament loaded, extruder clean, and printer attended.
Tap [Build], then [Disk], select a model, and tap the [Build] icon to start.
Navigate to [Control] then [Unload] to start the filament removal process.
Filament unloads from the port; operation finishes when filament exits.
After Wi-Fi connection, tap [Info] to find the printer's IP address.
Open VoxelMaker, go to [Print]-[Connect Machine], input IP, and click connect.
Copy firmware to USB, plug in, power cycle, and unplug USB to complete upgrade.
Connect via Wi-Fi, go to [Settings]-[Upgrade], and select 'upgrade online'.
| Layer Resolution | 0.1-0.4 mm |
|---|---|
| Filament Diameter | 1.75 mm |
| Nozzle Diameter | 0.4 mm |
| Supported Materials | PLA, ABS, PETG, TPU |
| Bed Leveling | Automatic |
| Frame Material | Metal |
| Max Bed Temperature | 100°C |
| Build Volume | 200 x 200 x 200 mm |
| Connectivity | USB |
| Display | Touchscreen |
| Max Nozzle Temperature | 260°C |
| Power Supply | 24V |