OR
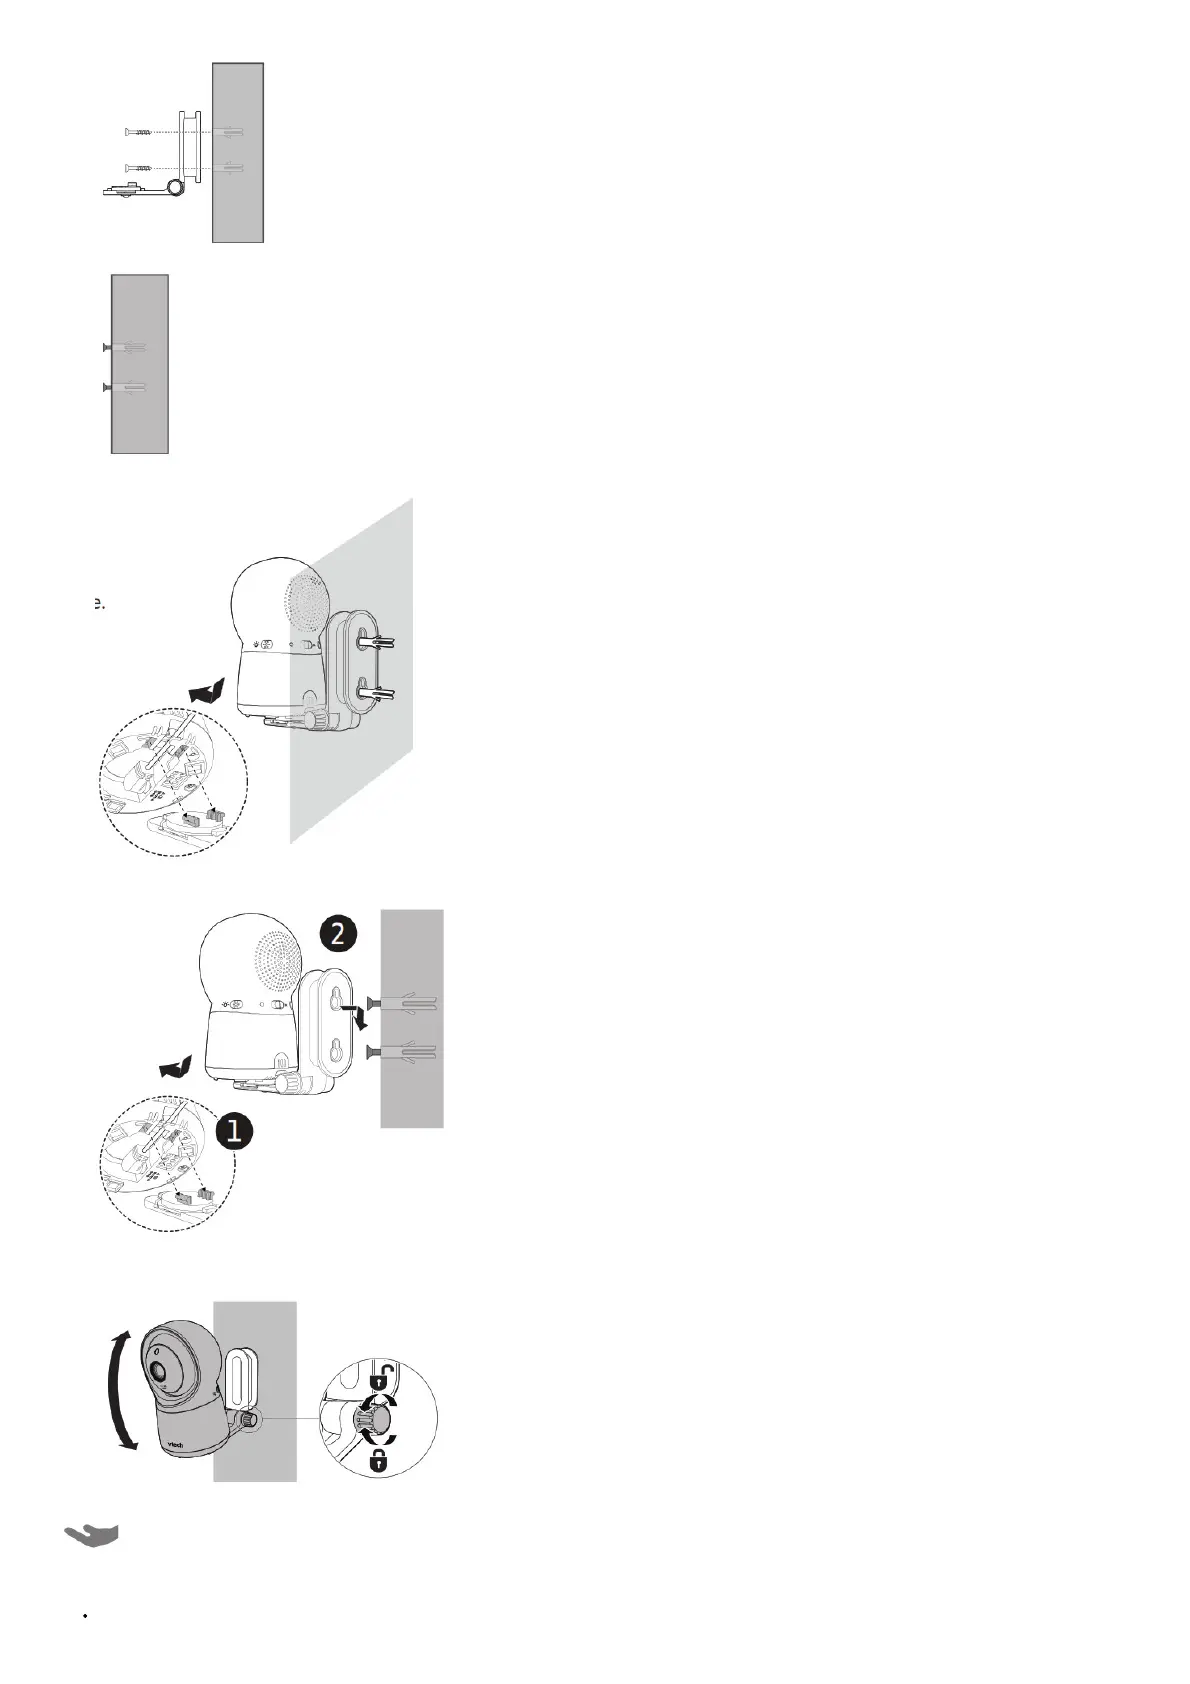
3. Insert the screws into the holes and tighten the screws until only 1/4 inch of the screws are exposed.
4. Place the baby unit on the wall mount bracket, and then slide it forward until it locks into place. Connect the power adapter to the baby unit and a power supply not
controlled by a wall switch.
OR
4. Place the baby unit on the wall mount bracket, and then slide it forward until it locks into place. Align the holes on the wall mount bracket with the screws on the wall,
and slide the wall mount bracket down until it locks into place.
5. You can maximize your baby unit’s viewing angles by tilting the wall mount bracket. Hold the baby unit, and then rotate the knob in nticlockwise direction. This will loosen
the joint of the wall mount bracket. Tilt your baby unit up or down to adjust to your preferred angle. Then, rotate the knob in clockwise direction to tighten the joint and
secure the angle.
General product care
To keep this product working well and looking good, follow these guidelines:
Avoid putting it near heating appliances and devices that generate electrical noise (for example, motors or fluorescent lamps).