Getting Started
3
Charge the wireless microphone unit
1. Place the battery with the label THIS SIDE UP facing up onto the battery
compartment.
2. Push the battery gently until it is fully inserted.
3. Slide the battery door until it clicks into place.
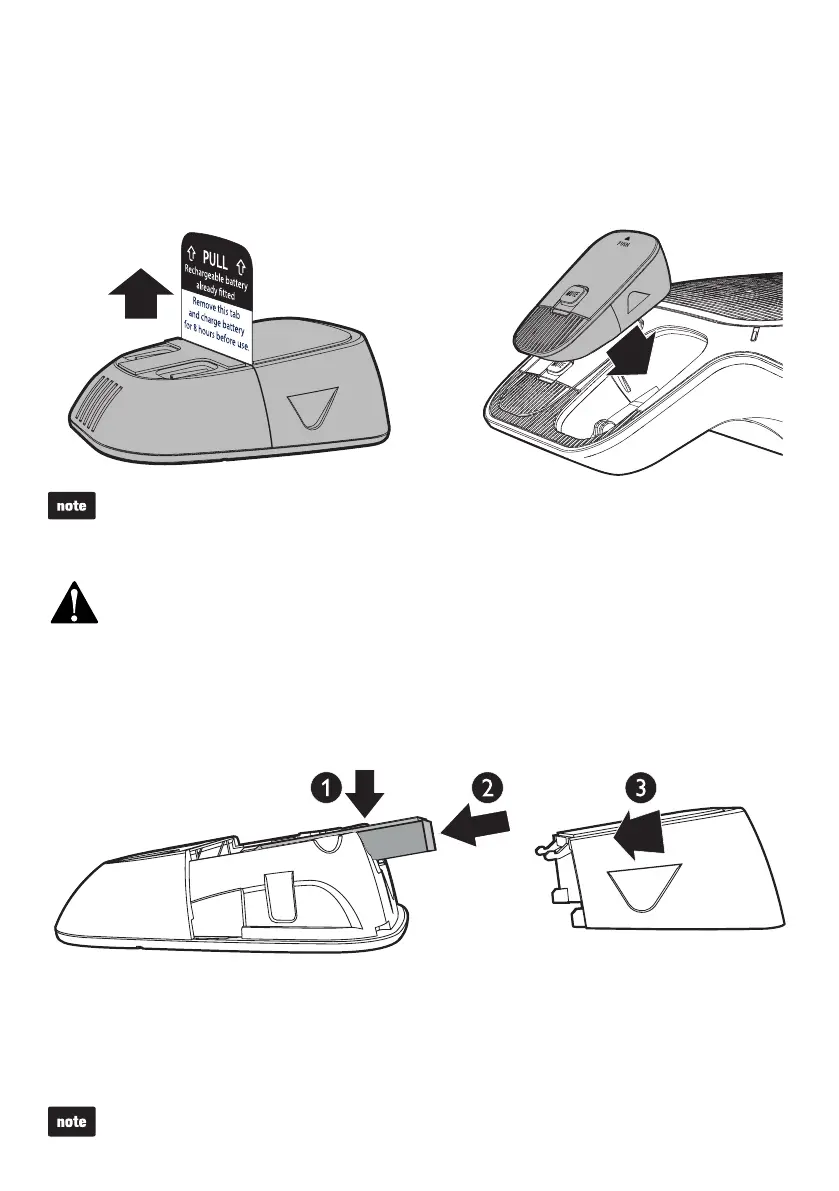
1. The battery is pre-installed in your wireless microphone unit. Pull the battery tap
off from the battery door before charging.
2. Place the wireless microphone unit into the charging cradles at the base unit until
they are flush.
Charge the battery for 8 hours before use.
The status indicator on the wireless microphone unit turns orange when charging, and turns off
when the wireless microphone unit is fully charged.
If the wireless microphone unit becomes warm when the battery is charging, it is normal.
Risk of explosion! Keep the battery away from heat, sunshine or fire. Never discard battery in fire.
Use only the supplied battery.
•
•
•
•
•
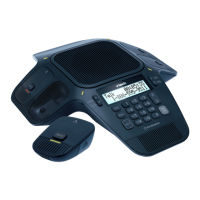
Replace the battery
To replace the battery, slide open the battery door and take the battery out from the
battery compartment. Then, install the new battery as shown below.
Charge the battery for 8 hours before use.