Do you have a question about the VWR International 1310 and is the answer not in the manual?
Inspect for visible exterior damage upon delivery, note it on the freight bill, and file a claim with the carrier.
Inspect for concealed interior and exterior damage and arrange for official inspection if any damage is found.
Save packaging and contact customer service for authorization and data plate information for returns.
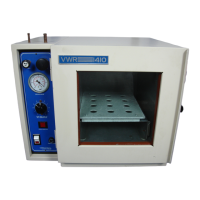
Verify all included accessories, such as shelves, clips, and thermometer, are present per the packing slip.
Symbol indicating the need to consult the manual for further description or discussion of a control or user item.
Symbol indicating AC Power.
Symbol indicating Adjustable Temperature.
Symbol indicating Manual Control.
Symbol indicating Heating.
Symbol indicating Over Temperature.
Symbol indicating Protective Earth Ground.
Symbol indicating a potential shock hazard.
Symbol indicating the unit should be recycled, not disposed of in landfills.
Ensure the power source matches unit specifications, voltage is within tolerance, and electrical codes are followed.
Choose an indoor location considering environmental factors and ensuring adequate airflow clearance around the unit.
Use appropriate lifting devices for heavy units, lift from bottom surfaces, and secure during transport.
Ensure the unit sits level and solidly on a stable surface using its rubber feet.
Clean the chamber thoroughly with an appropriate disinfectant after removing interior parts.
The main power switch controls all power to the oven and must be in the ON position for operation.
Details the SET TEMPERATURE control with an adjustment knob and graduated dial for setting oven temperature.
Explains the green pilot light that indicates when the oven element is activated and heating.
Describes the independent safety control for protecting the oven from excessive temperatures.
Explains the red pilot light indicating the Over Temperature Thermostat has activated.
Advises opening the exhaust damper during drying or degassing for optimal results.
Warns that the oven is not explosion-proof and not designed for combustible gases or materials.
Recommends positive ventilation for hazardous or unpleasant out-gassed byproducts.
Do not place sealed or filled containers in the oven chamber.
Oven is not designed for use in Class I, II, or III hazardous locations per NEC.
The oven is not intended or usable as a patient-connected medical device.
Details proper grounding, sizing, voltage matching, and cord connection for the power supply.
Instructions for turning on the power switch and setting the Over Temperature Thermostat to maximum.
Guidance on inserting a reference thermometer through the exhaust port using the provided clip.
How to set the Main Temperature Controller, its operating range, and stabilization procedures.
Procedure for setting the Over Temperature Thermostat for safety, approximately 10°C above the main set point.
Regular cleaning of the interior chamber with appropriate disinfectant, avoiding harsh chemicals.
Steps for storing the unit, including cleaning, drying, and securing the door before storage.
No maintenance is required for electrical components; refer to troubleshooting for issues.
Steps to diagnose and resolve issues where the oven temperature is excessively high.
Steps to address chamber temperature spikes over the set point followed by settling.
Steps to diagnose and resolve issues where the oven temperature is too low.
Steps to troubleshoot when the unit does not heat to or above the set temperature.
Steps to diagnose when the unit completely fails to heat up.
Steps to diagnose and resolve issues with unstable indicated chamber temperature readings.
Steps to troubleshoot problems with the oven not maintaining the selected set point temperature.
Steps to diagnose and resolve issues related to the oven door not sealing properly.
Troubleshooting blown fuses or circuit breakers, checking power sources and wiring.
Steps to diagnose why the unit is not receiving power or turning on.
Procedure for initial smoke from a new unit, typically running under vent.
Steps to address contamination within the chamber, referring to cleaning procedures.
| Brand | VWR International |
|---|---|
| Model | 1310 |
| Category | Oven |
| Language | English |