24
AG 19
Maintenance
Follow all safety precautions as described in the Safety Precautions
section of this manual before proceeding.
Refer to the Spare Parts List section in this manual for part
identication.
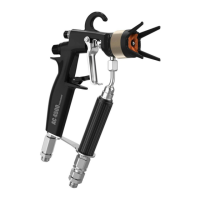
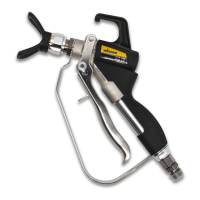
Replacing/Servicing the Seal Assembly
If any material leaks from the spray gun when the trigger is not activated,
then either the needle or the needle seat could be worn, damaged or dirty
and need to be cleaned or replaced.
Never attempt to perform maintenance on the spray gun
without rst performing the “Pressure Relief Procedure.”
1. Disconnect the material hose from the airless gun.
2. Remove the tip and tip guard.
3. With the trigger depressed, remove the diuser from the front of the
gun.
4. Unscrew the cap (1) with a screwdriver, then remove the spring (2).
5. With the 10-mm socket spanner (3), loosen the needle and pull it out of
the gun.
6. Clean the removed parts thoroughly.
7. Inspect the parts for wear or damage and use new parts during
reassembly of the gun, when necessary.
Lubricate all packings and moving parts before reassembly
with a lithium-based grease.
8. Slide the rear housing onto the retractor pins and secure in position with
the lock nut.
10. WIth the trigger depressed, install the diuser into the front of the gun
head and tighten securely with a wrench.
11. Insert the needle back into the gun.
12. Replace the spring (2) and tighten the cap (1) as far as the stop.
13. If required, adjust the packing as described below.
 Loading...