The following is a short list of minor diculties you might
encounter while spraying. If any of these occur, it will reduce the
ow of material, making your spray pattern poor, or material
will fail to spray from the gun.
Follow the guidelines on this page to correct any one of
these problems.
Unclogging the spray tip
WARNING
Do not attempt to unclog or clean the tip with your
nger.
Do not use a needle or other sharp pointed instrument
to clean the tip. The hard tungsten carbide can chip.
If the spray pattern becomes distorted or stops completely
while the gun is triggered, follow these steps:
1)
Turn the pump o, and release the trigger and lock the
gun o.
O
2) Rotate the reversible tip arrow 180° so that the point of
the arrow is toward the rear of the gun.
Under pressure, the spray tip
may be very dicult to turn.
Turn the PRIME/SPRAY knob
to PRIME and trigger the gun.
This will relieve pressure and
the tip will turn more easily.
3) Turn the PRIME/SPRAY knob
to SPRAY.
4) Unlock the gun and squeeze the trigger, pointing the
gun at a scrap piece of wood or cardboard. This allows
pressure in the spray hose to blow out the obstruction.
When the nozzle is clean, paint will come out in a high
pressure stream.
If paint still will not spray from the spray tip, follow the
steps on the next column.
5) Release the trigger and lock
the gun o.
6) Reverse the tip so the arrow
points foward again (SPRAY
position).
7) Unlock the gun and resume spraying.
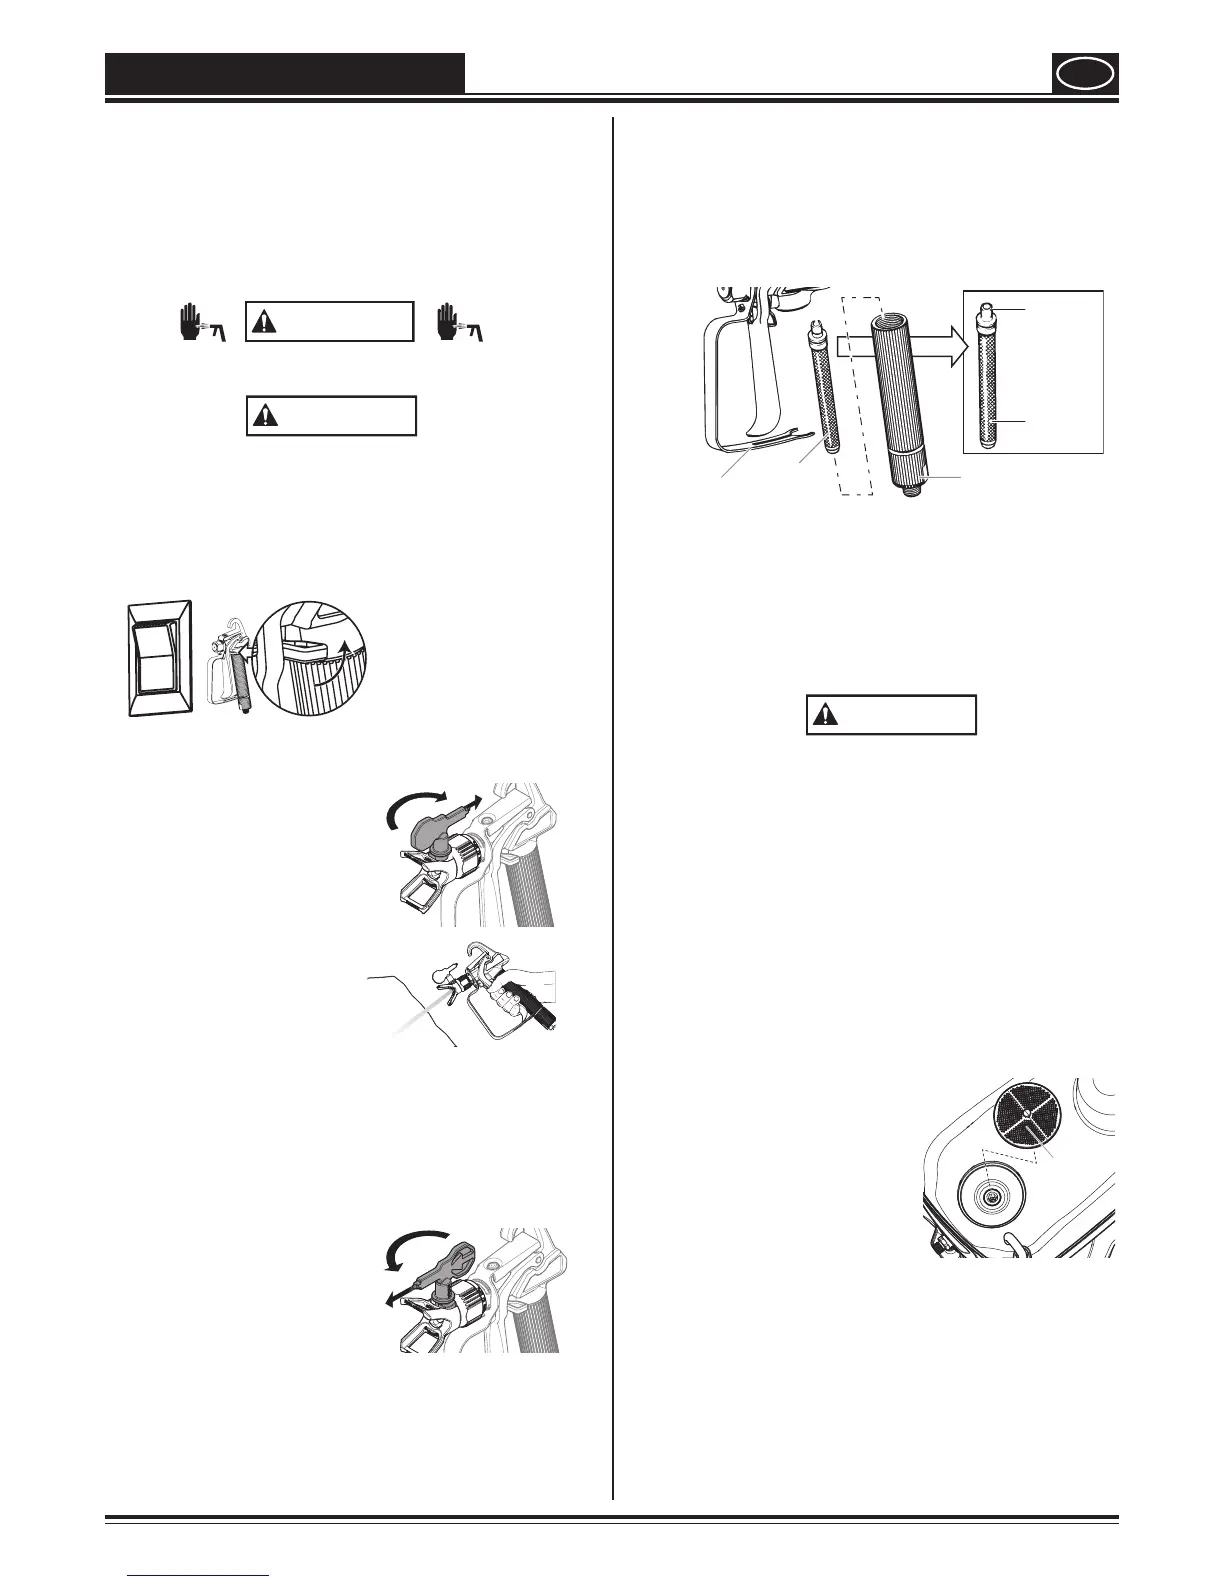
Unclogging the spray gun lter
This lter must be cleaned every time you use your
sprayer. When using thicker paints, the lter might need
to be cleaned more often.
1) Perform Pressure Relief Procedure (page 8).
2)
Unclip the trigger guard from the lter housing by pulling
outward from the lter housing. Unscrew the housing.
Hole
Filter top
(tapered
end)
Housing
Filter
rigger
guard
3) Remove the lter from the spray gun housing and clean
with the appropriate cleaning solution (warm, soapy
water)
When cleaning lter, look for sediments in the spraying
material you are using. Refer to Paint Straining, (page 8).
4) Inspect the lter for holes (see Hole picture, above).
Replace if holes are found.
NEVER POKE THE FILTER WITH A SHARP INSTRUMENT!
5) Replace the cleaned lter, tapered end rst, into the
gun housing.
The tapered end of the lter must be loaded properly
into the gun. Improper assembly will result in a plugged
tip or no ow from the gun.
6)
Replace the housing and spring and snap the trigger
guard back into the housing.
Unclogging the inlet lter
1) Perform Pressure Relief Procedure, (page 8).
2)
Empty the hopper of all spraying material (see Emptying
the Hopper, page 12).
3)
Remove the inlet lter from
the hopper. You may need to
use a screwdriver to pry the
lter loose.
4) Clean the inlet lter using
the appropriate cleaning
solution (warm, soapy
water).
5) Replace lter.
Inlet
lter
If after having completed all of the steps on this page
you are still experiencing problems spraying, refer to
the TROUBLESHOOTING page (page 16)
SPRAYING TROUBLESHOOTING