Thinning recommendation
Sprayed material
Glazes undiluted
Wood preservatives containing solvents or based on water, mordants, oils, disinfection agents, plant
protective agents
undiluted
Paints containing solvents and watersoluble paints, primers, vehicle coating paints, thick-lm glazes dilute by 5 - 10 %
Interior wall paint (dispersions and latex paint) dilute by 0-10 %
The values in the table are reference values.
Find out how much the paint needs to be thinned by testing it. Details on how to test the spray paint can be found
in the section called "Spray Technique".
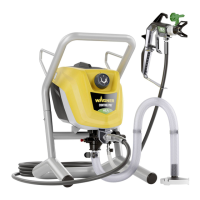
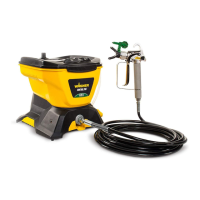
Assembly
1. Place both doors / aps in the storage compartment.
2. Insert the handle as shown in the picture and secure it by pushing downwards. (Fig. 2)
3. Remove the protective covers on the hose and hose connection. (Fig. 3)
4. Place the spray gun against the tapered end of the hose (Fig. 4, 1) and twist the gun onto the hose. Firmly tighten the thread
using a wrench (13).
5. Push the hose into the xing (Fig. 4, 2) until it engages.
6.
Twist the thread at the other end of the hose onto the hose connection.
Using a wrench (16), hold the hose connection rmly and tighten the hose with another wrench (17). (Fig. 5)
7.
Slide the suction hose onto the inlet valve. Secure with the clamp. (Fig. 6)
8. Press the return hose onto the return hose tting. Secure with the clamp. (Fig. 7)
Control elements on the device (Fig. 8)
A The pressure of the spray is set by the pressure regulator.
The correct spray pressure depends on the paint being used.
The device is switched o if the pressure regulator is in position 0.
B The following settings can be made with the selector switch:
PRIME (Switch set vertically)
•
For prelling the system with paint
•
For pressure relief
SPRAY (Switch set horizontally)
•
For using the spray gun
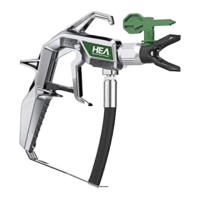
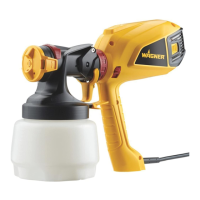
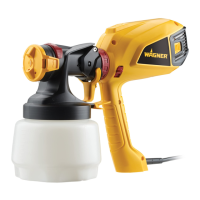
Spray Gun
Danger
Always lock the trigger o when attaching the spray nozzle or when the spray gun is not in use.
•
Fold the trigger lock downwards to lock the trigger (Fig. 9, A).
•
Fold the trigger lock upwards to unlock the trigger (Fig. 9, B).
i
Another nozzle size may be used, depending on the material to be processed.
Information about all the available nozzles can be found in the section about "Accessories".
Pressure Relief Procedure
Danger
Be sure to follow the Pressure Relief Procedure when shutting the unit o for any purpose.
This procedure relieves the pressure from the spray hose and the gun.
1. Secure the spray gun. (Fig. 9, A)
2.
Switch the device o (pressure regulator in position 0).
Turn the switch into the PRIME position (vertical). (Fig. 10)
3. Release the spray gun. Hold the spray gun over an empty container and press the trigger to relieve the pressure.
4. Secure the spray gun.