2
eN
gettiNg started
beFore you begiN
• Make sure the type of paint you use can be
cleaned with either mineral spirits (for oil-
based paints) or a warm water and soap
solution (for latex paints).
• It is a good idea to have drop cloths protecting
your oors and anything else in the room that
you do not want accidentally splattered with
paint.
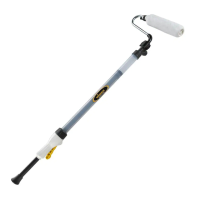
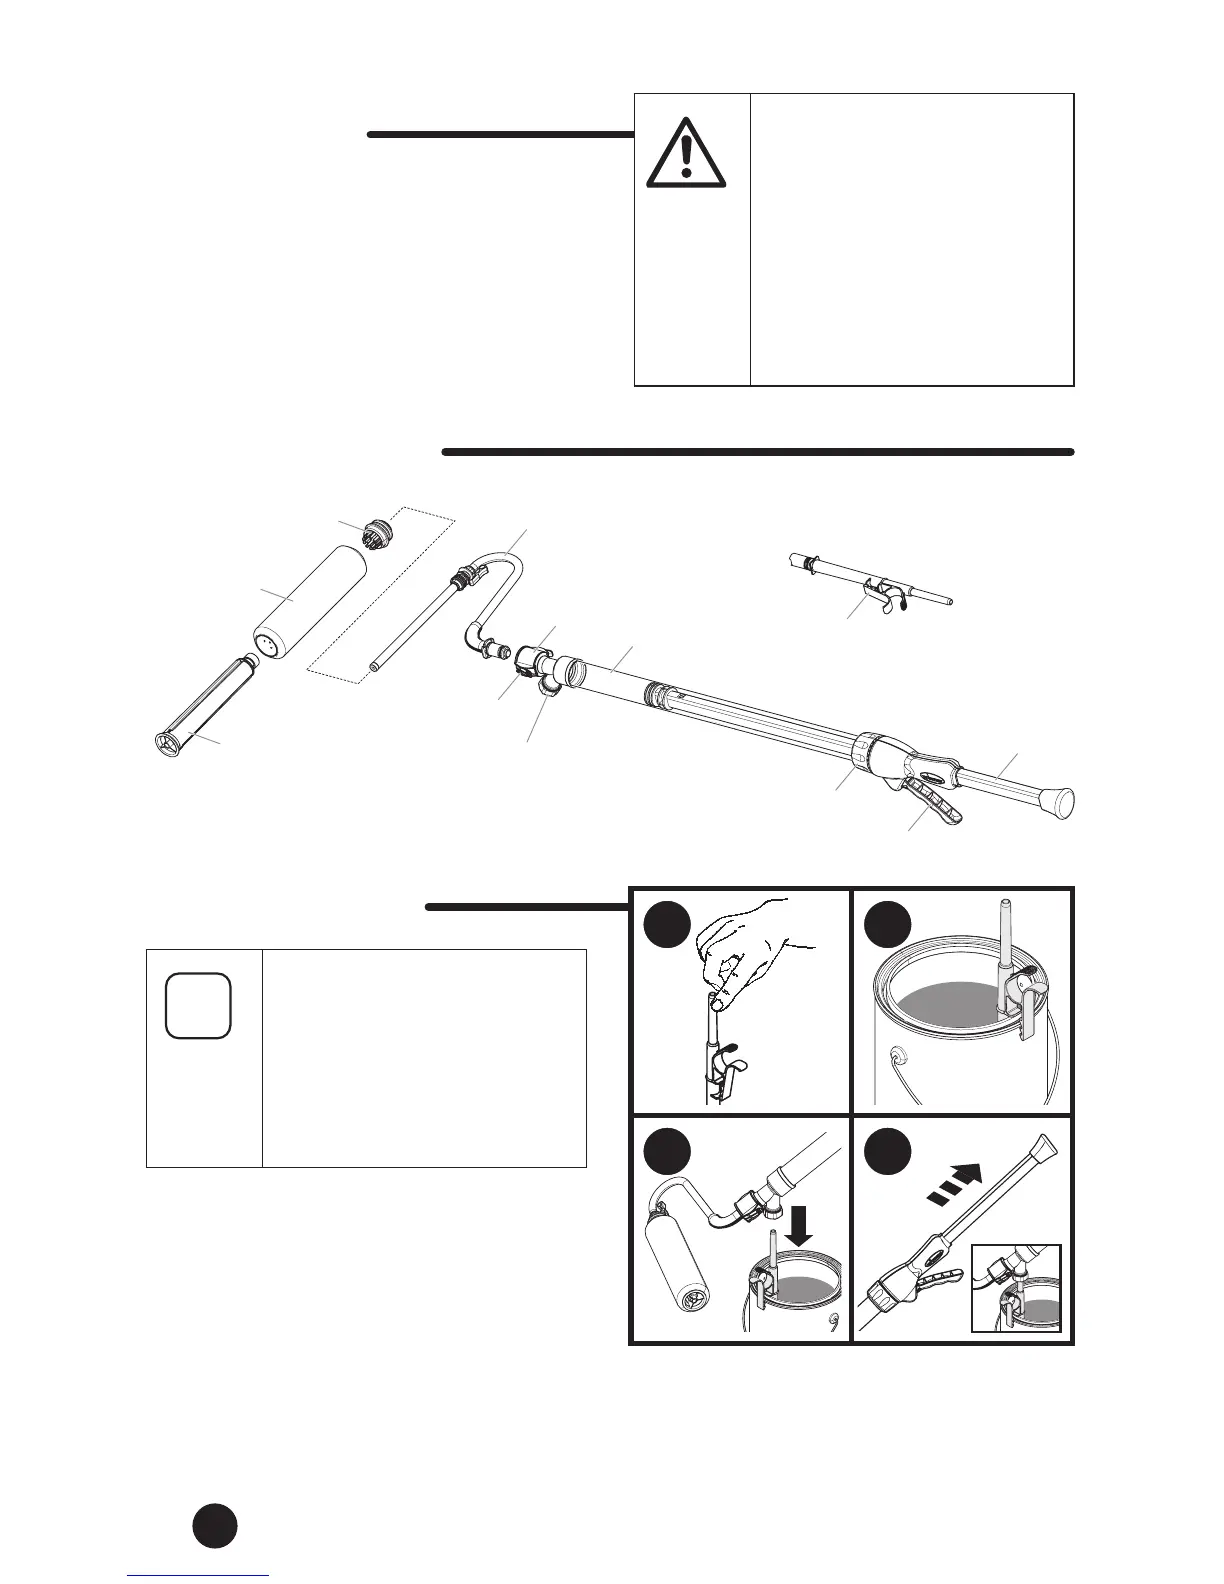
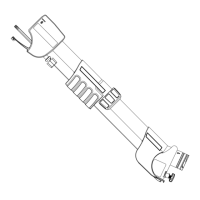
partS and componentS
Locking collar
Fill valve
Quick-release tabs
Fill tube
Main tube
Roller arm assembly
Roller cove
r
Roller core
Head
Plunger
FilliNg the maiN tube
The SMART Roller™ should come
preassembled new, or should
already be assembled after
Cleanup during previous usage.
If the unit is not assembled,
follow the “Lubricating the
Components” steps on page 6.
1. Apply a thin layer of petroleum jelly to the
ll tube. This will help the ll valve slide easily
o the ll tube.
2. Clip ll tube to paint container.
3. Press down and rmly hold the ll valve onto
the ll tube.
4. Pull the plunger to draw the material into
the main tube. When the tube is full, you are
ready to begin using the SMART Roller.
Some oil-based paints require a
stronger cleaning solution than
mineral spirits and should not be
used with the Smart Roller. Using
a cleaning solution stronger than
mineral spirits may cause damage
to the Smart Roller.
Check with your paint supplier to be
sure the oil-based paint you have
can be cleaned with mineral spirits.
1 2
3 4