This document outlines the features and usage of the Wansview Q5/Q6 1080P Indoor Security Camera, designed for home surveillance and monitoring. The camera offers a range of functionalities accessible through the Wansview Cloud APP, providing users with live feed, motion detection, and various storage options.
Camera Introduction and Indicator Lights
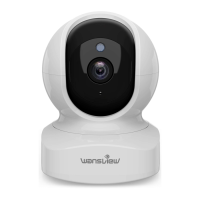
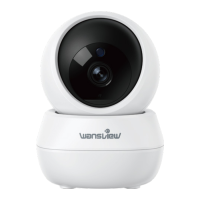
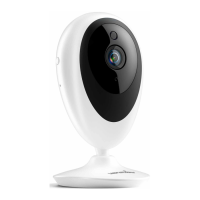
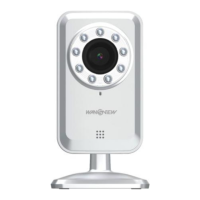
The Wansview Q5/Q6 camera features a photosensor, infrared LED, microphone, micro SD card slot, lens, speaker, indicator lights, power port, and a reset button. These components work together to provide comprehensive surveillance capabilities. The indicator lights serve as a visual cue for the camera's status:
- A solid red light indicates the camera is powered on.
- Alternating red and blue lights mean the camera is waiting to connect.
- A flashing blue light signifies the camera is connecting to Wi-Fi.
- A solid blue light confirms a successful Wi-Fi connection and pairing.
- A quickly flashing red light indicates the camera is resetting to factory settings.
It is important to ensure the router is connected to the internet for proper camera operation.
Wansview Cloud APP Installation and Account Setup
To begin using the camera, users must first download the Wansview Cloud APP from their respective app store (APP Store/Google Play). Account registration involves opening the app, clicking "Sign up," entering an email address and a strong password (8-16 characters, including digits, uppercase, lowercase, and special characters), agreeing to the Terms of Use and Privacy Policy, and then tapping "Next." A verification code will be sent to the registered email address, which must be entered into the app to complete the sign-up process. If the email is not found, users should check their spam folder or contact Wansview support. After successful registration, users can sign in using their email and password. For convenience, gesture login or Touch ID can be set up via the "Me" page under "Account security."
Camera Setup Mode
The camera supports 2.4GHz Wi-Fi only, not 5GHz. For optimal setup, the camera should be placed within 3 feet of the router, and the phone should be connected to the 2.4GHz Wi-Fi network.
There are two primary methods for Wi-Fi connection:
Wi-Fi Setup (QR Code Method)
- Power on the camera using the provided power cord.
- Tap "Add Device" on the Wansview Cloud APP and select the camera model (Q5 or Q6).
- Confirm that the camera's indicator light is flashing red and blue, then tap "Flashing" in the app.
- The Wi-Fi name should automatically display. Enter the correct Wi-Fi password and tap "Next." If the Wi-Fi name doesn't appear on Android phones, users may need to grant location permissions to the Wansview Cloud APP in their phone settings.
- Adjust the phone screen brightness to medium. Place the camera lens 3-8 inches in front of the phone to scan the QR code displayed on the screen.
- Once "QR code scanning is successful" is heard from the camera, tap "Next."
- After a successful connection, the blue indicator light will become solid. Users can then rename the camera and begin using it.
Wi-Fi Connection by Soft-AP
- Follow steps 1-3 of the Wi-Fi Setup (QR Code Method).
- If the QR code scanning fails or is not preferred, click "Didn't you hear it?" and select "Wi-Fi connection by Soft-AP."
- The app will guide the user to connect their phone to the camera's Wi-Fi hotspot (named WVC*****).
- After connecting to the camera's hotspot, return to the Wansview Cloud APP. The app will prompt the user to choose their home 2.4GHz Wi-Fi network and enter the password.
- The camera will then connect to the chosen Wi-Fi network. Once online, the camera can be renamed and used.
Live Feed and Control
The live feed interface offers several controls:
- FHD/HD Resolution Switch: Allows users to toggle between Full HD and HD resolution for the live stream.
- Full Screen: Tapping this icon expands the live stream to full screen.
- Audio Toggle: Enables or disables audio from the camera.
- Two-Way Audio: Holding the microphone icon allows users to speak through the camera.
- Manual Recording: Tapping the record icon initiates manual video recording, which can be accessed later in "Me" -> "Local Video."
- Snapshot: Clicking the snapshot icon saves a picture to the phone's storage, viewable in "Me" -> "Local Photo."
- Multiple View Mode: Users can set up this mode to view feeds from different cameras simultaneously. In this mode, video streams are displayed at 480P resolution.
Settings and Functions
The Wansview Cloud APP provides extensive settings and functions to customize the camera's operation:
Share with Family
Users can share camera access with up to three other devices. Before sharing, family members must download the Wansview Cloud APP and register their own accounts. To share:
- Tap the Settings icon, then "Invite family members."
- Press the share device icon.
- Send the invitation link to the family member's phone.
- The recipient clicks the link, opens it in a browser, and taps "Receive" to accept the invitation.
The shared link is valid for 30 minutes. Invited users can view the live stream, use two-way audio, and replay alert and cloud alarm videos, but do not have full access to camera settings.
Motion Detection
Motion detection is enabled by default, and generated alarm videos are stored on the "Alert" page.
- Detection Area: Users can define specific areas within the camera's view for motion detection.
- Sensitivity Level: A slider allows users to adjust the sensitivity of motion detection according to their preferences.
Motion Alert
When motion is detected, users receive a push notification on their Wansview Cloud APP. Tapping the notification displays a 10-second alarm video. The app also provides a timeline to review specific alarm events.
To set up motion alerts:
- Launch the Wansview Cloud APP, log in, and tap the settings icon to find the "Motion Alert" page.
- Enable "motion alert" and select a schedule (24/7 or custom start/end times).
Users can view free short videos for the past two days, which can be saved or deleted. Cloud service subscribers can replay videos from the past 7 days via the "Cloud" page.
RTSP and ONVIF
Wansview cameras supporting RTSP and ONVIF protocols can integrate with third-party software like iSpy, Blueiris, or IP Cam Viewer for live viewing and recording.
To connect via RTSP:
- Launch the Wansview Cloud APP, go to "Settings" -> "Local Application" -> "Local Account."
- Edit the desired username and password.
- Go to the "RTSP" page to set a specific port number (range 554-1554) and copy one of the live-stream URLs.
- In iSpy software, add a "Local Camera," choose "FFMPEG(H264)" in Video Source, paste the copied URL, and name the camera.
Camera Time Zone
Users can set the camera's time zone. This ensures that real-time alert notifications are accurate, even if the user and camera are in different time zones.
This section displays the camera ID, firmware version, IP Address, and Wi-Fi MAC information. A red dot on the Settings button indicates a new firmware version is available for update.
Network
Users can view the camera's Wi-Fi name and switch to a different Wi-Fi network. If using an Ethernet cable, this page allows switching to a Wi-Fi connection.
Device Management
Users can restart the camera or restore it to factory settings. Deleting the camera from here will reset all previous data. If the camera is restored to factory settings or deleted, it must be set up again as a new device.
Diagnose
If the camera fails to pair or the app experiences issues, users can access this page to run a built-in diagnostics system. The diagnostic report can be provided to Wansview Support for assistance.
Optional Storages
Memory Card Storage (Memory card not provided)
The micro SD card slot is located by pushing the camera head upward.
Install the micro SD card into camera
Before installing or uninstalling the SD card, power off the camera to prevent damage. If the SD card is not recognized, format it to FAT32 on a PC and reinsert it.
Set up SD card recording on Wansview Cloud APP
- Ensure the SD card is correctly inserted.
- Tap the Settings button and enable "Motion Alarm" and "Memory Card Storage."
- Select a 24/7 schedule for continuous motion detection.
- Tap the "Replay" button to view recordings on the memory card.
Playback
Playback is only available when the SD card is recognized and records only when motion is detected, not continuously.
- Tap the playback icon.
- Select "SD card storage" and choose the recording date.
- Use two fingers to zoom in on the timeline for detailed time selection.
- Press "1X" to select "2X" or "4X" for fast-forwarding.
- Tap the delete icon to remove unwanted videos, or the save icon to store important ones.
After formatting an SD card, power off the camera, insert the card, power on, and check if it's recognized.
Cloud Services
New Wansview users receive a 30-day free cloud service.
- Important Notes: Cloud storage operates independently of local SD card storage. Enabling both will record video to both the SD card and the cloud. Cloud service is optional; the camera functions correctly without a subscription. Users should cancel the free trial before it expires to avoid automatic renewal and charges. If accidentally charged, contact Wansview for a refund. Cloud storage only records alarm videos until the motion ends.
Introduction of Cloud plans
Wansview offers Basic (7-day alarm recording, max 3 cameras), Extended (15-day alarm recording, max 5 cameras), and Pro (30-day alarm recording, max 7 cameras) plans.
Add the camera to Cloud plan
- Go to the "Cloud" page, then tap "+ Add Camera to Plan."
- Select the camera, tap "Add to this plan," enable it, and set the schedule.
- The camera will appear on the cloud screen. Tap the camera screen to view recordings or the camera name to change settings.
- Recordings can be deleted or downloaded. Downloaded videos are viewable in "Local Video" on the "Me" screen.
How to Cancel the Cloud
To cancel cloud service, tap the Settings button on the Cloud screen, then tap "Cancel this subscription plan."
Me Page
The "Me" page provides access to personal settings and information:
- Local Video: Check alarm videos, SD card, and cloud recordings, and real-time recordings.
- Local Image: Check recorded pictures or real-time images.
- Message: Check system messages.
- Account Security: Set up Face ID, Touch ID, and password changes.
- General Settings: Set notifications for language, cellular usage reminders, and alarm messages.
- Contact Us: Find Wansview's US email address for support.
- FAQ: Access frequently asked questions.
- About: View APP version information.
- Sign Out: Log out of the account.
Alexa Compatibility
The Wansview Q5/Q6 camera is compatible with Amazon Alexa for voice control.
- Enable Wansview Cloud Skill: Open the Alexa App, go to "Skills & Games," search for "Wansview Cloud," and enable the skill.
- Link Account: Log in to your Wansview Cloud account through the Alexa App to link it. Allow Alexa device interaction.
- Add Device: Go to the "Device" page in the Alexa App, click "Add Device," then "Others." Alexa will discover all cameras connected to your Wansview Cloud account.
- Select Camera: Add found cameras to Alexa. Only one camera can be added at a time. After adding, check "Devices" -> "ALL Devices" to see all cameras.
Once linked, users can use voice commands like "Alexa, show my front door" to view the camera video.
Support and Feedback
Wansview encourages users to provide feedback on their products and services. Support is available via email for US/CA and UK customers. Facebook and YouTube channels offer additional resources. Phone support is available during specific hours (6 pm - 3 am PST Time, Monday to Friday). The manual is for reference, and slight differences in the user interface may occur. For the latest instructions and software, visit www.wansview.com.