Do you have a question about the Warn 90930 and is the answer not in the manual?
Provides general safety advice and hazard identification for product use.
Details critical warnings about potential severe injury or death during installation.
Highlights cautions for moving parts and equipment damage before commencing installation.
Instructs users to disconnect the positive battery lead before starting installation.
Lists specific torque values for all fasteners used in the installation process.
Lists all necessary tools for performing the winch mounting kit installation.
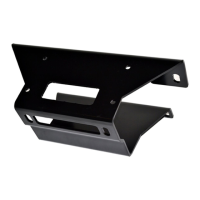
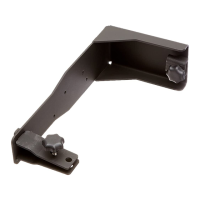
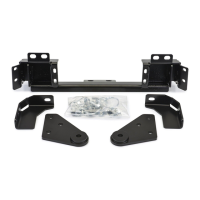
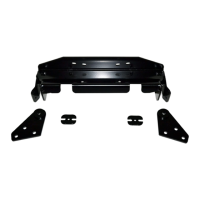
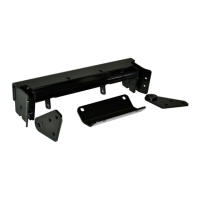
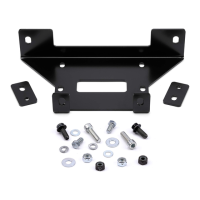
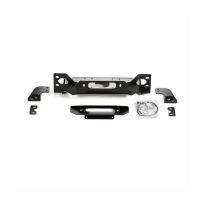
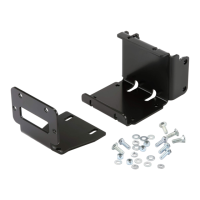
Details all components and hardware included in the winch mounting kit with a visual diagram.
Instructions for removing the plastic grill and lower bumper bolts.
Guides on removing the upper bumper mounting bolts to detach the bumper.
Mounting the winch bracket to the vehicle using specified hardware.
Installing longer bolts into the front of the winch mount prior to winch placement.
Securing the winch into the mount and attaching associated cables.
Reattaching the vehicle bumper, aligning it with the winch mount.
Reattaching the front plastic grill, ensuring fairlead bolts are correctly positioned.
Attaching the fairlead, ensuring the winch cable or rope passes through it.
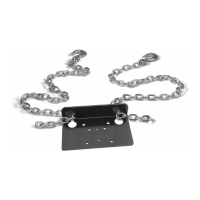
Final step of attaching the winch hook and safety strap to complete installation.
Guidance on wiring the winch and proceeding to the maintenance section.
Instructions for inspecting the winch, mount, and hardware for wear and damage before each use.
Procedures for checking winch cables and ensuring moving parts are free from debris.
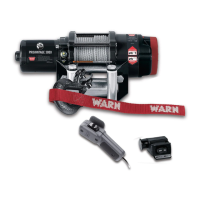
| Part Number | 90930 |
|---|---|
| Product Type | Winch |
| Category | Automobile Accessories |
| Type | Electric Winch |
| Line Length | 100 ft |
| Motor Type | Permanent Magnet |
| Voltage | 12V |
| Remote Control | Yes |