Do you have a question about the Warn 101255 and is the answer not in the manual?
Warns about severe injury or death from entanglement with moving parts.
Warns about minor to moderate injury from entanglement with moving parts.
Notifies users about potential equipment damage from improper use.
Lists essential tools for installation: wrenches, sockets, and a hacksaw blade.
Provides recommended torque values for various fastener sizes in lb-ft and N.m.
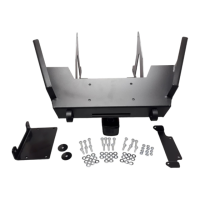
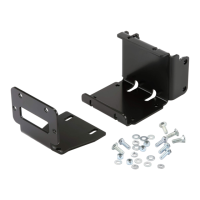
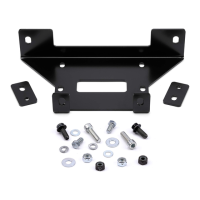
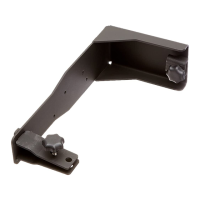
Lists all kit components with part numbers, quantities, and descriptions.
Guides removal of fascia plate, skid plate, and OE bumper components.
Details attaching winch plate brackets, winch plate, and securing with zip ties.
Covers mounting the winch, spooling rope, and installing plate spacers.
Covers reinstalling the bumper, fairlead, license plate, and reconnecting wiring.
Outlines checks for parts, hardware, cables, and moving parts before each use.
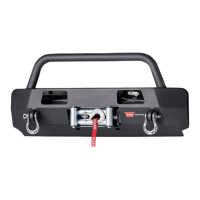
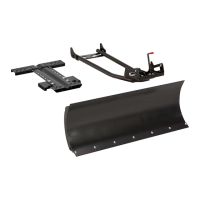
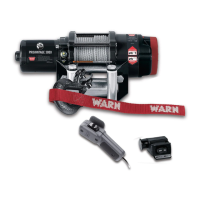
The WARN Winch Mount Kit, part number 101255, is designed for the 2018-2021 Jeep Wrangler JL Rubicon. This kit facilitates the secure installation of a winch onto the vehicle's front bumper, enhancing its off-road recovery capabilities. The primary function of this kit is to provide a robust and integrated mounting solution for a winch, allowing users to safely perform winching operations.
The installation process involves several steps, beginning with the removal of existing vehicle components to prepare for the winch mount. Users will first remove the fascia plate located behind the bumper, which will not be reinstalled. Following this, the skid plate, secured by seven bolts, is removed from the bumper and frame. It's important to retain the hardware from the skid plate for its reinstallation later. The fog light wire harness, situated along the passenger side frame rail, must be disconnected to allow for bumper removal.
The OE bumper is then detached by removing eight nuts using an 18mm socket. These nuts are located both on the outside of the bumper and the inside of the frame. Additionally, the inner frame support gussets and their associated hardware are removed; these components will not be reused. Care should be taken when removing the bumper, and it should be placed on a clean, stable surface.
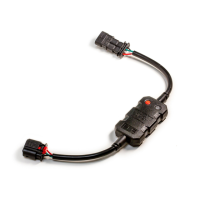
A T45 Torx driver is used to un-install the cover plate from the bumper by removing five bolts. For cosmetic purposes, the supplied M8 x 1.25mm hex nuts and the previously removed T45 Torx head bolts are then reinstalled into the bumper. The license plate and its cover are also removed by pressing six clips and pushing the plate forward. Wire harness clips are pried upward with a small flat head screwdriver, and fog light harness Christmas tree clips are disconnected from the bumper. The fog light wire will hang loosely but will be secured to the winch plate later.
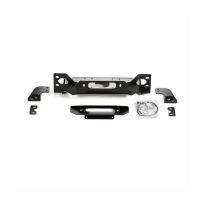
The four bolts (two on each side) that attach the two skid plate mounting brackets to the frame are removed. These brackets and their hardware are retained for the winch plate bracket installation. The left and right winch plate brackets, along with the skid plate mounting brackets, are then installed back onto the vehicle frame using the previously removed hardware. At this stage, the hardware should not be fully tightened.
The winch plate is installed onto the winch plate brackets using the supplied M10x1.5 carriage bolts and hex nuts, again without fully tightening the fasteners at this time. Zip ties are threaded through indicated holes on the winch plate wings and through the frame, started but not fully tightened. The front of the winch plate is lifted until the mounting holes align between the winch plate and the frame rails, and the zip ties are tightened to hold the plate in this position.
The winch is then mounted onto the winch plate using the hardware provided in the winch kit, with specific torque specifications applied to fully tighten the hardware. Approximately one foot of winch rope is spooled out, and the mounting hole alignment is checked. Once confirmed, the zip ties are tightened to maintain alignment, and any excess zip tie material is trimmed. Winch plate spacers are placed onto each of the outer sets of studs on the bumper.
With assistance, the front bumper is reinstalled using stock factory nuts at the eight mounting points in the frame. The winch rope must be fed through the fairlead opening in the bumper, and the hardware torqued to Jeep factory specifications. The winch rope is threaded through the filler plate and fairlead, which are then secured to the bumper using the supplied hardware, fully tightened according to fairlead installation specifications. The license plate is installed onto the flange on the fairlead filler plate, and the hook is installed onto the winch rope.
The fog light wire harness is secured to the winch plate using the exposed Christmas tree clips. All bolts attaching the winch plate brackets to the frame, as well as the hardware attaching the winch plate to the winch plate brackets, are fully tightened. The winch ground and power wires are routed to the battery, ensuring they are clear of extreme heat or moving parts, and secured with zip ties if necessary. The front skid plate is reinstalled using factory hardware and fully tightened. Depending on fitment, some slotting of the rear stock skid pan holes may be required. Finally, the plug for the fog light harness is reconnected.
Maintenance features for this product focus on regular inspections to ensure safety and optimal performance. Users should inspect all parts on the winch, winch mount, and related hardware prior to each use, replacing any components that appear rusted or deformed. All nuts and bolts on the winch, winch mount, and related hardware should be inspected before each use, and any loose nuts should be tightened. Stripped, fractured, or bent bolts or nuts must be replaced. Cables should be checked prior to use, and any worn or frayed cables replaced. Finally, all moving or rotating parts should be checked, and any debris that might inhibit free movement removed. These maintenance steps are crucial for the longevity and safe operation of the winch mount kit and the attached winch.
| Part Number | 101255 |
|---|---|
| Brand | Warn |
| Product Type | Winch |
| Voltage | 12V |
| Motor | Permanent Magnet |
| Line Diameter | 3/8 in |
| Remote Control | Yes |
| Material | Steel |
| Series | VR |
| Finish | Black |
| Motor Type | DC |