Do you have a question about the Warn 103209 and is the answer not in the manual?
Explains signal words like WARNING, CAUTION, and NOTICE used in the manual.
Lists critical safety precautions to avoid entanglement hazards with moving parts.
Details necessary tools and recommended torque specifications for assembly.
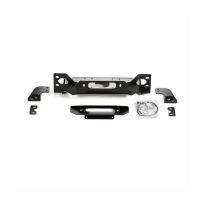
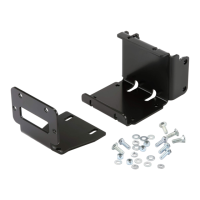
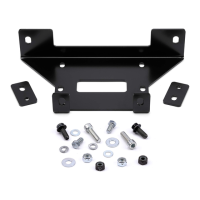
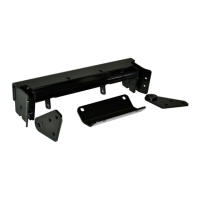
Lists all included parts with their part numbers, descriptions, and quantities.
Steps for removing the grille, fender clips, and tow hooks.
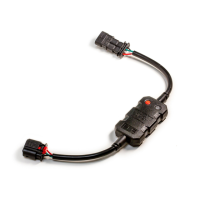
Instructions for removing the bumper and disconnecting vehicle electrical harnesses.
Instructions for modifying the bumper and installing new mounting brackets.
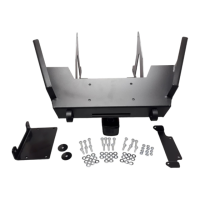
Steps to mount the fairlead and the winch to the weldment assembly.
Steps for positioning the weldment/winch assembly and routing power cables.
Final steps for aligning the bumper and assembly, and tightening all hardware.
Instructions for installing the license plate and plastic access hole covers.
Guidelines for regular inspection, tightening, and cleaning of the installed product.
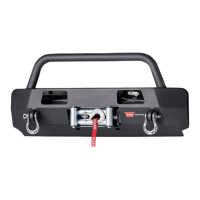
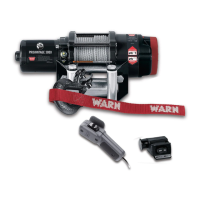
This document provides comprehensive installation instructions and safety precautions for the Warn Industries Semi Hidden Kit, Part Number 103209, designed for 2014+ Toyota Tundra applications. The kit facilitates the discreet mounting of a winch, integrating it with the vehicle's existing bumper structure while maintaining a clean, semi-hidden appearance.
The Warn Semi Hidden Kit serves as a mounting system for a winch, allowing it to be installed behind the front bumper of a 2014+ Toyota Tundra. This design offers several advantages, including protection for the winch from road debris and weather elements, and a less obtrusive aesthetic compared to traditional bumper-mounted winch systems. The kit includes specific bumper brackets and a weldment assembly that integrate with the vehicle's frame and bumper structure, providing a robust and secure platform for the winch. The installation process involves modifying the existing bumper to accommodate the winch and its control pack, ensuring a custom fit that aligns with the vehicle's styling lines.
The installation process for the Semi Hidden Kit is detailed step-by-step, beginning with the removal of the vehicle's grille, fender liners, and tow hooks. These initial steps prepare the front end of the vehicle for the integration of the winch mounting components. The existing bumper structure and reinforcement bar are partially disassembled to allow for the installation of the new left-hand (LH) and right-hand (RH) bumper brackets. These brackets are crucial for securely attaching the semi-hidden weldment, which is the primary mounting point for the winch.
A significant aspect of the installation involves carefully cutting a section of the bumper's plastic and, for winches with top-mounted control packs, a portion of the bumper support rib. These modifications are necessary to create space for the winch and its control pack, ensuring proper fitment and access. The instructions emphasize the importance of precision during these cutting steps, recommending the use of a reciprocating saw or similar tool and suggesting masking cut lines to prevent unnecessary damage. For winches with a remote plug on the side of the contactor, an extended cutout is specified to accommodate the plug.
Once the bumper modifications are complete, the fairlead is mounted to the semi-hidden weldment, followed by the winch itself, according to the specific winch mounting instructions. The document highlights the need for assistance when moving or lifting heavy parts, such as the bumper and the weldment/winch assembly, to prevent injury. The assembly is then carefully positioned on the vehicle, sliding underneath the bumper and aligning with the mounting studs. The winch control pack must pass through the trimmed-out space in the bumper, and further trimming may be required for an accurate fit. It is also crucial to ensure that the winch power cables are kept clear of the weldment assembly.
After achieving an accurate fit, the factory mounting nuts are installed (four per side) but not fully tightened, allowing for subsequent adjustments. The bumper and semi-hidden assembly are then adjusted horizontally, with horizontal alignment being achieved at the frame pad studs. Vertical alignment of the stock bumper is adjusted at the bumper bracket vertical slots, with the recommendation of using a floor jack to assist with this step. Once satisfied with the alignment, all hardware is torqued to the specified values provided in the torque specifications table. The installation concludes with the option to install a license plate to the front of the weldment using the provided bolts and nuts, and the use of black plastic plugs to cover the two lower front winch access holes.
The document outlines essential maintenance and care procedures to ensure the longevity and safe operation of the installed Warn product. Regular inspection is paramount:
These maintenance guidelines are critical for ensuring the continued safe and effective performance of the Warn Semi Hidden Kit and the winch it supports. Adherence to these instructions helps prevent equipment damage and potential hazards associated with worn or damaged components.
| Product Type | Winch |
|---|---|
| Voltage | 12V DC |
| Part Number | 103209 |
| Category | Automobile Accessories |
| Manufacturer | Warn |