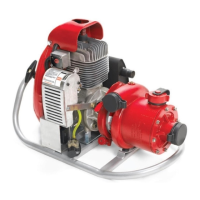
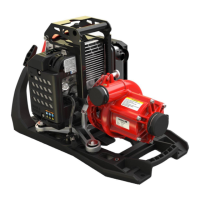
WATERAX MARK-3 Owner's Manual
03/2016 – Page 37 of 52
Decarbonising
After several hours of normal operation, carbon deposits will form on the piston crown, cylinder head, in
the cylinder exhaust port and around piston rings and in the ring grooves, causing erratic and faulty
operation. The piston skirt may also show signs of gum and varnish deposits.
To decarbonise, the cylinder head and cylinder should be removed. All carbon deposits should be
carefully removed, particularly from the piston ring grooves. After removing carbon, wash all parts in a
suitable solvent, then dry with compressed air. On reassembly, always use new piston rings.
After every 100 hours of operation, or more often if a loss of power is observed, the engine should
be decarbonised.
To decarbonise the engine, proceed as follows:
1. Remove muffler. If muffler is very dirty internally or appears burned or cracked, it should be replaced
with a new muffler.
2. Remove cylinder head, cylinder head gasket and cylinder.
3. Remove all carbon deposits from cylinder head.
4. Using a brass scraper tool, carefully scrape carbon deposit from cylinder exhaust port.
5. Block the top of the crankcase opening to prevent any carbon deposit from falling inside the
crankcase.
6. Use a stiff (not wire) brush to remove loose, flakey carbon from top of piston. Do not remove hard
deposit of carbon, as this layer forms a natural heat insulator to protect the piston crown.
7. Verify that the piston rings are free to move. If necessary, clean the piston ring grooves. Replace with
new piston rings.
8. Install cylinder with new base gasket.
9. Install cylinder head with new cylinder head gasket (large band up). Tighten nuts uniformly to
recommended torque 20-22 Nm [177-195 in-lbs] value.
10. Reinstall muffler with new gasket.
11. If piston rings were changed, proceed with a cylinder hone and an engine break-in to ensure proper
seal between rings and cylinder.
Deglazing
When installing a new piston and/or piston rings on a used Nikasil cylinder, the cylinder surface must be
prepared and deglazed.
1. Clean the cylinder bore surface.
2. Using a “ball-hone” (e.g., BRM Flex-Hone® model BC212240AO – 240 grit, aluminum oxide) and
suitable honing lubrication, hone the surface to achieve a cross-hatch of 30-40°. This is accomplished
with approximately 10 strokes with 2 strokes per second and a drill speed of 300 rpm.
3. Thoroughly clean the cylinder bore surface.
Break-in
Engine break-in is a crucial step in the successful repair of an engine. In essence, the repair is only as
good as the break-in. The purpose of the break-in is to GRADUALLY wear down the “high” spots on the
piston, rings and cylinder; this will allow for the piston rings and cylinder to physically mate to each other
at controlled engine temperatures.
Moreover, the break-in process flattens the peaks of the cylinder honing to create a "plateau" for a proper
cylinder surface and ring seal. Failure to properly break in an engine can result in leaks, bore glazing, loss
of performance, poor longevity, and even piston seizure.
All machined parts are imperfect to a certain degree and will have “high” and “low” areas that must be
mated to their counterpart to achieve a good running fit. The biggest enemy of a proper engine break-in is
 Loading...