Step 3 - Flush Filters
Carbon Filter (Figure 3)
1.Loosen the Wing Nut (8) to adjust it to the top position with enough space reserved to hold the
height of the Priming Washer (14), and screw the Priming Washer (14) above the Wing Nut (8).
2.Attach the Carbon Fiber (5) to a water outlet of your faucet to make a tight seal by means of the
Priming Washer (14); if tight seal fails, adjust the Wing Nut (8) upwards again.
3.Flush the Carbon Fiber (5) for at least 60 seconds or until the water runs clear.
Fluoride Filter * (Only applicable to WD-TK-F/WD-TK-FS)
“Attach the Fluoride Filter (9) to the water outlet of your faucet to make a tight seal by means of the Priming
Washer(14), and ush the Fluoride Filter (9) for at least 120 seconds or until the water runs clear.” (Figure 4)
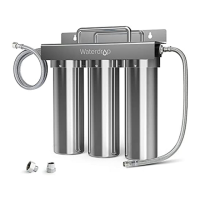
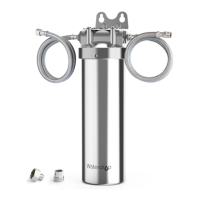
Step 4 - Filters Installation
Carbon Filter Installation (Figure 5)
Insert the threaded rod of the Carbon Filter (5) into the hole in the upper chamber (6) and fasten the
threaded rod of the Carbon Filter (5) with the Filter Washer (7) and the Wing Nut (8) sequentially.
8. Wing Nut
5. Carbon Filter
6. Upper Chamber
7. Filter Washer
8. Wing Nut
5. Carbon Filter
14. Priming Washer
Figure 3
Figure 5
9. Fluoride Filter
14. Priming Washer
Figure 4