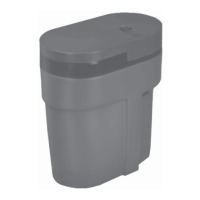
Installation And Start-Up Procedures
Each water conditioner includes 8’ of drain line.
1. Placement. Place your appliance in desired location. Turn off electricity and water supply to water
heater. Make sure inlet/outlet and drain connections meet the applicable local codes. Check arrows
on valve to be sure water fl ows in proper direction.
See fi gures 1, 2, & 3. CAUTION: DO NOT PLUMB APPLIANCE IN BACKWARD.
2. Connecting Water Lines. Lift and remove the valve cover. Attach the water lines to the in and out
connections. Do not over tighten connections on the plastic threads. Check inlet connection and out-
let connection to be certain water fl ows in the proper direction. (As you face the front of the appliance,
the inlet is on the left and the outlet is on the right.) See fi gure 2
3. Drain Line. The drain line must be a minimum of 1/2” I.D. tubing and should make the shortest run
to a suitable drain. The drain line may be elevated up to 8 feet from the discharge on the appliance
as long as the water pressure in your system is 40 psi or more. If drain line is 25’ or longer, increase
drain line to 5/8” I.D. Also, the end of the drain line must be equal in height or lower than the control
valve. See fi gure 1.
4. Flushing. Before placing your appliance in service, it is very important to fl ush the cold water
lines of any debris. Turn on water supply, open the nearest cold water tap and let the water run for 2
to 3 minutes until the water fl ows clear. Then put the by-pass in the Service position. See fi gures 4
through 6.
5. Check Leaks. Close faucet and check for leaks. If leaks are found, turn off main water
supply and open the nearest cold water faucet to depressurize lines. Close faucet to eliminate
siphoning action. Repair leaks. Turn on water supply and electricity to water heater.
Place the bypass valve in the Service position. See fi gure 6.
6. Connect Overfl ow Line. The overfl ow line is used to direct excess water to a fl oor drain
if the brine tank fi lls with to much water, or the appliance malfunctions. The overfl ow line must
end at a drain that is at least 3” lower than the bottom of the overfl ow fi tting. It is a gravity
line and cannot be run overhead. See fi gure 7.
7. Complete The Installation. Open a cold water tap and allow the appliance to fl ush for 20
minutes or until approximately 72 gallons has passed through the appliance per NSF
requirements.
8. Plug In Transformer. See fi gure 8.
12