SmartPlate Installation, Operation & Maintenance Manual
CHAPTER 8 – CORRECTIVE MAINTENANCE
socket head screws removed in step 4.
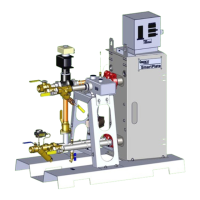
7. Refer to Figure 8-23 and ensure that the three (3) DIP switches on the replacement
Module are all in the OFF (down) position.
8. Reconnect the power and control signal wire leads to the Electronics Module.
9. Turn ON the POWER Switch on the side of the ECS/SP Control Box.
10. Recalibrate the Control Valve using the procedures in Chapter 4, section 4.2.1.
11. Replace the cover on the Electronics Module after the Valve has been successfully
calibrated.
12. Return the unit to service.
 Loading...