Page 12
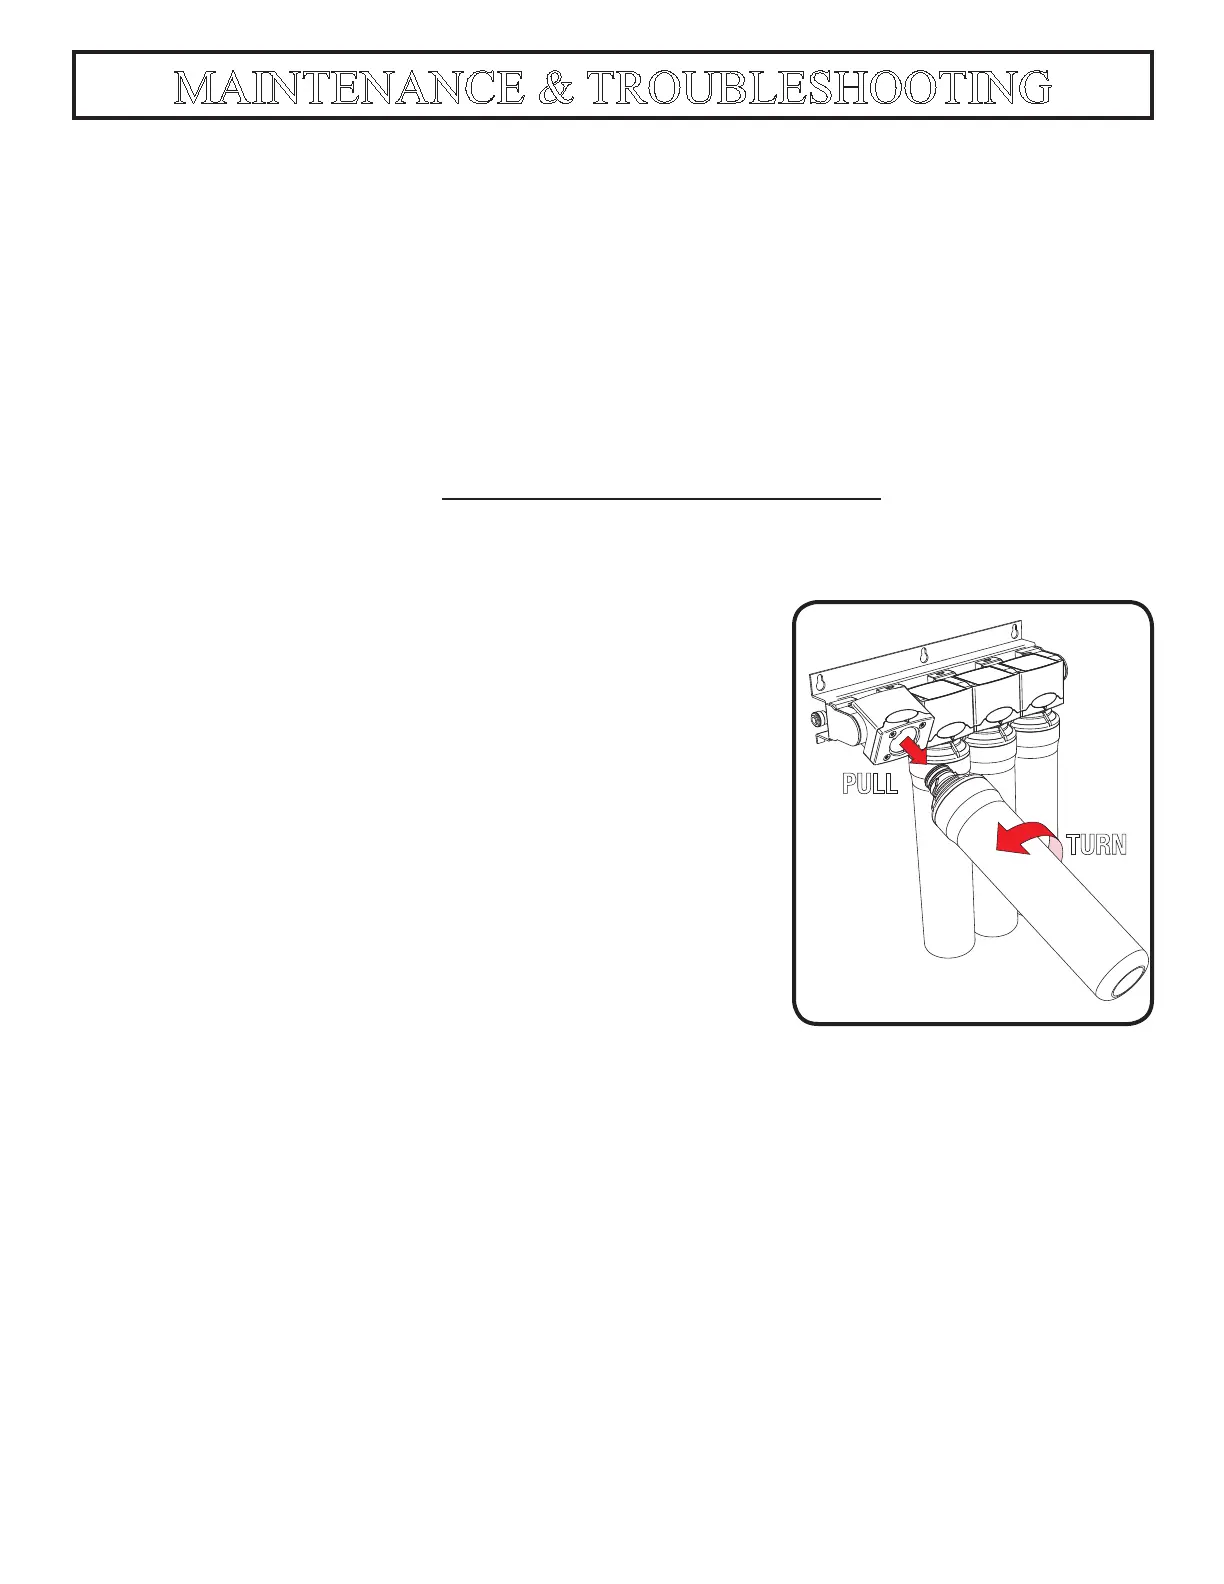
TURN
PULL
Place a towel under the RO module to catch any excess
water that may drip out from the lters during the
changeover.
Step 1
Your RO module is equipped with valved heads which will automatically turn off the water supply to
each lter when the lter is released, thus you do not need to turn off the incoming water supply at the
Adapt-a-Valve. The RO faucet must be off when lters are replaced. To make the removal of the lter
cartridges easier, the heads & cartridges may be swiveled up to 90 degrees as shown in the pictures below.
Step 2
To install a lter cartridge: Remove the seal cap
and insert the cartridge into the valved head with the
label facing to the left (9 o’clock position) rotating it
clockwise 1/4 turn.
Step 3
To remove a lter cartridge: Grasp the cartridge
and pull it towards you. Rotate the cartridge 1/4 turn
counter clockwise to remove.
Changing The Filter Cartridges
Membrane Replacement (2 - 5 Years)
√ One Membrane (P/N: WQCM11-50 / WQCM13-100)Replace:
Membranes have a life expectancy between 2 and 5 years, depending on the incoming water
conditions and the amount the RO system is used. This reverse osmosis membrane is critical for effective
reduction of total dissolved solids (TDS). The product water should be tested periodically to verify that
the system is performing satisfactorily.
Normally, a membrane would be replaced during a semiannual or annual lter change. However,
if at any time you notice a reduction in water production or an unpleasant taste in the reverse osmosis
water, it could be time to replace the membrane. Watts Premier recommends replacing the membrane
when TDS reduction falls below 75%.
This reverse osmosis system contains a replaceable component (the RO membrane) which is critical to the ef-
ciency of the system. Replacement of this reverse osmosis membrane should be with one of identical speci-
cations as dened by Watts Premier to assure the same efciency and contaminant reduction performance.
Annual Maintenance -
(Sanitization Recommended See Page 14)
√ One sediment lter (P/N: WQCSC11 / WQCSC13)
√ One carbon pre-lter (P/N: WQCCC11 / WQCCC13)
√ One carbon post-lter (P/N: WQCGAC11 / WQCGAC13)
Replace:
√ One sediment lter (P/N: WQCSC11 / WQCSC13)
√ One carbon pre-lter (P/N: WQCCC11 / WQCCC13)
Replace:
6 Month System Maintenance
Tip:
This is a good time to check the air pressure in your
storage tank. For instructions please see page 14.
Flush rst tank full after completing the annual
Note:
MAINTENANCE & TROUBLESHOOTING