10
VW Passat
Heater Preparation/Installation
ATTENTION
Remove burs and sharp edges from heater mounting
bracket after modification.
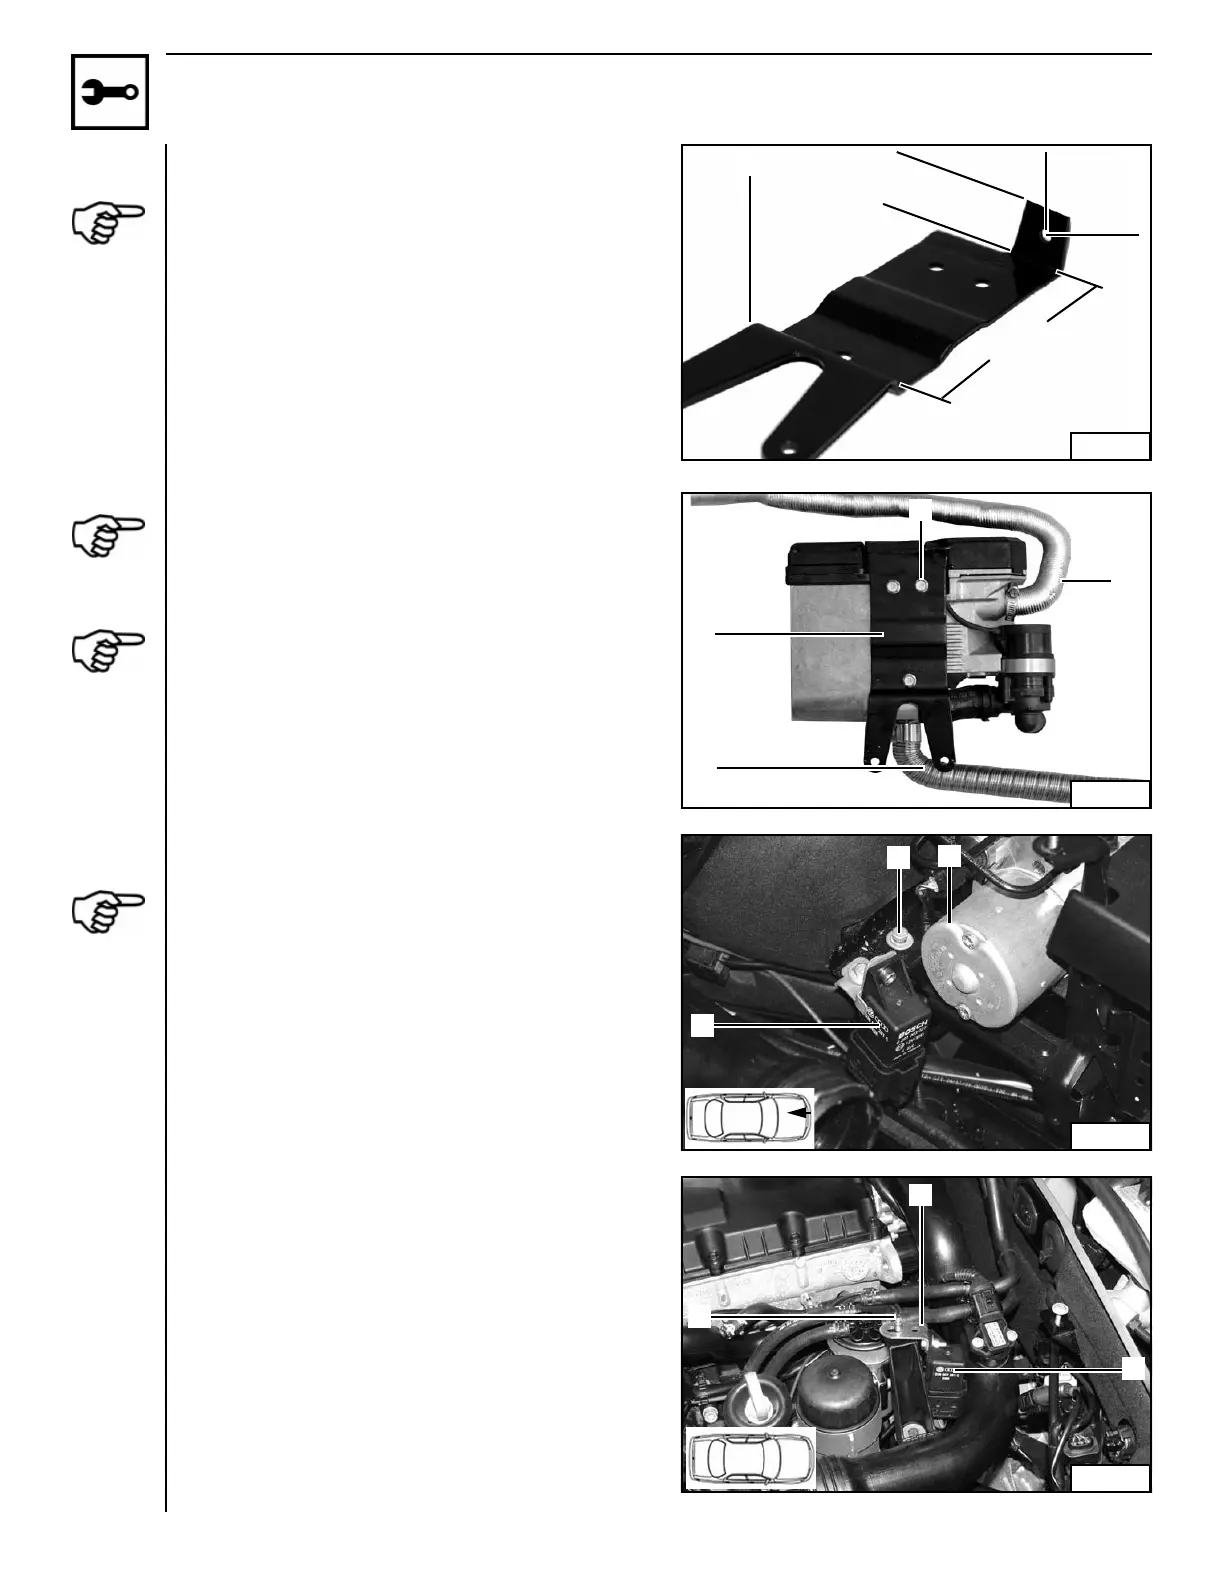
Cut supplied mounting bracket as shown in Figure 11.
Bend mounting bracket “ear” inward 90° as shown.
– (1) Heater mounting bracket
ATTENTIONI
Observe torque specifications.
Install heater mounting bracket with three EJOT screws.
Tighten EJOT screws to 10 Nm (88.5 lb.-in.).
ATTENTION
See Figure 38 for correct length of exhaust tube.
Connect air intake tube and exhaust tube to heater
prior to installation.
– (1) EJOT screws
– (2) Air intake tube
– (3) Exhaust tube
– (4) Heater mounting bracket
Relocating Vehicle Relay
ATTENTION
Remove hardware securing coolant recovery tank to
vehicle and position tank out of the way.
The relay shown in Figure 13 will have to be relocated
in order to mount the Webasto heater.
Remove bolt securing relay to vehicle and relocate relay
to engine cover stud. See Figure 14.
– (1) Existing bolt and washer
– (2) Vehicle ABS
– (3) Relay
Mount vehicle relay on engine cover stud with
bracket and hardware provided. See Figure 14.
– (1) Engine cover stud
– (2) Bracket
– (3) Vehicle relay
1
Fig. 11
90° 90°
10 mm
888888888888
8 mm
30 mm
1
2
0
m
m
Fig. 12
4
1
2
3
1
2
3
Fig. 13
3
1
2
Fig. 14
 Loading...