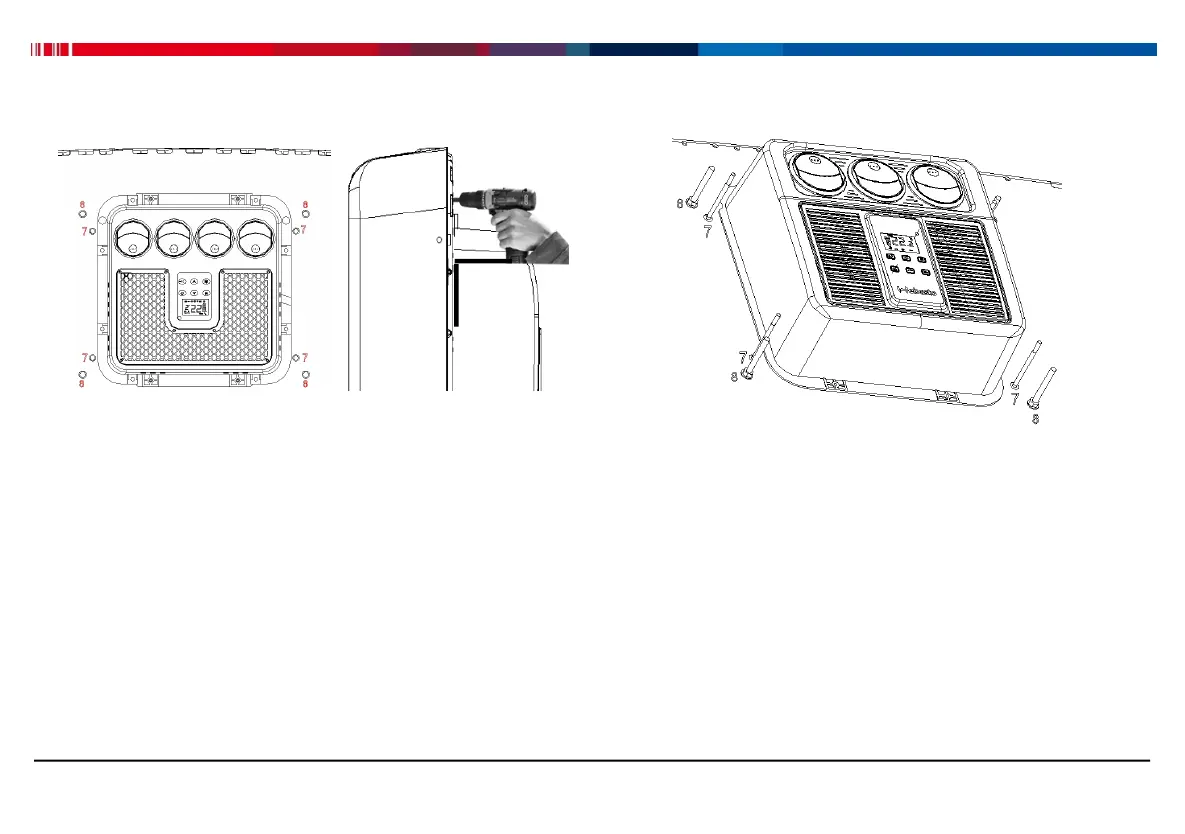
Fig.13 Installation holes schematic
Step-2: Manually fix M8x90 screws into
corresponding thread holes in first step to end, then
fix them with M8 flange nuts by wrench. And then fix
M6x110 screws in same way. Installations schematic
are shown in below.
Torque value for M8 flange nut: 10±0.5N.m
Fig.14 Screws Installation schematic
4.3 A/C main assembly installation
Step-1: Dismantle existing roof,clean the roof
perimeter zone and remove dirt with towel, ensuring
that sealing zone is dry and dustless.
Note: if there is no sunroof, the minimum opening
size is about 500mm (left and right) x400mm(front
and back)