Connection to the Vehicle Cooling System
The heater is to be connected to the vehicle cooling sys-
tem in accordance with Figs. 4, 5 and 6. The coolant sys-
tem capacity must be at least 4 liters.
As a rule, the water hoses (pipes) supplied by Webasto
are to be used. If not, the hoses must at least conform to
DIN standard 73411. The hoses are to be laid without any
kinks and - for proper venting - should be pitched upward,
if possible. Hose connections must be secured against slip-
ping off by means of hose clamps.
NOTE:
The hose clamps at the heater must be mounted between
the flared neck of the pipe and the heater.
The hose clamps must be tightened to a torque of 2,0 +
0,5 Nm.
Before the heater is operated for the first time or after cool-
ant has been replaced it must be ensured that the cooling
system is properly vented. Heater and piping should be so
installed as to ensure static venting.
Insufficient venting can result in a failure during heating
operation due to overheating.
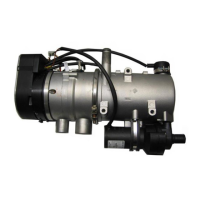
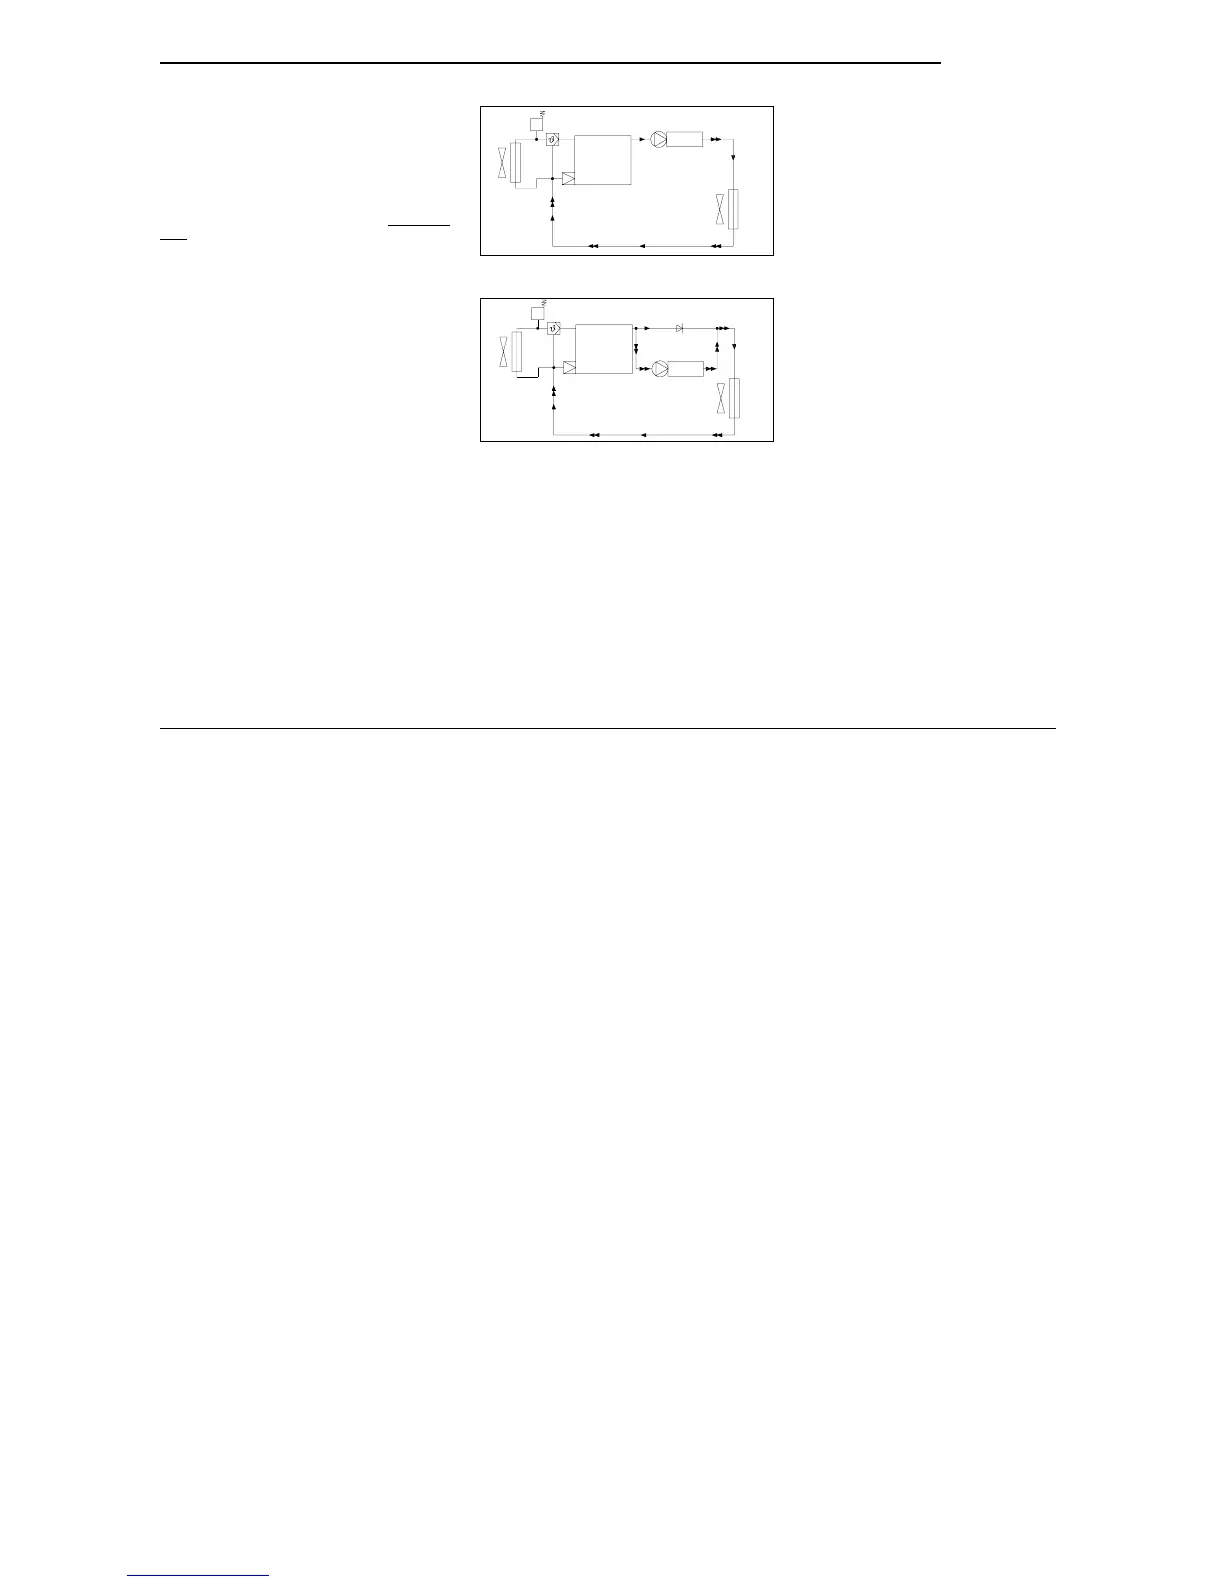
Legend for Fig. 4 and 5:
1 Expansion tank
2 Thermostat
3 Engine
4 Check valve
5 Heater
6 Heat exchanger
7 Radiator
1
3
5
6
2
7
Fig. 4: Integration into engine/cooling water circuit
“Inline-Integration”
1
3
4
5
6
2
7
Fig. 5: Integration with check valve
Thermo Top
19
 Loading...