b
3
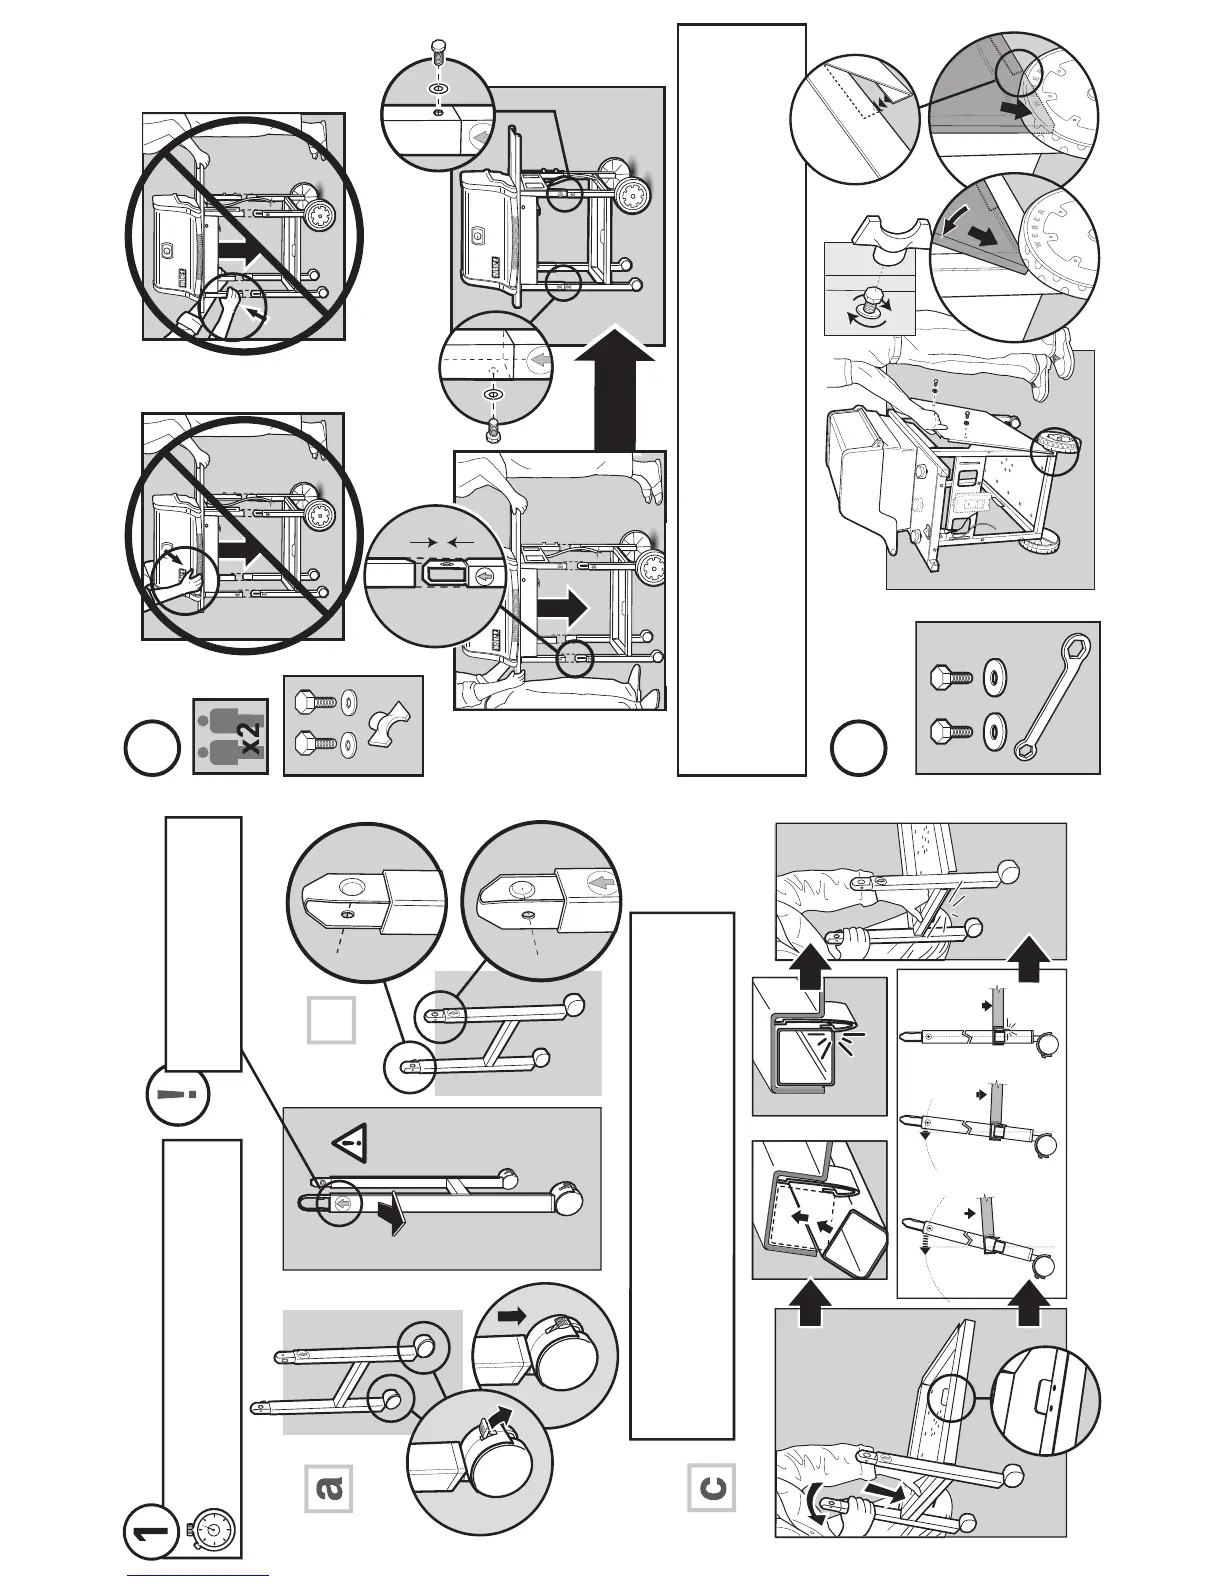
• Install bolts at indicated locations. Use supplied tool to tighten. Finish tightening bolt with metal wrench provided or
a 11mm (7/16”) wrench.
• Instale los tornillos en el lugar indicado. Para apretarlos, utilice los utensilios suministrados. Termine de apretar el tornillo con
la llave de metal suministrado o con una llave fi ja de 11 mm (7/16 pulg).
• Placez les boulons aux emplacements indiqués. Utilisez l’outil fourni pour les serrer. Vérifi ez si chaque boulon est bien serré
avec une clé à fourche de 11 mm.
4
Assembly: Consumer - 30 Minutes. *Professional - 15 Minutes.
Asameblea: Consumidor - 30 Minutos. *Profesional - 15 Minutos.
Assemblage : Consummateur - 30 minutes. *Professionnel - 15 minutes.
• Arrow sticker to the front.
• Adhesivo de la fl echa hacia el frente
• Autocollant fl èche sur le devant
• Push down fi rmly until Bottom Rack Locking Clip, “locks” under the rail.
• Presione hacia abajo fi rmemente hasta que el bloqueo de la parrilla inferior encaje
bajo las guías.
• Appuyez fermement jusqu’à ce que le dispositif de blocage inférieur s’enclenche
sous le rail.