EasyManua.ls Logo

Weber E-320 - Final Assembly and Component Installation; Steps 8-10: Install Drip Pan and Handle Hardware; Steps 11-12: Connect Side Burner Tube and Attach Panels; Steps 13-18: Install Grates, Racks, and Trim

Weber E-320
4 pages
Print Icon
To Previous Page IconTo Previous Page
Loading...
16
17
18
b
a
a
b
a
b
8
9
10
11
12
13
14
15
(1)
(2)
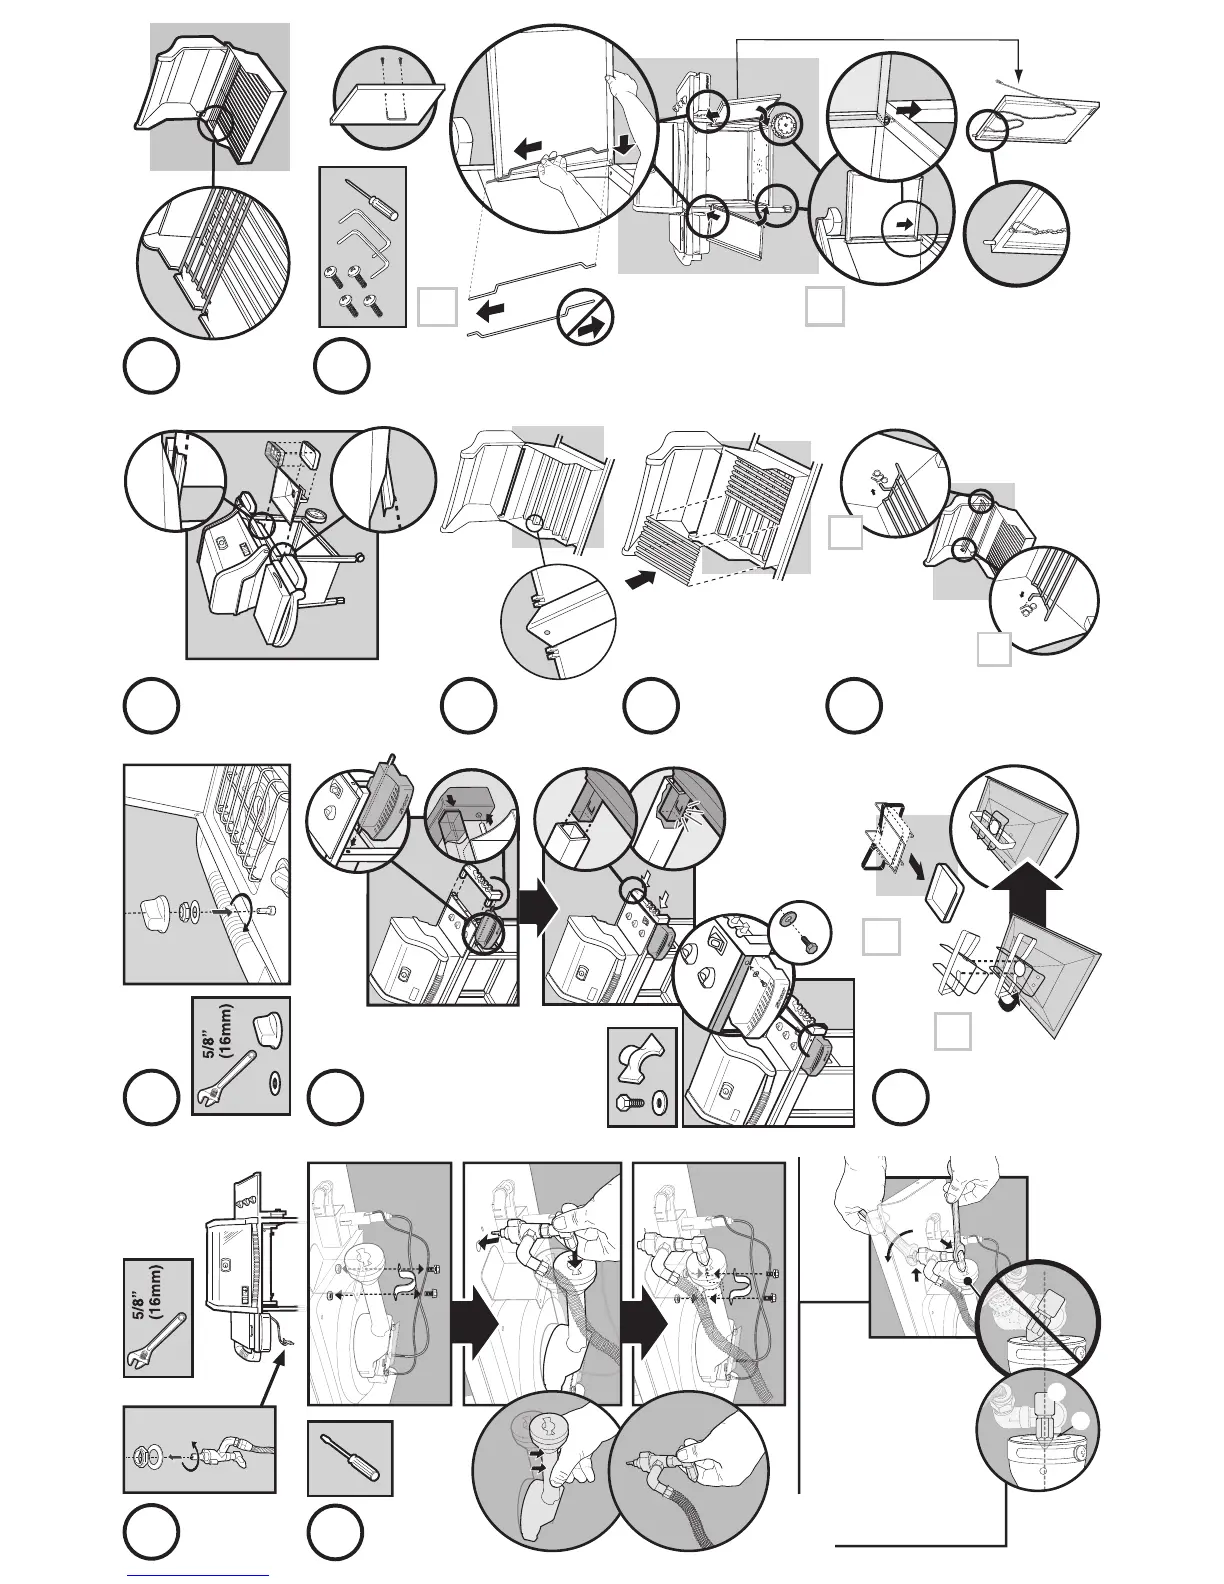
WARNING: The side burner
ori ce (1) must be parallel to the
side burner tube opening (2).
ADVERTENCIA: El ori cio (1) del
quemador lateral debe de estar
paralelo a la abertura (2) del tubo
del quemador lateral.
MISE EN GARDE: L’ori ce du
brûleur latéral (1) doit être
parallèle à l’ouverture du tube du
brûleur latéral (2).

Related product manuals