Do you have a question about the Weber SX-335 and is the answer not in the manual?
Download the BILT app for 3D step-by-step instructions.
Assemble on a flat, level surface; use hand tools; two people needed; handle parts carefully.
Identifies screws, clips, and fasteners in labeled bags for assembly.
Attaching wheel components and securing them with clips.
Attach wheel assemblies, spoke covers, and front casters.
Fastening the lower shelf to the grill frame.
Install wire clips and route internal wiring through the frame.
Connecting specific wires to ignition modules.
Fastening the side shelf to the grill frame.
Secure bottom brackets and the rear panel to the frame.
Fasten side panels and mount the main grill body onto the frame.
Assemble the lid, route wires internally, and along the gas line.
Fasten parts to side panels and mount the control panel housing.
Fasten components to the front panel using screws.
Making the final connections for the electronic components.
Secure wiring harnesses and fasten the front panel with screws.
Install the igniter module and connect its wiring.
Securing a bracket to the side panel.
Connect wires to the display and install batteries into the module.
Mount the module onto the back panel and connect its wiring.
Fastening side components to the grill frame.
Connect gas line, wire terminals, and install the igniter battery.
Secure wires to panels and route them to the control module.
Routing wires to the main display unit.
Attaching the bracket that holds the igniter.
Place cooking grates and connect the gas regulator assembly.
Route wires to and connect them within the control box.
Secure wire sheathing and attach side component clips.
Attaching the holder for the drip tray.
Securing the igniter bracket to the panel.
Route wires under the hood and connect them to hood components.
Routing wires through a specific opening.
Assemble the display module and attach it to the grill.
Secure wires with clips and attach components to the side panel.
Fasten shelf support and mount side panels to the frame.
Securing the side panel to the grill body.
Instructions on using the warming rack, including safety precautions.
Secure the lid and notes on extra fasteners. Includes safety warning.
Place burner caps and grease collection trays.
Insert the side shelf and position heat deflector plates.
Information on connecting an external power bank.
Ensure all parts are tightened; register grill; contact support.
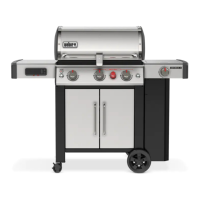
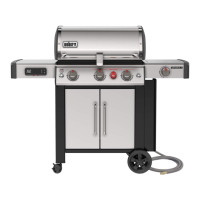
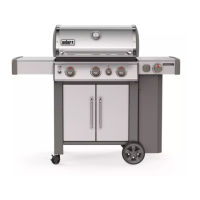
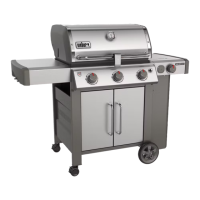
| Main Burners | 3 |
|---|---|
| Total Cooking Area | 669 sq in |
| Fuel Type | Liquid Propane |
| Side Burner | Yes |
| Sear Station | Yes |
| Built-in Thermometer | Yes |
| Grill Category | Freestanding |
| BTU Main Burners | 39, 000 |
| Side Burner BTU | 12, 000 |
| Grill Type | Gas |
| Ignition | Electronic |
| Material | Stainless Steel |
| Dimensions | Unknown |