16
ADJUSTMENT
T
he instructions below describe how each part of the weight system can be adjusted.
I
MPORTANT: When
attaching the lat bar or handle, make sure that the accessories are in the correct starting position for the
exercise to be performed. If there is any slack in the cable or chain as an exercise is performed, the
effectiveness of the exercise will be reduced.
C
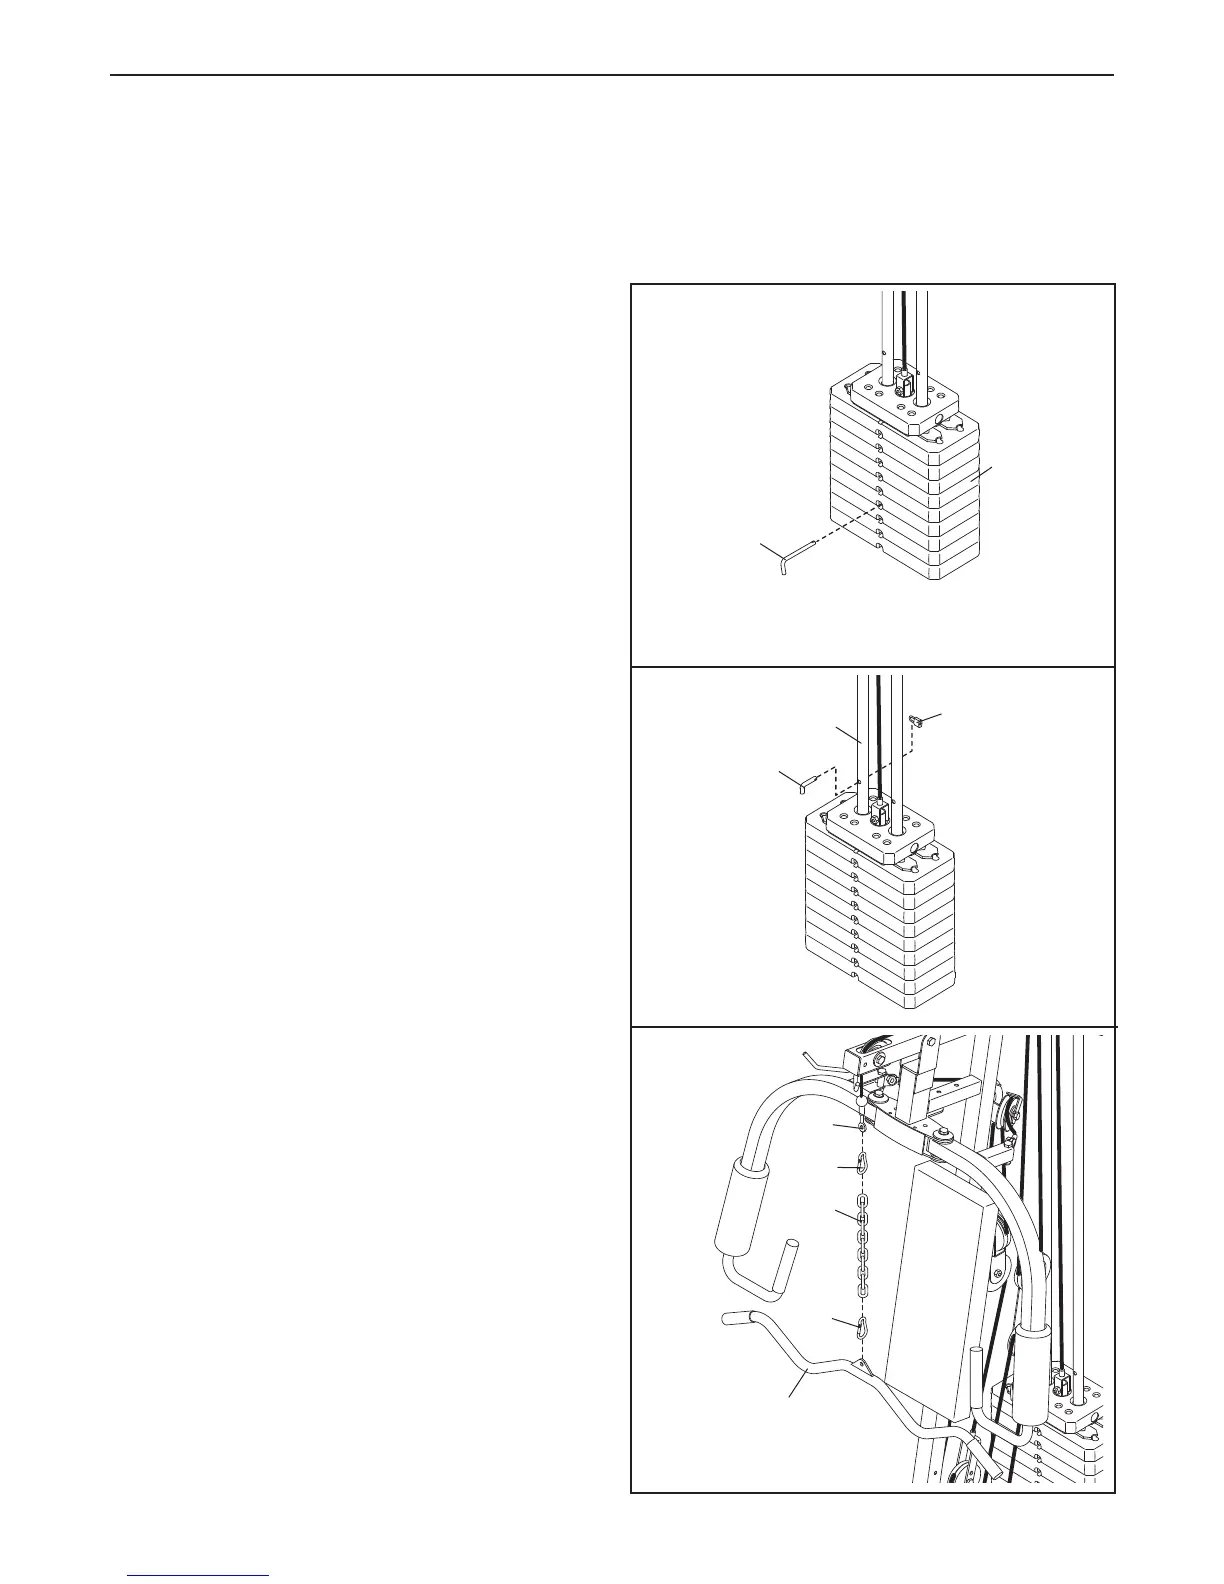
HANGING THE WEIGHT SETTING
To change the weight setting, insert the Weight Pin
(20) under one of the Weights (16). Make sure to
insert the Weight Pin until the bent end of the Weight
Pin is touching the Weights, and turn the bent end
downward. The weight setting can be changed from
12.5 pounds to 125 pounds, in increments of 12.5
pounds.
Important: Due to the cables and pulleys,
the actual amount of resistance at each exercise
station will vary from the weight setting. Refer to
the WEIGHT RESISTANCE CHART on page 18 to
find the actual amount of resistance at each sta
-
tion.
Note: 1 kg = 2,2 pounds.
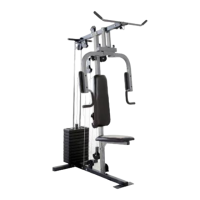
LOCKING THE WEIGHT STACK
To prevent unauthorised use of the weight system,
insert the Locking Bar (21) into the indicated hole in
one of the Weight Guides (5). Secure the Locking Bar
with the Lock (22).
Remove the Lock (22) and Locking Bar (21) to use
the weight system again.
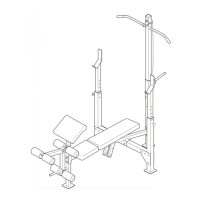
A
TTACHING THE ACCESSORIES TO A PULLEY
STA
TION
Attach the Lat Bar (101) to the High Cable (57) with a
Cable Clip (68). For some exercises, the Chain (99)
should be attached between the Lat Bar and the High
Cable with two Cable Clips. Adjust the length of the
Chain between the Lat Bar and the High Cable so
that the Lat Bar is in the correct starting position
for the exercise to be performed.
The Handle (not shown) can be attached in the same
manner. The accessories can be attached to the Low
Cable (not shown) in the same manner.
20
16
5
22
21
68
68
101
99
57