9
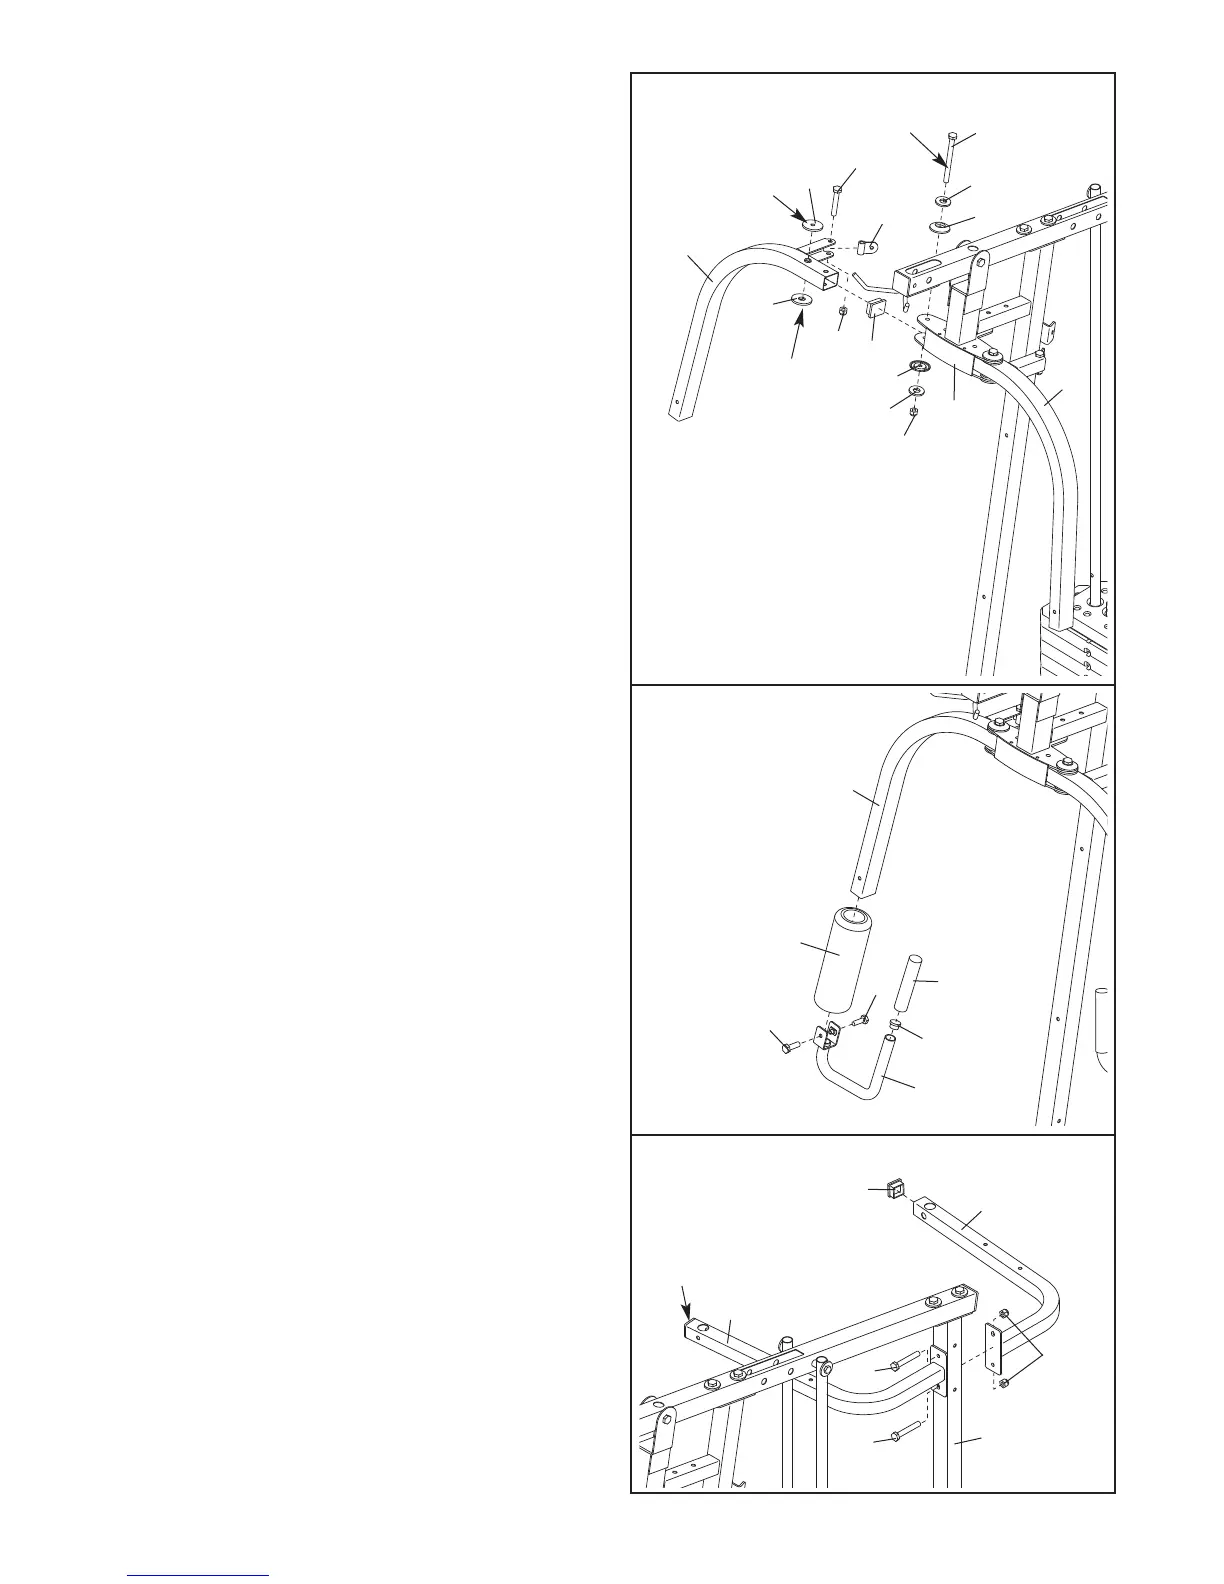
9. Attach a Cable Pivot (58) to the Right Fly Arm (9)
with an M10 x 50mm Bolt (85) and an M10 Nylon
L
ocknut (72). Do not overtighten the Locknut; the
Cable Pivot must be able to pivot easily.
Press a 40mm x 50mm Inner Cap (23) into the
Right Fly Arm (9).
Lubricate an M10 x 83mm Button Head Bolt (86)
and the flat sides of two Plastic Washers (59) with
grease. Attach the Right Fly Arm (9) to the indi-
cated side of the Butterfly Frame (11) with the
Bolt, two M10 Washers (71), two Butterfly Caps
(60), the two Plastic Washers, and an M10 Nylon
Locknut (72).
Do not overtighten the Locknut;
the Fly Arm must be able to pivot easily.
Assemble the Left Fly Arm (10) in the same
manner.
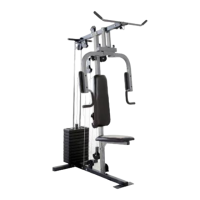
10. Wet the lower end of the Right Fly Arm (9) with
soapy water. Slide a Large Foam Pad (65) onto
the Fly Arm.
Attach an Arm Handle (24) to the Right Fly Arm
(9) with two M8 x 20mm Button Head Bolts (84).
Press a 25mm Dome Inner Cap (25) into the
Right Fly Arm (9). Slide a Long Handgrip (102)
onto the Fly Arm.
Slide the Large Foam Pad (65) down so that it
is aligned with the bottom of the Right Fly
Arm (9).
Repeat this step with the Left Fly Arm (not
shown).
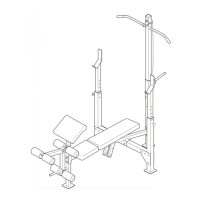
11. Press two 38mm Square Inner Caps (29) into the
Right and Left VKR
Arms (12, 13).
Attach the Right and Left VKR Arms (12, 13) to
the Rear Upright (3) with two M10 x 72mm Bolts
(89) and two M10 Nylon Locknuts (72).
11
29
29
13
12
72
3
89
89
9
9
65
84
84
102
Lubricate
Lubricate
Lubricate
72
23
11
10
85
58
86
71
71
60
60
72
59
9
59
10
24
25