11
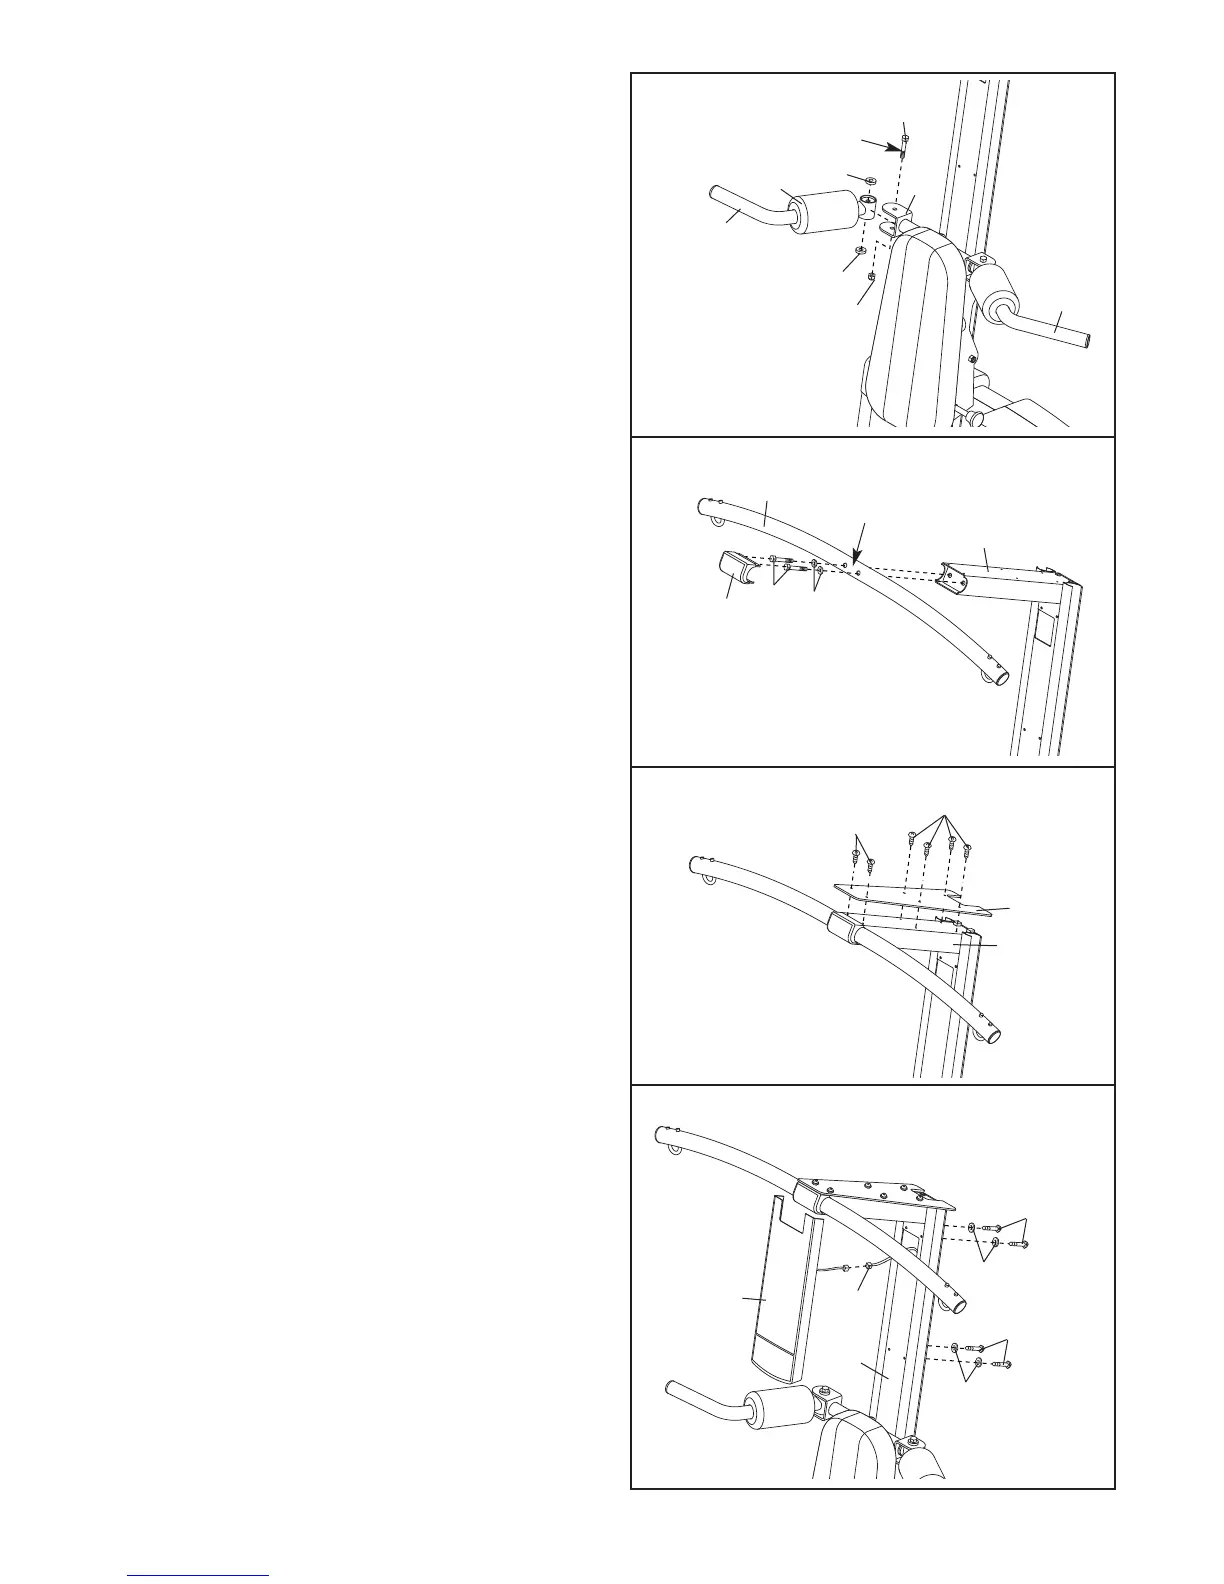
13. Wet a Squat Arm (18) and the inside of a Small
Foam Pad (36) with soapy water. Slide the Foam
P
ad onto the Squat Arm.
G
rease an M10 x 73mm Bolt (137). Attach a
Squat Arm (18) to the Squat Carriage (10) with
the Bolt, two 24mm Plastic Washers (110), and
an M10 Nylon Locknut (112). Do not overtighten
the Locknut; the Squat Arm should be able to
pivot with intermediate effort.
Repeat this step with the other Squat Arm
(18).
1
10
112
110
13
137
G
rease
10
18
36
18
14. Orient the Top Frame (20) with the mark in the
position shown. Attach the Top Frame to the
Upright (3) with two M10 x 65mm Button Screws
(117) and two M10 Washers (129). Press the
Plastic Cap (46) into the Upright, over the Top
Frame.
14
46
20
117
129
3
Mark
16. Attach the Console (21) to the Upper Wire
Harness (172). The connector should slide easi-
ly into the socket and snap into place. If a con-
nector does not slide easily and snap into place,
turn it over and then insert it. IF THE CONNEC-
TOR IS NOT INSERTED PROPERLY, THE CON-
SOLE MAY BE DAMAGED WHEN THE POWER
IS TURNED ON.
Push the excess wire into the
Upright (3).
Attach the Console (21) to the Upright (3) with
two M4 x 80mm Self-tapping Screws (145), two
M4 x 65mm Self-tapping Screws (158), and four
M4 W
ashers (157).
16
172
21
157
3
158
145
157
15. Attach the Upright Plate (23) to the Upright (3)
with six M4 x 9mm Self-tapping Screws (106).
15
106
23
3
106





 To Next Page