17
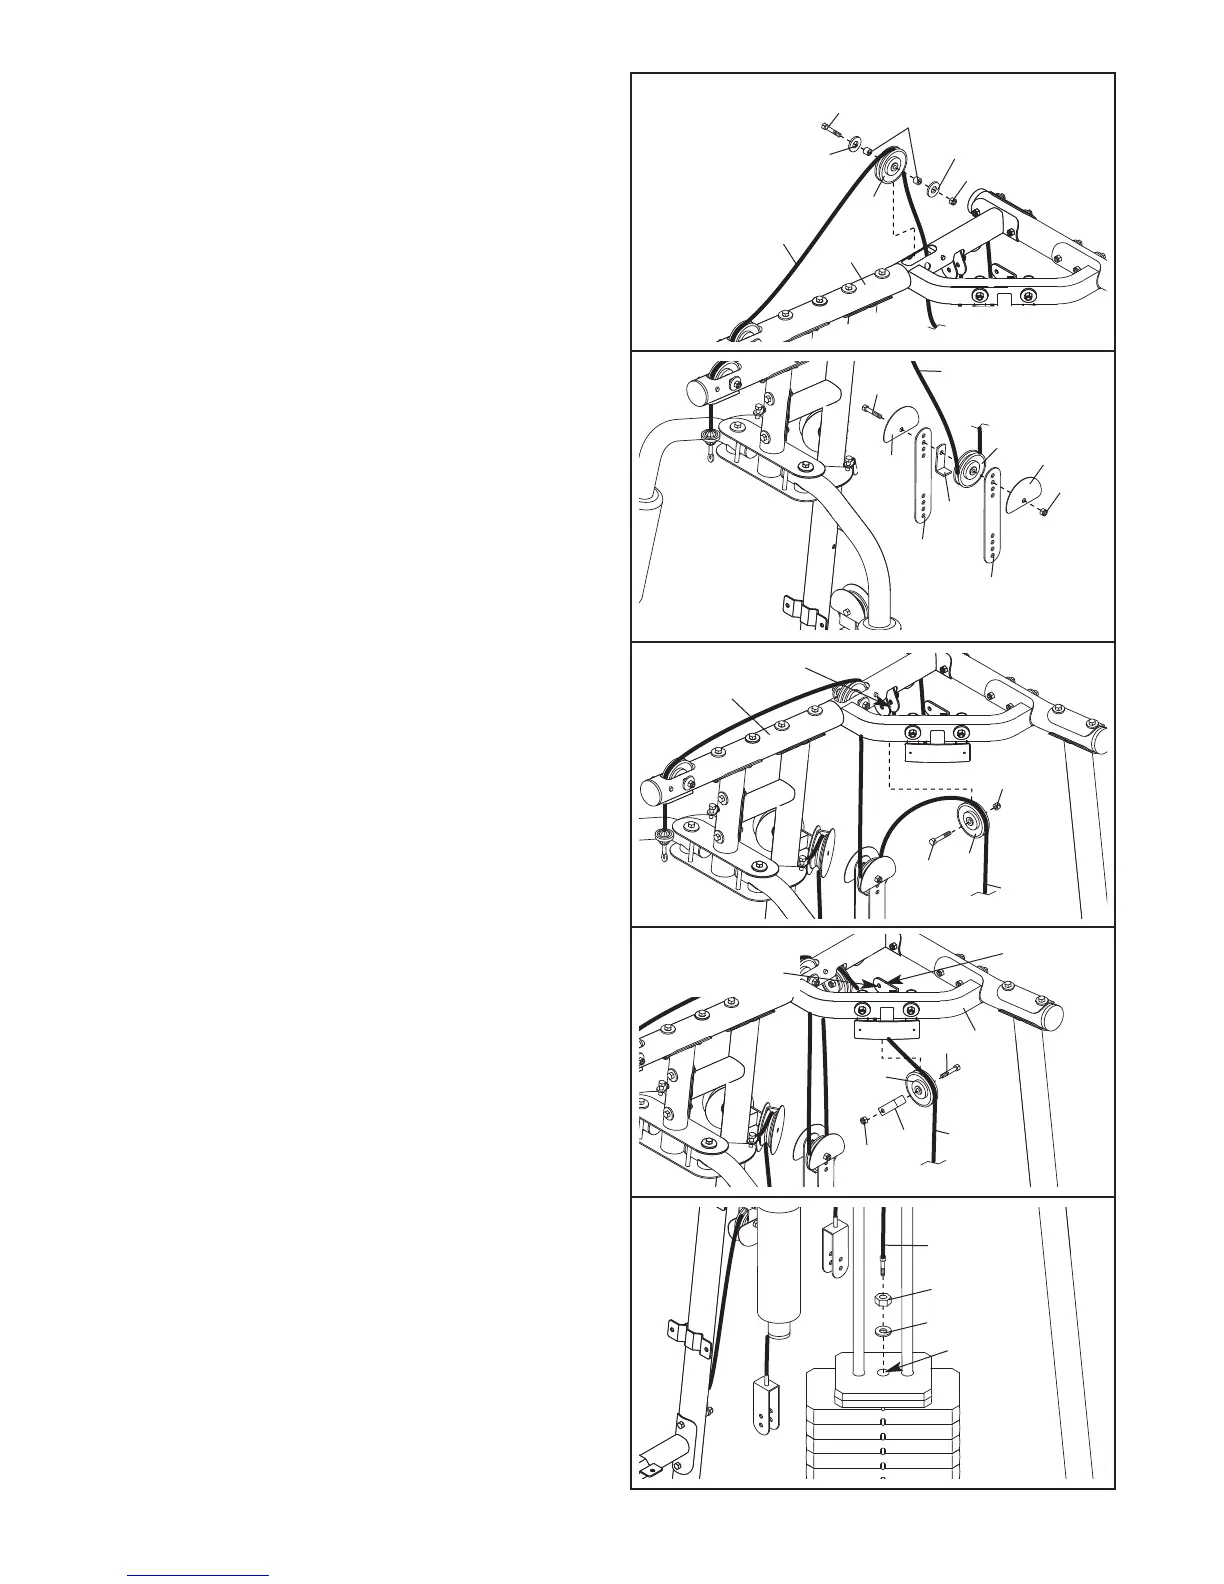
41. Route the Weight Cable (110) over a 90mm
Pulley (63) and down through the Right Top
F
rame (5). Attach the Pulley inside the Top Frame
with an M10 x 80mm Bolt (75), two M10 Washers
(
99), two M10 x 19mm Spacers (102), and an
M10 Nylon Locknut (90).
43. Wrap the Weight Cable (110) over a 90mm Pulley
(63). Attach the Pulley to the indicated bracket on
the Right Top Frame (5) with an M10 x 43mm
Bolt (80) and an M10 Nylon Locknut (90).
44. Wrap the Weight Cable (110) over a 90mm Pulley
(63). Attach the Pulley and a Cable Trap (68) to
the indicated bracket on the Right Top Frame (5)
with an M10 x 43mm Bolt (80) and an M10 Nylon
Locknut (90). Make sure the Cable T
rap is ori
-
ented to hold the Cable in the groove of the
Pulley.
45.
Set the M12 Washer (33) on top of the Weight
T
ube (47).
Thread the M12 Nut (49) all the way
onto the Weight Cable (110).
Thread the Weight Cable (110) into the Weight
T
ube (47) a couple of turns.
42. Wrap the Weight Cable (110) under a 90mm
Pulley (63). Attach the Pulley, a Cable Trap (68),
and two Half Finger Guards (66) at the second
hole from the top of the two Pulley Plates (51)
with an M10 x 48mm Bolt (64) and an M10 Nylon
Locknut (90). Make sure the Cable Trap and
Finger Guards are oriented as shown.
41
42
43
5
Bracket
44
45
5
63
90
99
99
7
5
102
110
63
90
64
110
66
66
68
51
51
90
63
80
110
5
Bracket
Attach pulley
on this side
80
63
68
90
1
10
47
33
49
110