13
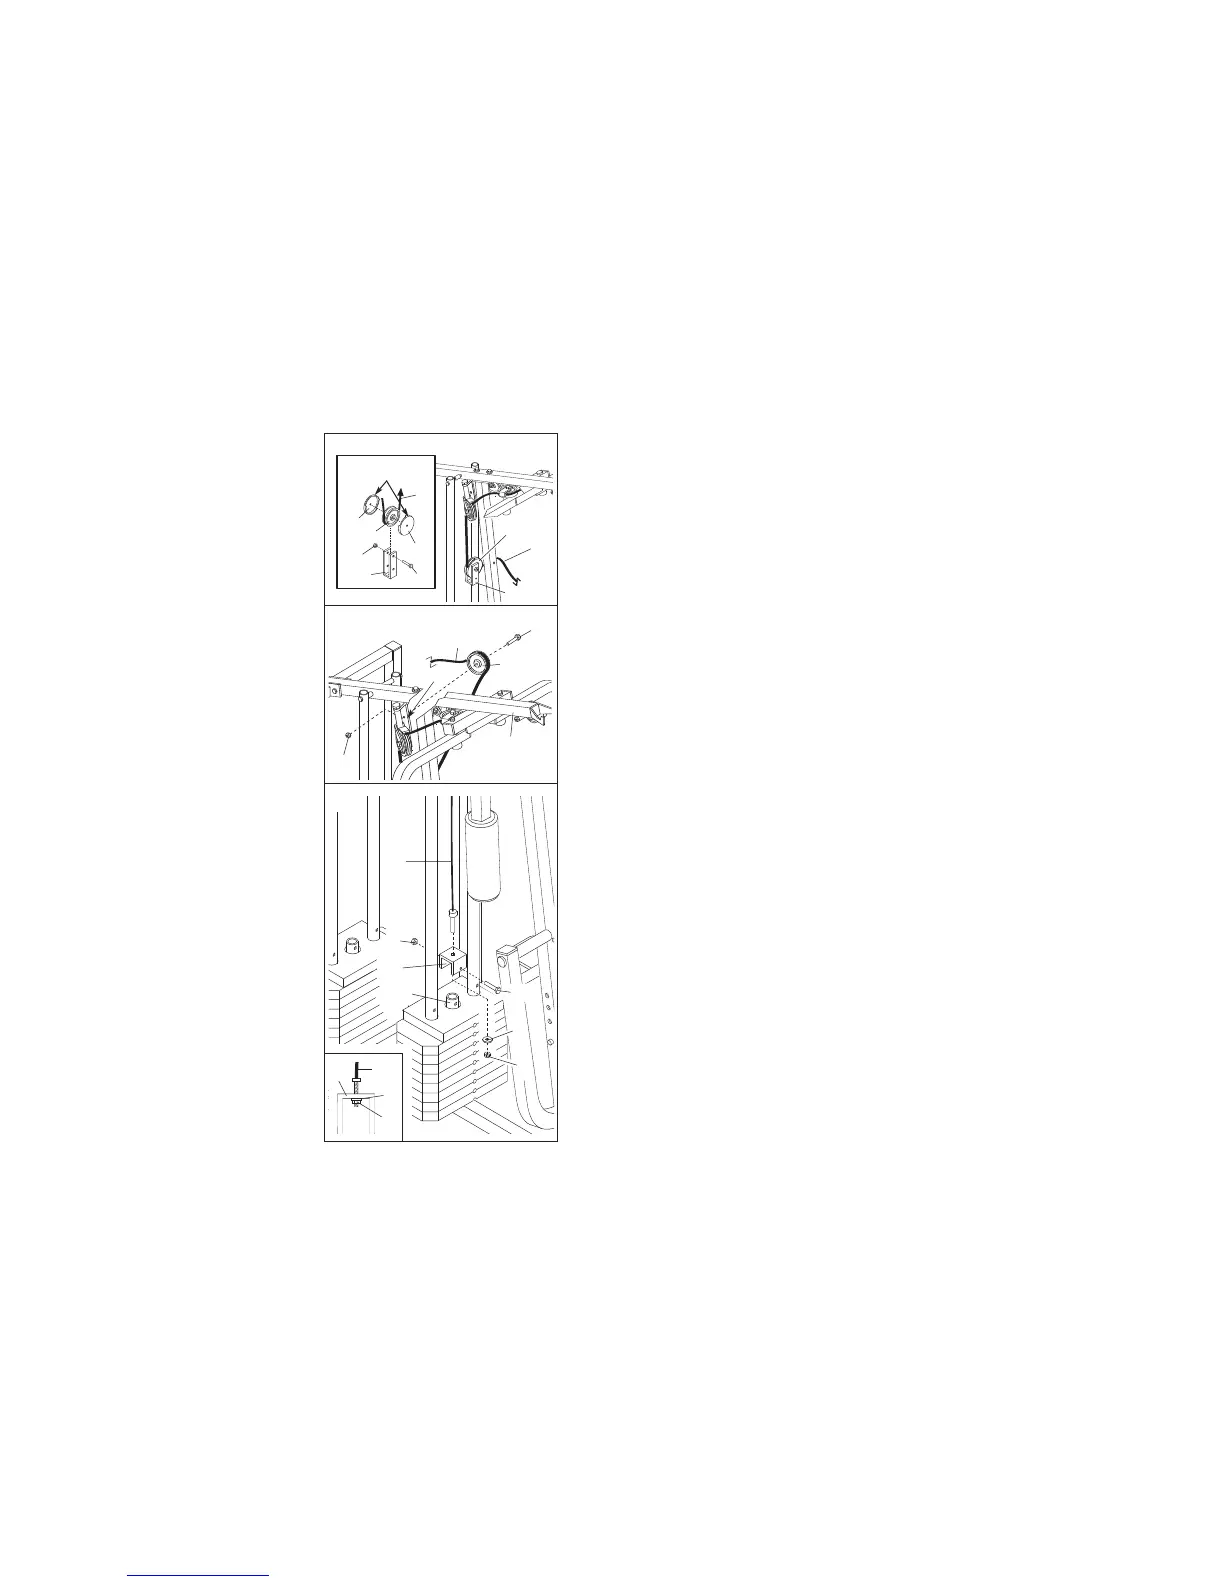
22. See the inset drawing. Wrap the High Cable (58)
around a 3 1/2” Pulley (15). Attach the Pulley and a
s
et of Pulley Covers (77) to the upper hole in a Long
“U”-Bracket (57) with a 3/8” x 2” Bolt (12) and a 3/8”
N
ylon Locknut (21). N
ote: This may be pre-assem-
bled. Be sure that the small tabs on the Pulley
Covers are in the position shown and that the
Cable and Pulley move smoothly.
23. Wrap the High Cable (58) around a 3 1/2” Pulley
(15). Attach the Pulley to the bracket on the Top
Frame (55) with a 3/8” x 2” Bolt (12) and a 3/8”
Nylon Locknut (21).
Be sure that the Cable is in
the groove of the Pulley and that the Cable and
Pulley move smoothly.
24. Attach the High Cable (58) to a Small “U”-Bracket
(71) with a 1/4” Nylon Locknut (2) and a 1/4” Washer
(10).
Do not completely tighten the Nylon
Locknut. It should be threaded onto the end of
the Cable only a couple of turns, as shown in the
inset drawing.
Attach the Small “U”-Bracket (71) to the indicated
W
eight
Tube (63) with a 5/16” x 1 3/4” Bolt (24) and
a 5/16” Nylon Locknut (3).
Bracket
55
21
12
15
58
23
58
1
5
1
5
7
7
77
21
12
57
58
Small tabs
should be up.
57
22
58
71
10
3
58
10
2
71
2
24
63
24