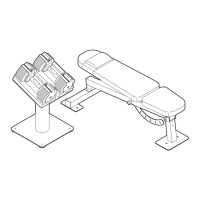
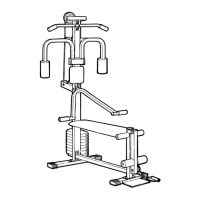
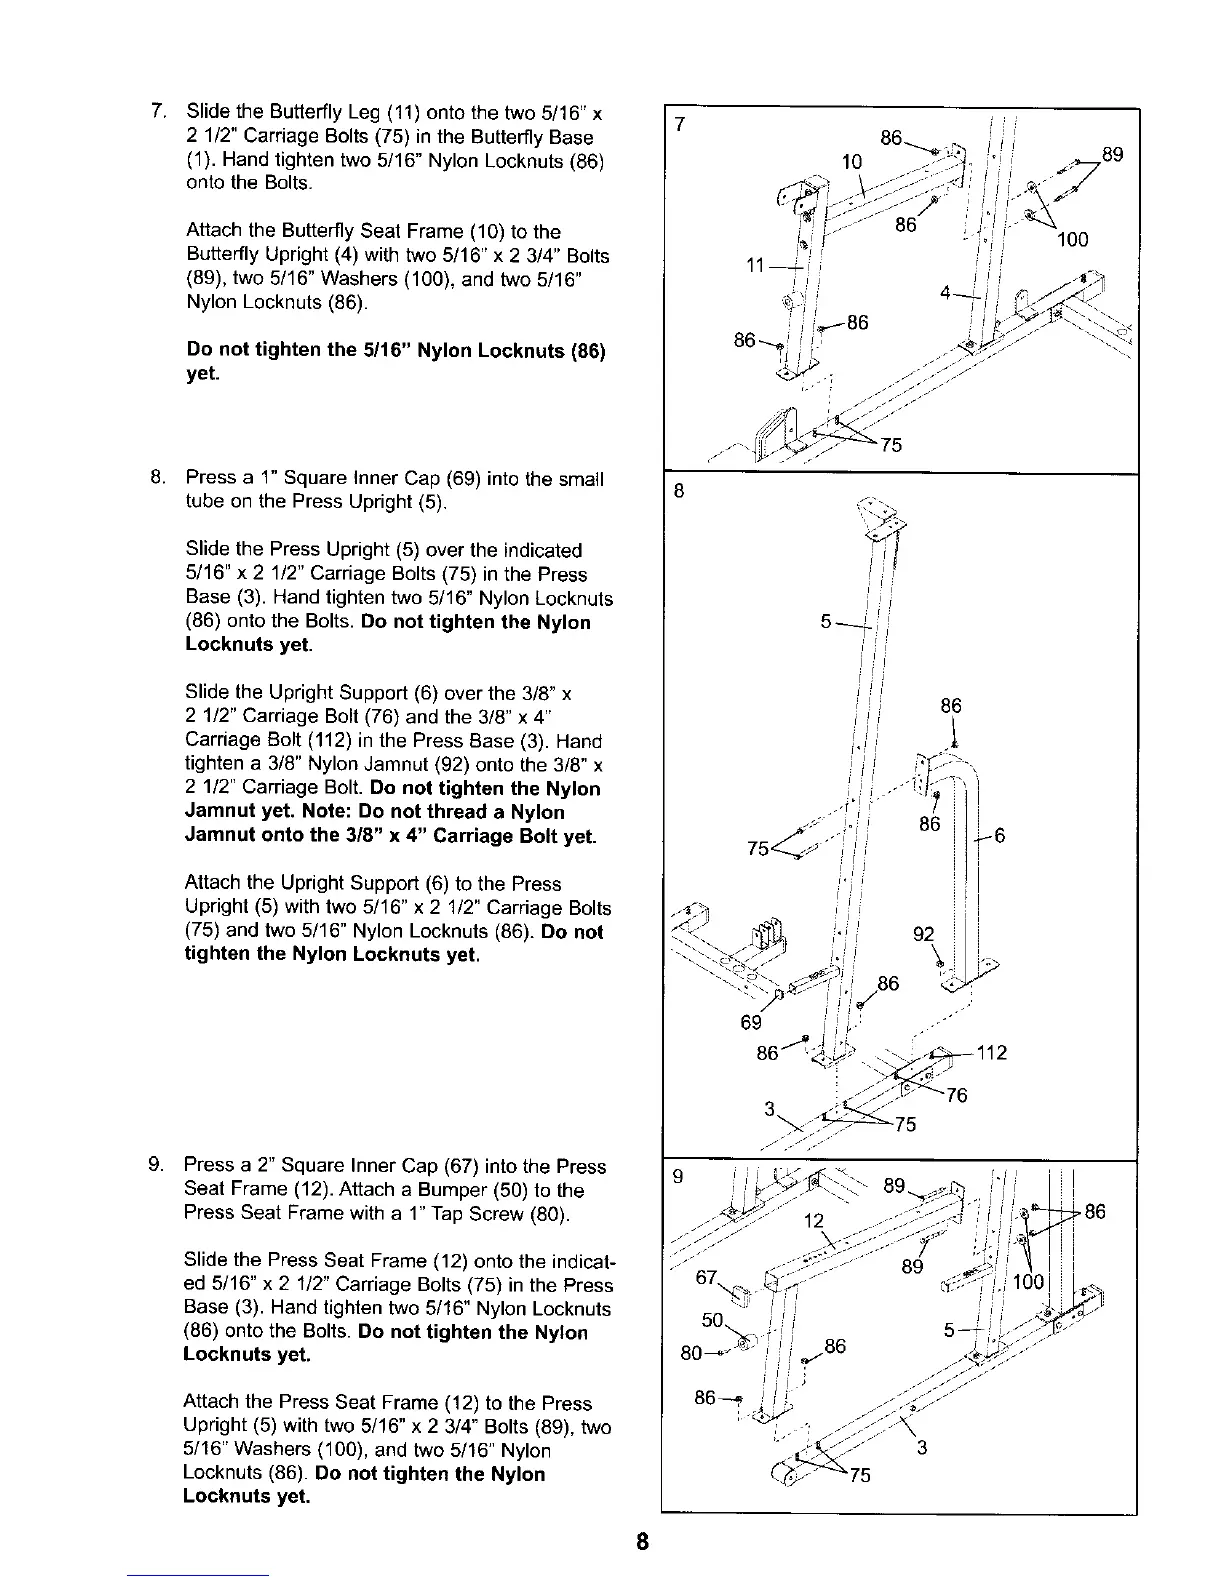
7. Slide the Butterfly Leg (11) onto the two 5/16" x
2 1/2" Carriage Bolts (75) in the Butterfly Base
(1). Hand tighten two 5/16" Nylon Locknuts (86)
onto the Bolts.
Attach the Butterfly Seat Frame (10) to the
Butterfly Upright (4) with two 5/16" x 2 3/4" Bolts
(89), two 5/16" Washers (100), and two 5/16"
Nylon Locknuts (86).
Do not tighten the 5/16" Nylon Locknuts (86)
yet.
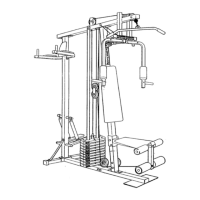
8.
Press a 1" Square Inner Cap (69) into the small
tube on the Press Upright (5).
Slide the Press Upright (5) over the indicated
5/16" x 2 1/2" Carriage Bolts (75) in the Press
Base (3). Hand tighten two 5/16" Nylon Locknuts
(86) onto the Bolts. Do not tighten the Nylon
Locknuts yet.
Slide the Upright Support (6) over the 3/8" x
2 1/2" Carriage Bolt (76) and the 3/8" x 4"
Carriage Bolt (112) in the Press Base (3). Hand
tighten a 3/8" Nylon Jamnut (92) onto the 3/8" x
2 1/2" Carriage Bolt. Do not tighten the Nylon
Jamnut yet. Note: Do not thread a Nylon
Jamnut onto the 3/8" x 4" Carriage Bolt yet.
Attach the Upright Support (6) to the Press
Upright (5) with two 5/16" x 2 1/2" Carriage Bolts
(75) and two 5/16" Nylon Locknuts (86). Do not
tighten the Nylon Locknuts yet.
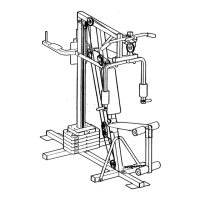
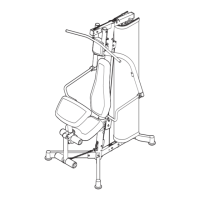
g,
Press a 2" Square Inner Cap (67) into the Press
Seat Frame (12). Attach a Bumper (50) to the
Press Seat Frame with a 1" Tap Screw (80).
Slide the Press Seat Frame (12) onto the indicat-
ed 5/16" x 2 1/2" Carriage Bolts (75) in the Press
Base (3). Hand tighten two 5/16" Nylon Locknuts
(86) onto the Bolts. Do not tighten the Nylon
Locknuts yet.
Attach the Press Seat Frame (12) to the Press
Upright (5) with two 5/16" x 2 3/4" Bolts (89), two
5/16" Washers (100), and two 5/16" Nylon
Locknuts (86). Do not tighten the Nylon
Locknuts yet.
10
8
i J
= i i:
sfl
! 1=iI
, 86
1
86 _6
J: I=
100