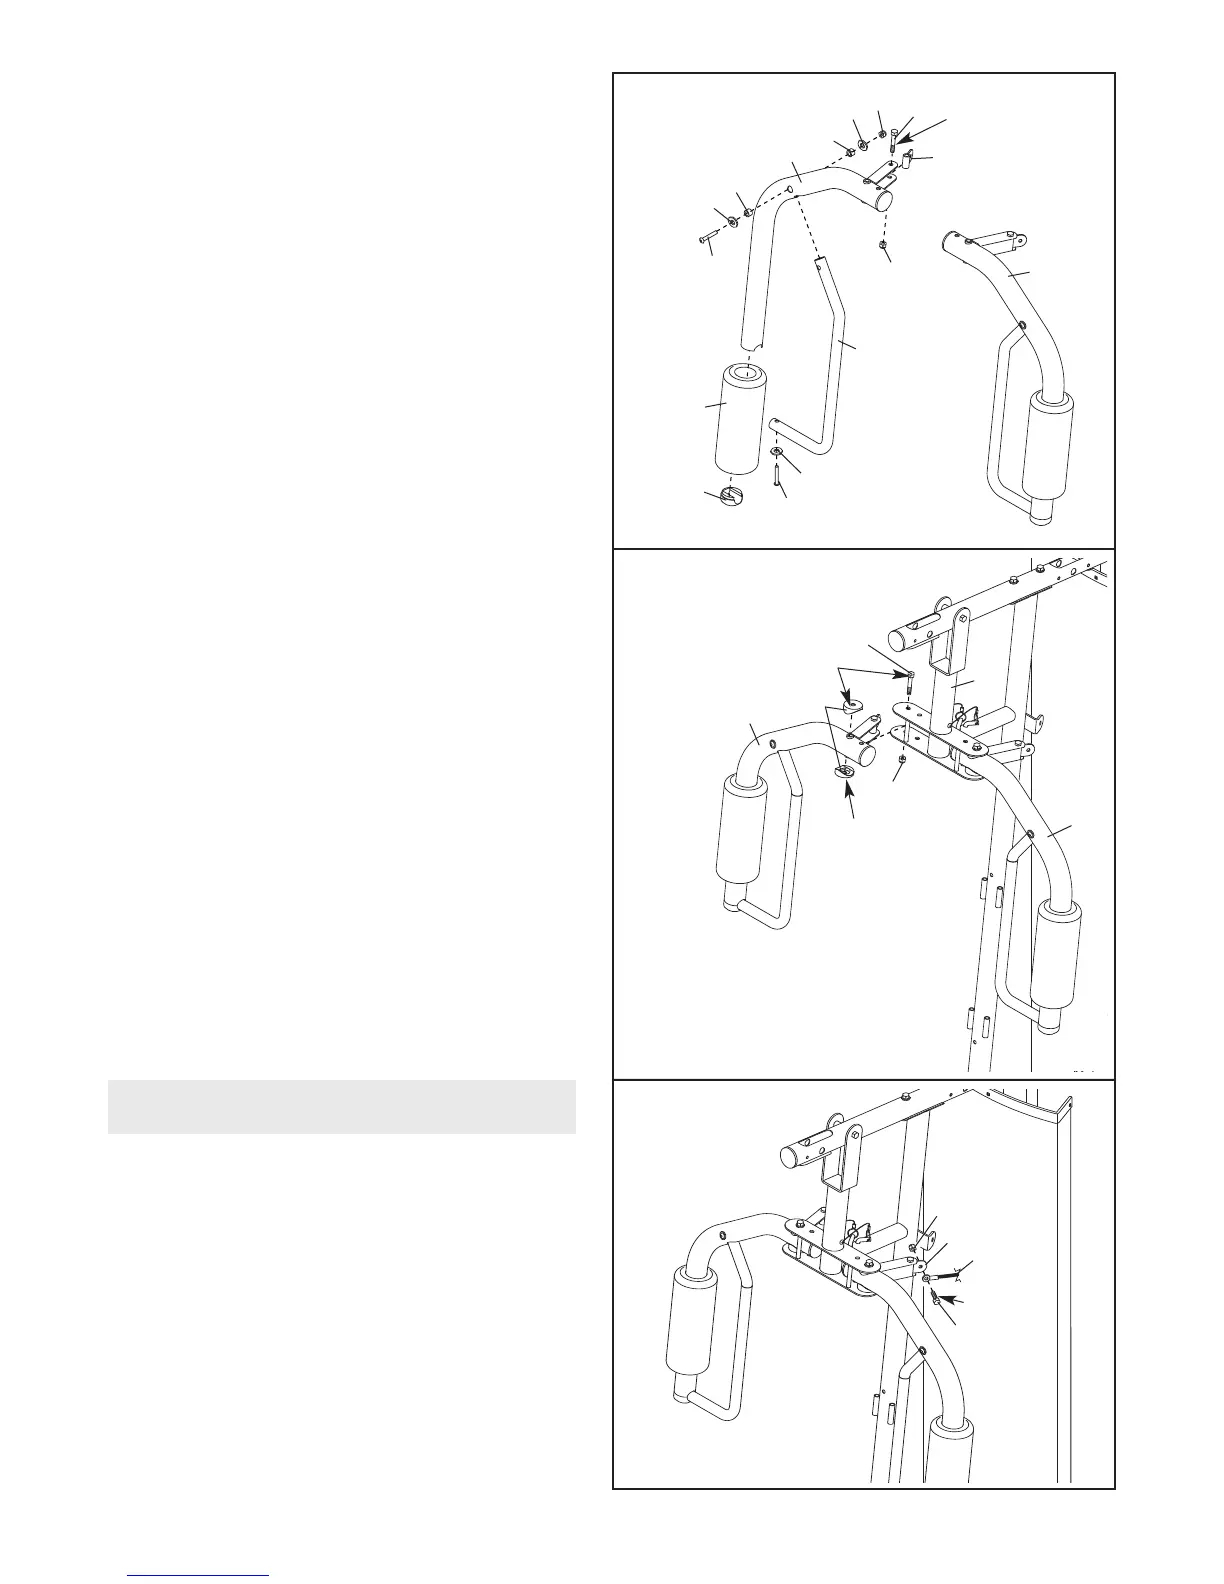
10
11. Grease an M10 x 52mm Button Bolt (66).
Attach a Cable Pivot (39) to the Right Arm (9)
w
ith the Button Bolt and an M10 Nylon Locknut
(56).
Do not overtighten the Nylon Locknut;
t
he Cable Pivot must pivot freely.
Wet the inside of a Large Foam Pad (42) with
soapy water. Slide the Large Foam Pad onto
the Right Arm (9).
Attach the upper end of a Handle (11) to the
Right Arm (9) with an M10 x 72mm Button Bolt
(85), two M10 Washers (57), two 16mm
Spacers (52), and an M10 Nylon Locknut (56).
Do not tighten the Button Bolt yet.
Press a Handle Cap (31) into the Right Arm (9).
Attach the lower end of the Handle (11) to the
Right Arm with an M10 x 40mm Button Bolt (77)
and an M10 Large Washer (80).
Tighten the
M10 x 72mm Button Bolt (85).
Assemble the Left Arm (10) in the same
manner.
12. Grease an M10 x 90mm Button Bolt (67) and
two Arm Bushings (44). Attach the Right Arm
(9) to the Pivot Frame (5) with the Bolt, the two
Arm Bushings, and an M10 Nylon Locknut (56).
Do not overtighten the Nylon Locknut; the
Right Arm must pivot freely.
Attach the Left Arm (10) to the Pivot Frame
(5) in the same manner.
13. Refer to the CABLE DIAGRAMS on page 20
as you identify and assemble the cables.
Identify the Arm Cable (54).
Grease an M8 x
19mm Shoulder Bolt (65).
Attach the Cable to
the indicated Cable Pivot (39) with the Shoulder
Bolt and an M8 Nylon Locknut (58). Make sure
that the Cable can pivot freely around the
Shoulder Bolt.
11
12
11
10
39
31
77
80
66
52
52
5
7
85
56
56
57
9
10
42
9
44
56
5
67
58
65
54
39
Grease
Grease
G
rease
Grease
13
Cable Assembly