8
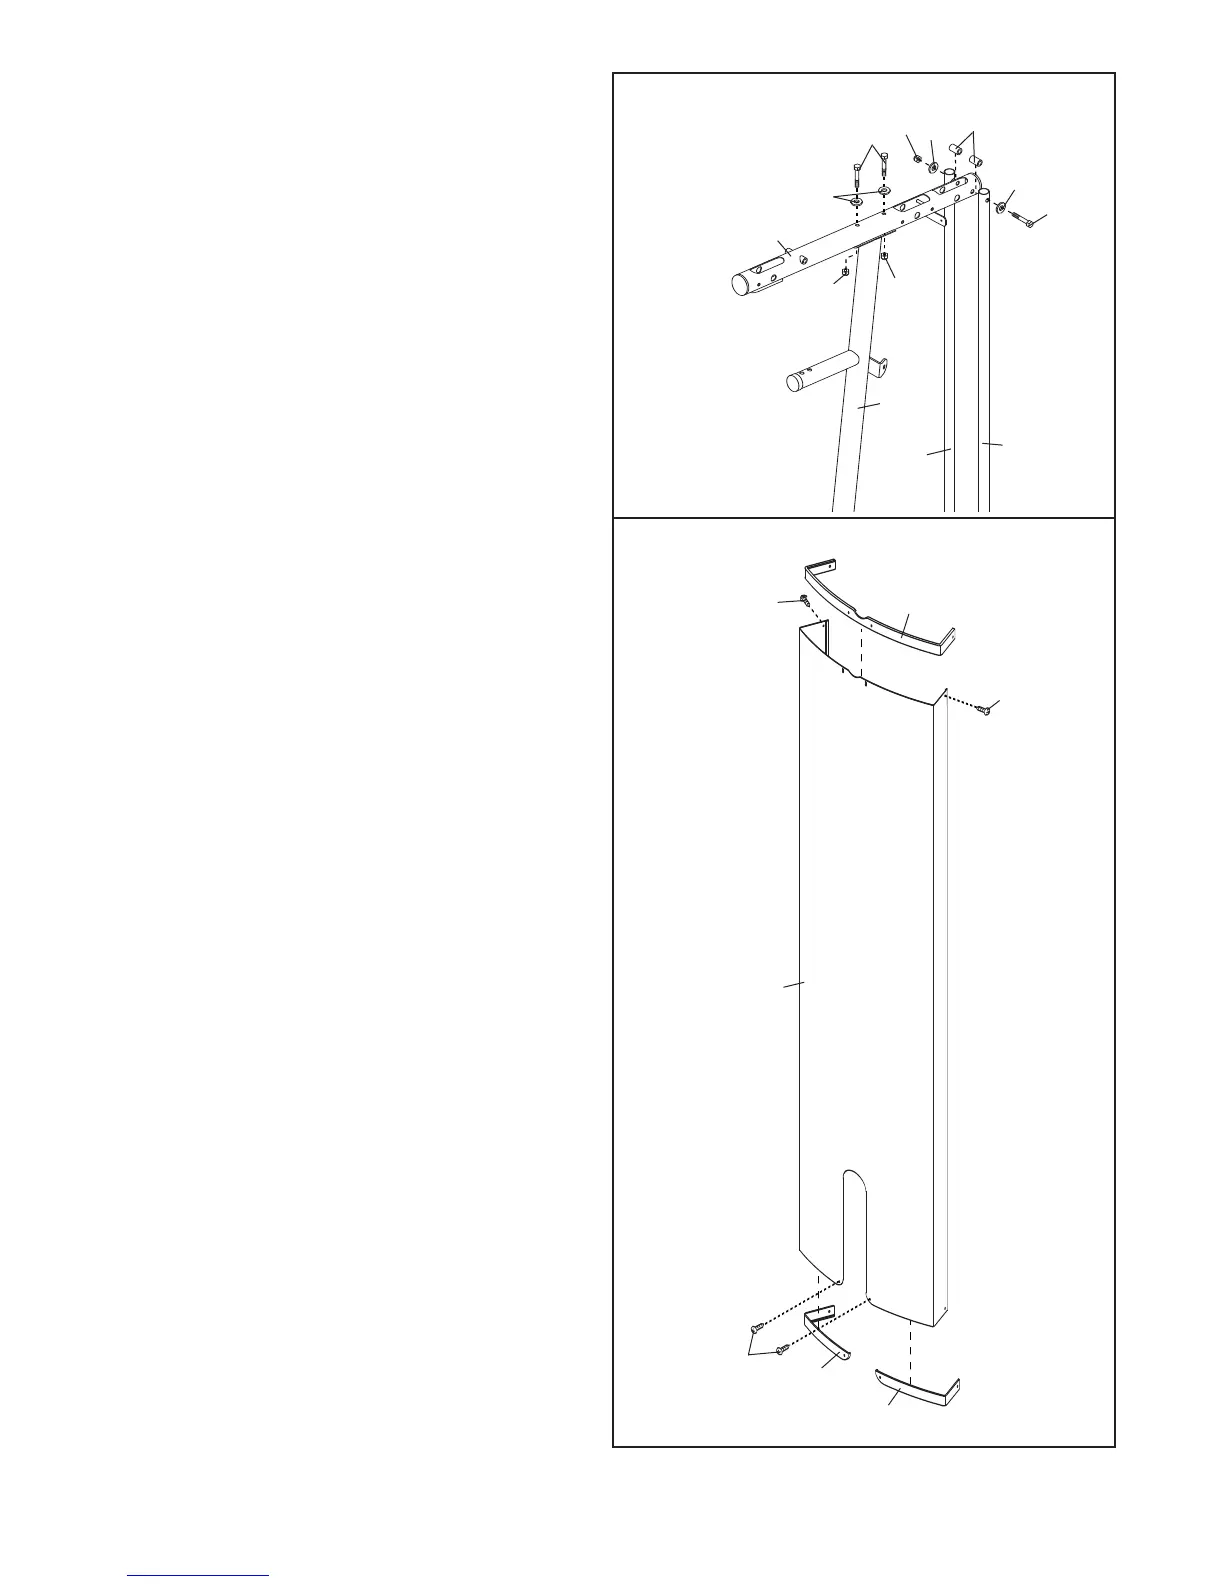
6. Attach the Top Frame (4) to the Upright (3) with
two M8 x 77mm Button Bolts (68), two M8
W
ashers (59), and two M8 Nylon Locknuts (58).
Do not tighten the Nylon Locknuts yet.
Attach the Top Frame (4) between the Weight
Guides (21) with an M10 x 155mm Button Bolt
(74), two M10 Washers (57), two 13mm
Spacers (76), and an M10 Nylon Locknut (56).
Do not tighten the Nylon Locknuts yet.
7. Attach the Left Cap (19) and the Right Cap (20)
to the bottom of the Shroud (17) with two M4 x
10mm Screws (84).
Attach the Top Cap (18) to the top of the
Shroud (17) with two M4 x 10mm Screws (84).
6
7
4
3
56
58
74
21
21
59
5
7
7
6
57
68
5
8
18
84
84
17
20
19
84