10
15
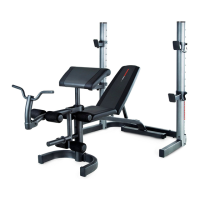
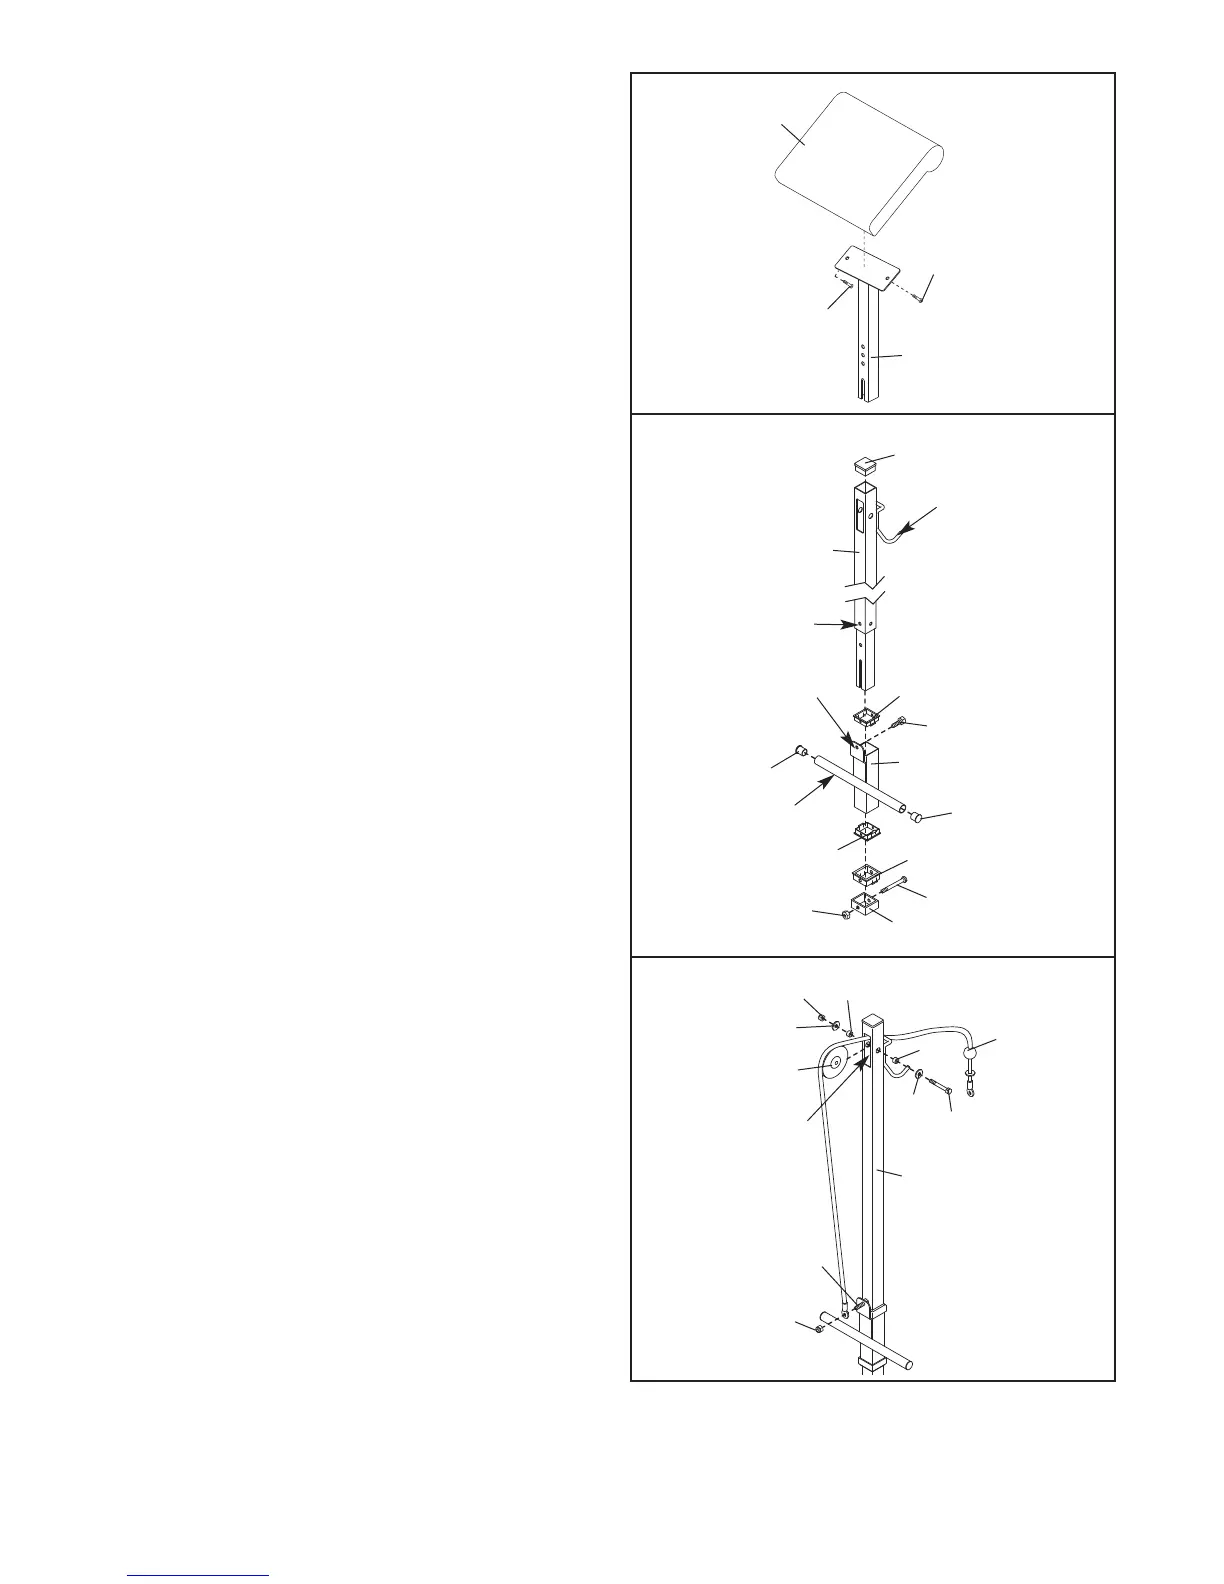
14. Press a 50mm Square Inner Cap (54) into the top
of the Lat Tower (47).
Press Carriage Bushings (49) into the top and
bottom of the Weight Carriage (48). Press two
25.4mm Round Inner Caps (23) into the ends of
the weight tube. Insert an M10 x 20mm Bolt (50)
into the bracket from the direction shown.
Slide the Weight Carriage (48) onto the bottom of
the Lat Tower (47) as shown.
Press a Bushing (28) into the top of the Carriage
Stop (52). Attach the Carriage Stop to the indicat-
ed hole in the Lat Tower (47) with an M8 x 70mm
Bolt (67) and an M8 Nylon Locknut (13).
15. Find the Cable (58); note that it has a ball on one
end and a loop on the other
. Route the loop end
of the Cable through the slot in the Lat Tower (47)
and over a Pulley (55) as shown. Attach the
Pulley inside the slot with an M10 x 65mm Bolt
(40), two M10 Washers (24), two Wide Spacers
(44), and an M10 Nylon Locknut (19).
Slide the loop on the Cable (58) onto the M10 x
20mm Bolt (50) and secure it with an M10 Nylon
Locknut (19).
19
50
24
24
44
44
47
55
58
19
40
Slot
16. Make sure that all the bolts and nylon locknuts are properly tightened before you use the weight
bench. The use of all remaining parts will be explained in ADJUSTMENTS, starting on the following page.
15
15
27
26
54
50
52
48
23
23
67
13
Bracket
Hole
47
28
49
49
Weight
Tube
Lat Bar
Rest
14
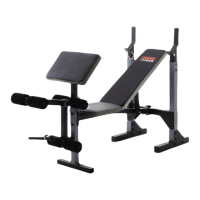
13. Attach the Curl Pad (27) to the Curl Post (26)
with two M6 x 16mm Bolts (15).
13