12 Functional check
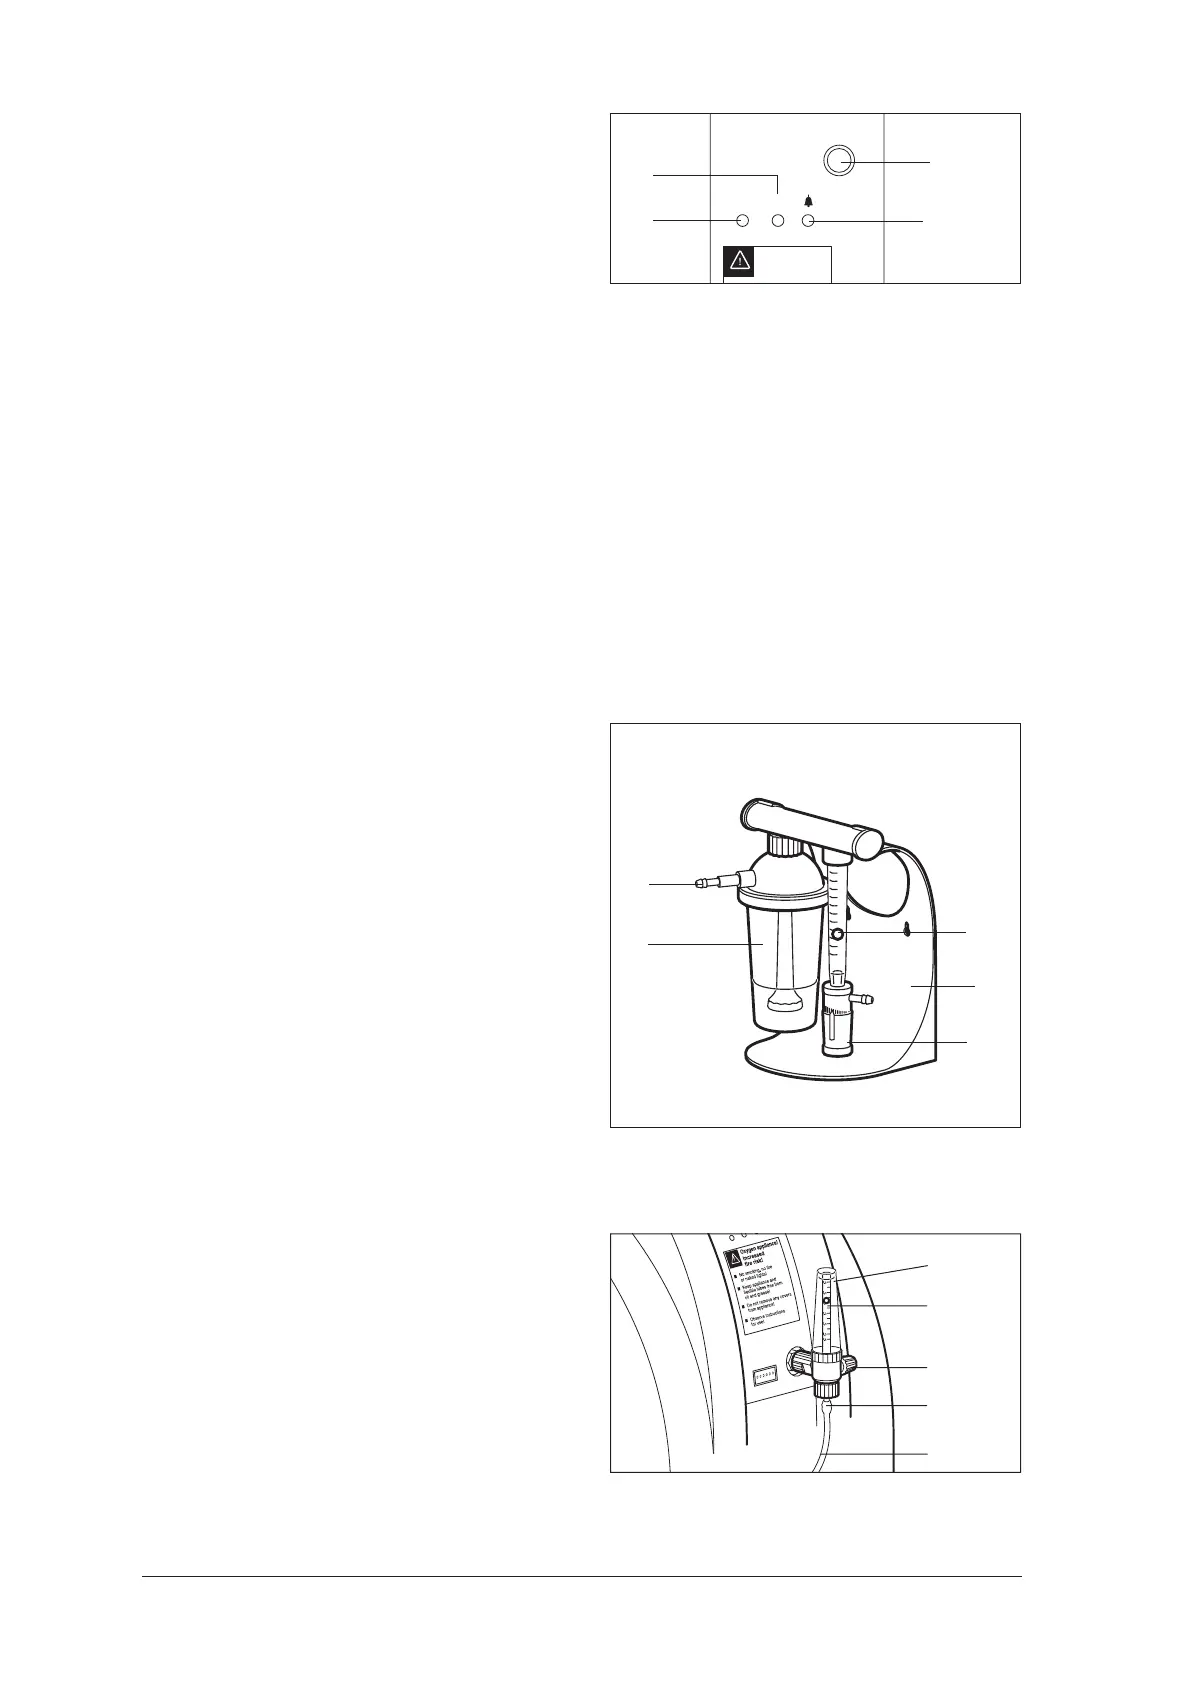
3. Switch on the OXYMAT 3 at the On/Off
knob 2. The following LED displays will ap-
pear:
– The power indicator (green LED) 20 lights
up.
– The fault indicator (red LED) 18 and status
indicator (yellow LED) 19 light up briefly.
Important
The program then makes an internal check for
leaks:
– Pressure is built up within 20 seconds. The
green operating indicator 20 flashes light/
dark.
– Then the compressor is switched off and the
existing pressure is monitored for about 20
seconds. If there is a fault and the pressure
drops, the yellow status indicator 19 lights
up.
– Finally the system is vented so that the com-
pressor can start up again without any
back-pressure.
5.3.6 Checking the dosage monitor for leaks
1. Check the screw connections between the hu-
midifier glass/cap and humidifier/dosage
monitor to verify that they are firmly seated. If
necessary, re-tighten the connections by hand.
2. Set a flow of 4 l/min on the flow control
knob 24 for oxygen dosage.
3. To check the dosage monitor 9 for leaks,
– bend the 3 m tube 11
– or pull the 3 m tube 11 from the connection
of the bubble humidifier 25 and hold the
connection 26 closed.
If the ball 22 sinks all the way to the bottom,
there are no leaks in the dosage monitor sys-
tem.
4. In the event of leaks, change the sealing rings
on the humidifer.
5.3.7 Checking the flowmeter for leaks
1. Set a flow of 4 l/min on the knob 27.
2. To check the flowmeter 16 for leaks:
– Bend the connection tube 17
– or pull the tube 17 from the connection of
the flowmeter and hold the connection 29
closed.
If the ball 22 sinks all the way to the bottom,
there are no leaks in the flowmeter.
3. In the event of leaks, change the sealing rings
on the flowmeter.
O/ I
Oxygen appliance!
O
2
O/I
Increased
fire risk!
2
18
19
20
5
,
0
4
,
0
3
,
0
2
,
0
1
,
0
0
,
5
9
24
26
25
22
29
22
16
17
27
 Loading...