���
I 2000/K 2000
Assembly instructions | Notice de montage Version | Version 05.08.2019
Reserve technical changes | Sous réserve de modifications techniques Item no. | N° art. 115729-0000 Page | Page 16/32
Notice de montageAssembly instructions
Pict 6.4 Pict 6.5 Pict 6.6
6.2.2 Couplage des barres de charge
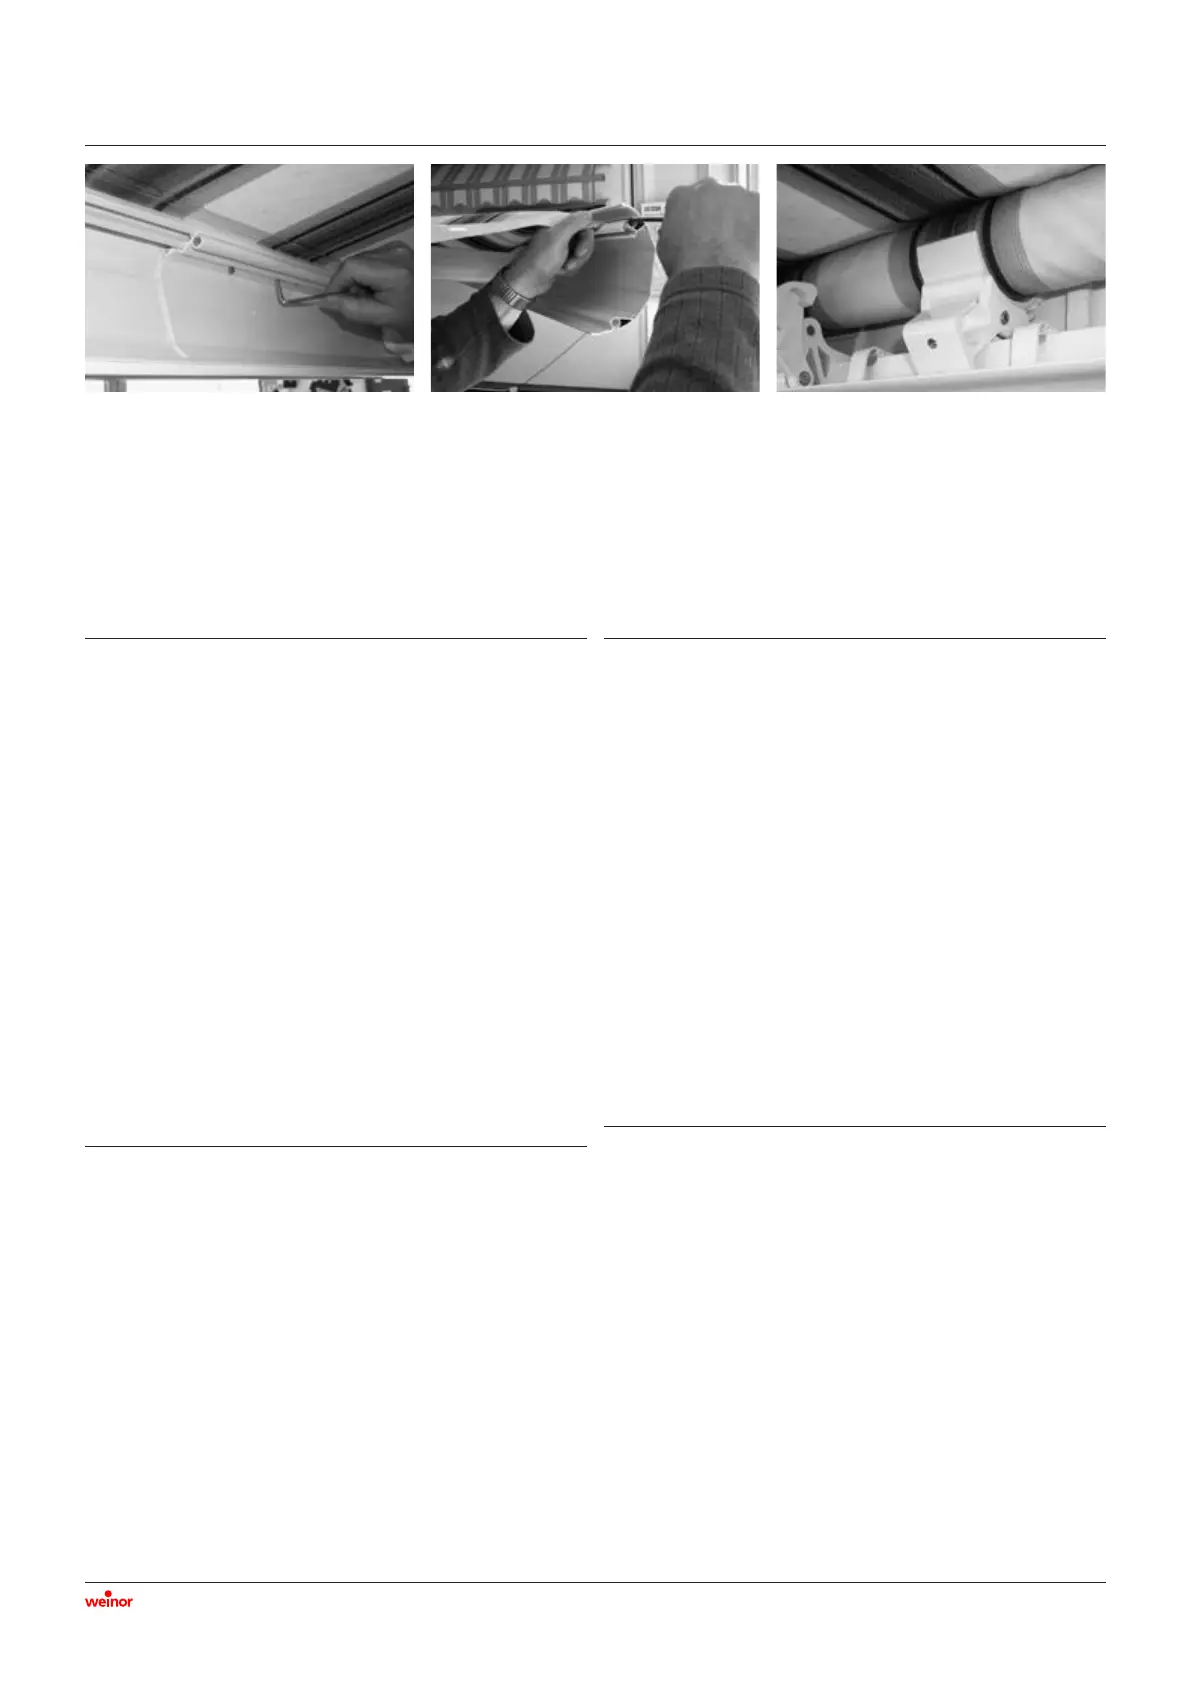
• Insérer le profilé de couplage dans une barre de charge de sorte
qu’il relie les deux barres de charge. Pousser les barres de charge
ensemble. Visser le profilé de couplage à l’aide des quatre tiges
filetées (Pict 6.4).
• Afin que la toile ne puisse pas tomber entre les bras du store lors
de son déploiement, une corde est tendue entre les articulations
centrales.
���
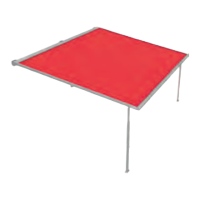
6.2.3 Déploiement de la toile
• La toile est à présent déroulée au-dessus des bras. L’étiquette
cousue de la toile weinor doit être orientée vers le bas à l’extré-
mité de la barre de charge.
• Tirer la toile par l’avant sur l’axe d’enroulement jusqu’à la
rainure de l’axe d’enroulement/la bande adhésive.
• Retirer le film de protection de la bande adhésive sur l’axe
d’enroulement.
• En commençant par le côté (à environ 1,5 cm de l’extrémité de
l’axe d’enroulement), placer la toile sur la bande adhésive
parallèlement à la rainure de l’axe d’enroulement. La toile doit
être à la même distance de l’extrémité de l’axe d’enroulement
de l’autre côté.
• Enrouler la toile d’un tour.
• Fixer ensuite la toile à la barre de charge.
• Insérer la couture de la toile dans le compartiment de la barre
de charge et introduire le jonc par le côté (Pict 6.5). La barre
de charge peut aussi être tirée sur la toile avec le jonc inséré –
pour ce faire, les bras doivent être dévissés.
• Couper le jonc au niveau des côtés extérieurs de sorte qu’il soit
5 cm plus court que la toile et insérer les chevilles.
���
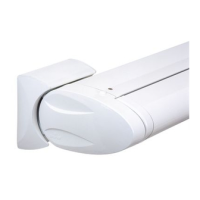
6.2.4 Montage du palier lisse
• Le palier lisse (Pict 6.6) est prémonté. Vérifier le réglage du
palier lisse.
• Le palier lisse est toujours sans coussinet supérieur.
• La bande du palier lisse ou la couture centrale de la toile doit se
trouver au milieu du coussinet inférieur.
• Une fois l’inclinaison du store réglée, la position du palier lisse
doit être réglée. Desserrer la vis de blocage et déplacer le
coussinet de sorte qu’il y ait un espace de 10 mm entre le bord
du coussinet et la toile. Serrer la vis de blocage.
• Si plusieurs paliers sont fournis, ceux-ci doivent être montés
conformément aux instructions.
6.2.2 Connecting the front rails
• Insert a coupling section into a front rail and center the profile
in the middle of the joint and then push the front rails together
so that they are firmly in place. Locate the coupling section by
means of the four threaded screws (Pict 6.4).
• So that the fabric cover does not fall between the awning arms
when it is drawn up, a cord is tensioned between the centre
joints.
���
6.2.3 Winding the fabric
• The cloth should now be unwound over the arms. The sewn-in
weinor fabric label must be at the end of the front rail and be
visible from below.
• Pull the cloth from the front over the roller support up to the
roller support slot/adhesive tape.
• Remove the protective film from the adhesive tape on the roller
support.
• Starting at the side (approx. 1.5 cm from the end of the roller
support) lay the cloth onto the adhesive tape parallel to the roll-
er support slot. The cloth should have on the opposite side
of the roller support the same distance to the end of the roller
support.
• Roll up the cloth by rotating once.
• Then attach the cloth to the front rail.
• Insert the stitched seam of the cloth into the front rail cavity
and feed the piping cover pocket in from the side (Pict 6.5).
Alternatively, the front rail can also be pulled over the cloth
with the attached piping cover pocket – for this, the arms have
to be unscrewed.
• Cut off the piping cover pocket on the outsides approx. 5 cm
shorter than the cloth and insert the rawlplugs.
���
6.2.4 Fitting the cradle
• The cradle (Pict 6.6) is pre-assembled. Check the alignment of
the cradle.
• Cradle always without top bushing
• The middle strip or seam of the cloth must be seated centrally
on the lower bushing of the cradle.
• After adjusting the awning pitch, the cradle position must be
set. Loosen the locking screw and push the bushing so that there
is 10 mm space between the upper edge of the bushing and the
cloth. Tighten the locking screw.
• If several cradles are in place, they should all be fitted according
to the instructions.
 Loading...