���
I 2000/K 2000
Assembly instructions | Notice de montage Version | Version 05.08.2019
Reserve technical changes | Sous réserve de modifications techniques Item no. | N° art. 115729-0000 Page | Page 14/32
Notice de montageAssembly instructions
5. Montage du palier lisse pour les installations individuelles
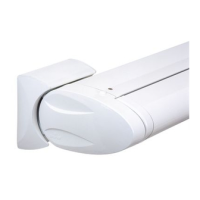
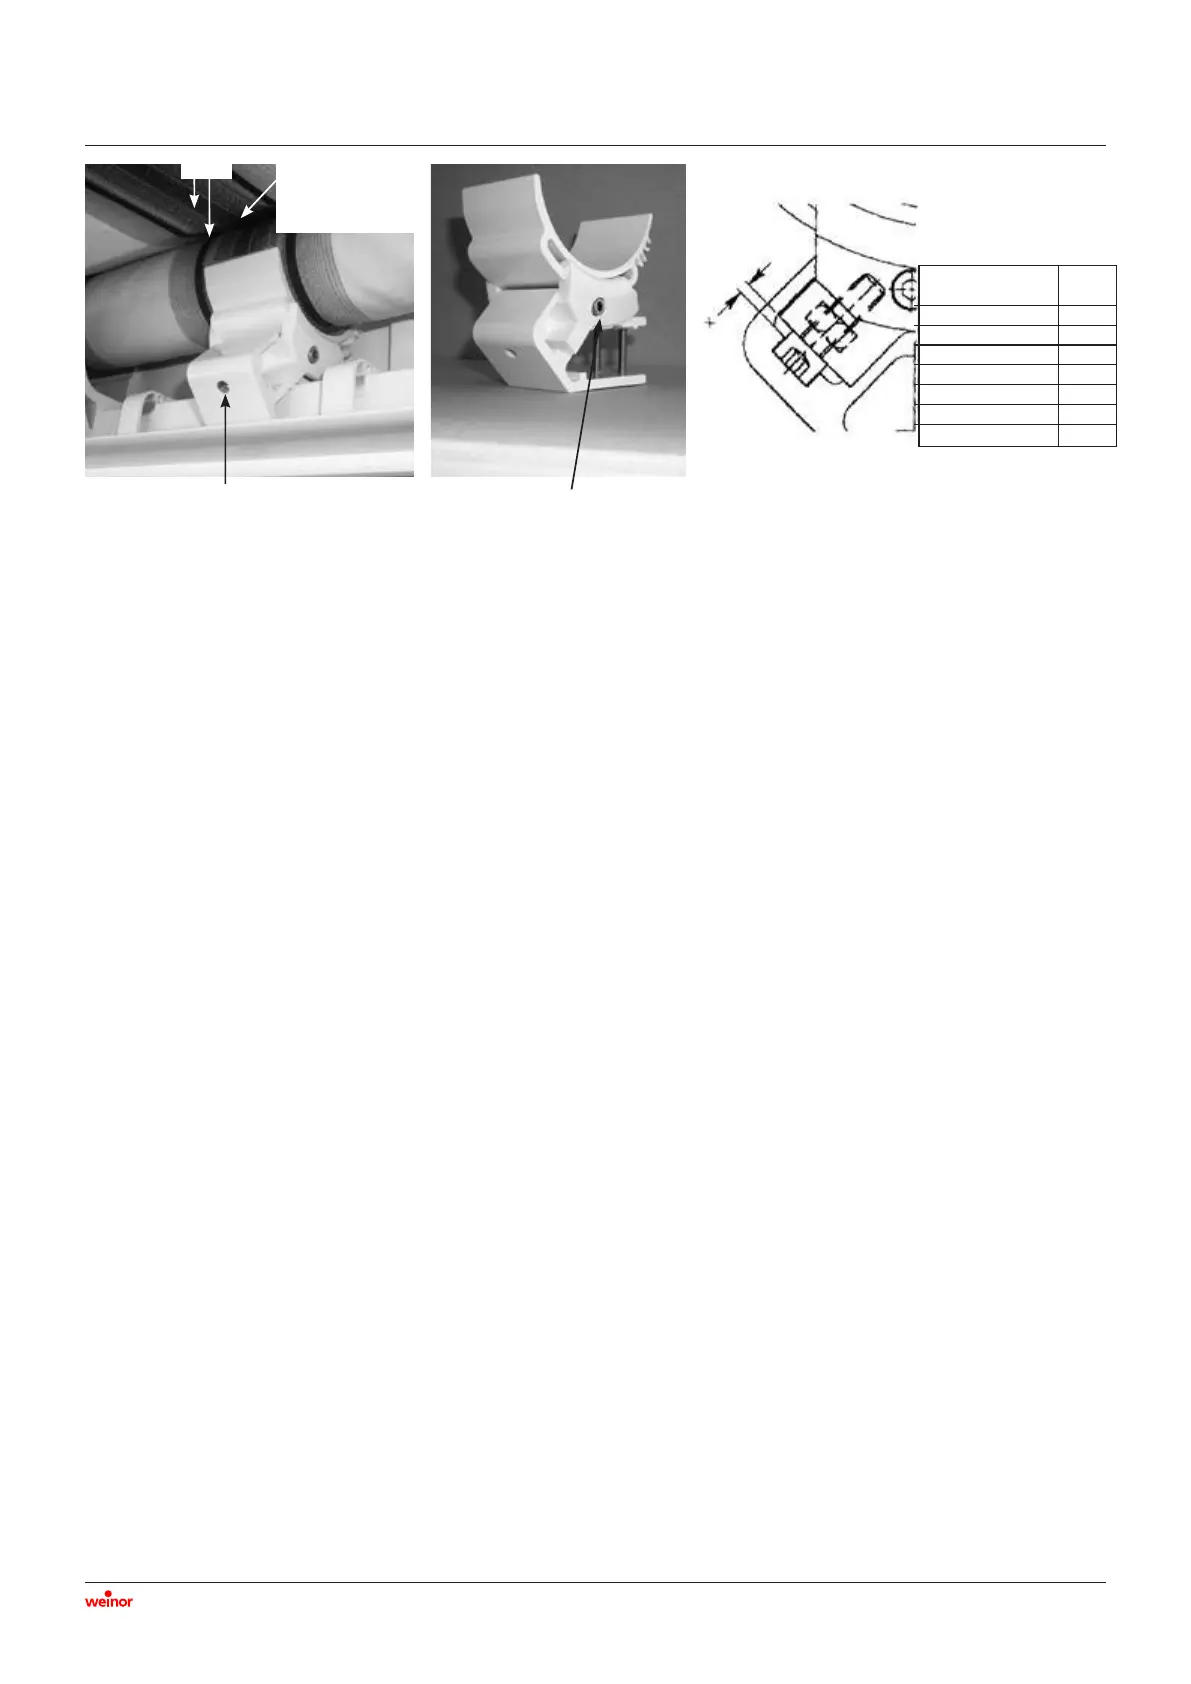
• Le palier lisse (Pict 5.1) est prémonté. Vérifier le réglage du
palier lisse.
• Le palier lisse est toujours sans coussinet supérieur (Pict 5.2).
• La bande du palier lisse doit se trouver au milieu du coussinet
inférieur.
• Une fois l’inclinaison du store réglée, la position du palier lisse
doit être réglée. Desserrer la vis de blocage et déplacer le
coussinet de sorte qu’il y ait un espace de 10 mm entre le bord
du coussinet et la toile. Serrer la vis de blocage.
• L’angle de projection des installations individuelles est réglé en
usine. Contrôler le réglage.
• Desserrer légèrement la vis de blocage.
• Procéder au réglage avec une clé Allen de 6 selon le tableau.
• Rotation vers la gauche : petit angle de projection.
Rotation vers la droite : grand angle de projection.
• Serrer la vis de blocage.
• La cote «X» ne doit pas être dépassée. La toile risque autrement
d’être endommagée (Pict 5.3).
10 mm
Pitch adjustment
Réglage de l’inclinaison
Locking screw
Vis de blocage
Cradle strip to be
central on the bushing
Bande du palier lisse
au milieu du coussinet
Pict 5.1 Pict 5.2 Pict 5.3
Carry out the projection angle
adjustment according to the table
Procéder à l’ajustement de l’angle
de projection selon le tableau
Projection angle X
Angle de projection
mm mm
1500 12
2000 10
2500 8
3000 7
3500 5
4000 3
5. Fitting the cradle on individual units
• The cradle (Pict 5.1) is pre-assembled. Check the alignment of
the cradle.
• Cradle always without top bushing (Pict 5.2).
• The cradle strip must be seated centrally on the lower bushing
of the cradle.
• After adjusting the awning pitch, the cradle position must be
set. Release the locking screw and slide the bushing so that
there is 10 mm space between the upper edge of the bushing
and the fabric. Tighten the locking screw.
• The projection angle of the awning on one-piece units is set at
the factory. Check the adjustment setting.
• Loosen the locking screw slightly.
• Carry out the adjustment using an SW 6 Allen screw key.
• Turn to the left to achieve a small projection angle.
Turn to the right to achieve a large projection angle.
• Tighten the locking screw.
• The dimension “X” must not be exceeded otherwise there is a
danger of the fabric being damaged (Pict 5.3).
 Loading...