Document P/N:
2P121260
Release Date: 02/27/2017
Revision: E
33 of 41
SPM
®
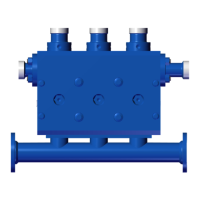
TWS600S Fluid End Repair Procedures:
To remove Valves and Seats:
1. Using the SPM
®
2” hex cover wrench and a 10lb. hammer, remove the suction covers and
discharge covers from the fluid cylinder.
2. Turn the suction valve stops approximately 90 degrees and remove them from the fluid cylinder
along with the valve springs underneath them.
3. Using an SPM
®
magnetic valve removal tool, cock each suction valve to one side in order to drain
any fluid standing over it, and remove the valve from the fluid cylinder. Follow the valve
manufacturer's recommendation of removing the insert from the valve.
4. Remove the discharge valve springs and discharge valves from the fluid cylinder.
5. Using an SPM
®
hydraulic seat puller assembly, remove each of the discharge valve seats and
suction valve seats.
6. The tapered valve seat bore in the fluid cylinder must be thoroughly cleaned and lightly hand
polished with a 220 to 240 grit emory cloth prior to installing new valve seats.
7. Always install a new o-ring seal when reinstalling a valve seat. Do not use any type of grease,
sealer, etc.-the valve seat must be installed dry. Upon installing the valve seat hand tight, install
the valve in the seat and using a heavy steel bar, hammer the valve seat into the taper.
8. When reinstalling the valves, do not mix one manufacturer's valve with another manufacturer's
valve seat. Likewise, do not mix one manufacturer's valve insert with another's valve.
9. When reinstalling the suction valve stop, make certain it is turned perpendicular to the plunger and
securely seated in the groove in the cylinder. Note also the orientation of the valve stop. If the
wings on the stop are not symmetrical, they must be pointed towards the suction cover and
away from the plunger. (See Engineering Bulletin 1003 for more detail).
10. Before reinstalling the discharge and suction covers, remove the seals from each, clean the covers
thoroughly, and install new seals in the same direction that the old ones came off. Each cover
bore in the fluid cylinder must be cleaned thoroughly and lightly hand polished with a 220 to 240
grit emory cloth prior to cover installation.
11. Upon installing the threaded suction and discharge covers with a coating of oil or very light grease,
tighten them securely with the 2” hex cover wrench and a 10 lb. hammer.

 Loading...