ASSEMBLY & ADJUSTMENTS
RAISE OR LOWER THE TABLE (FIG. 11)
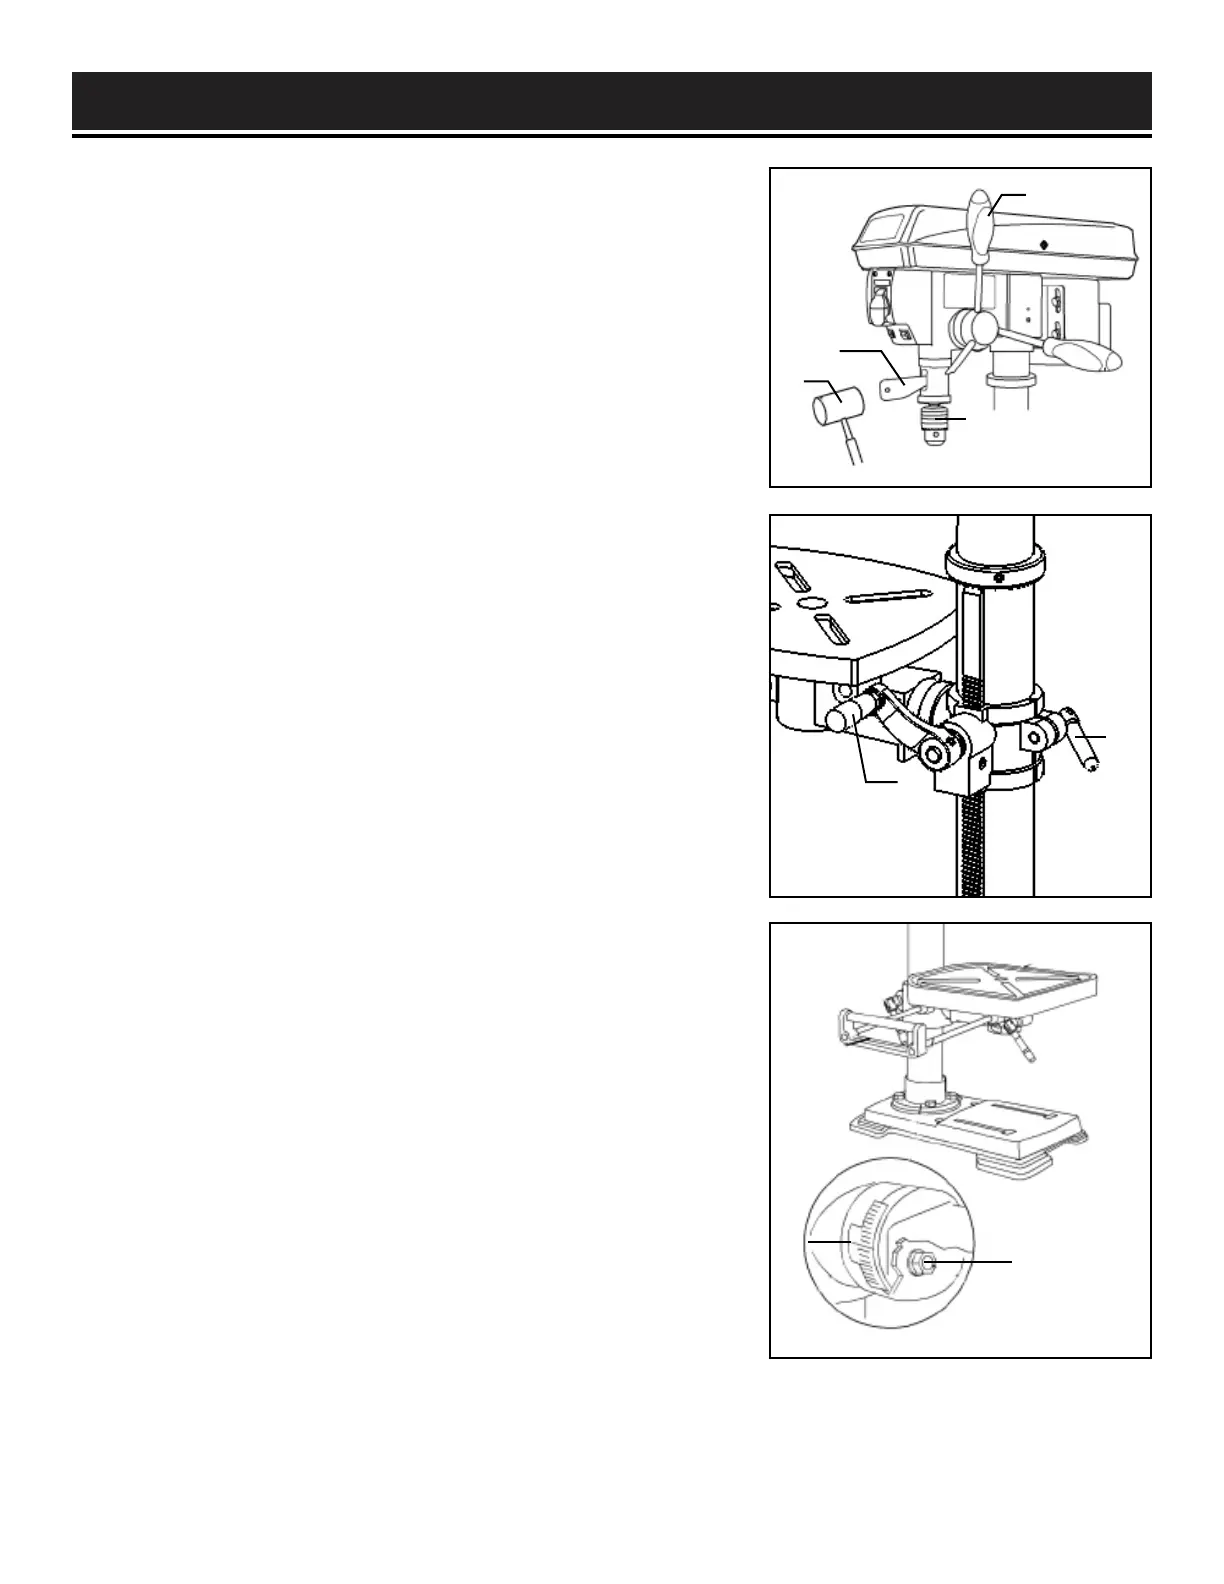
1. Loosen the support lock handle (Fig. 11 - 1) and turn the
crank handle (Fig. 11 - 2) until the table is at the desired height.
2. Tighten the support lock handle before drilling.
ROTATE THE TABLE (FIG. 11)
1. Loosen the support lock handle (Fig. 11 - 1) and turn the
table around the column to the desired position.
NOTE: The rack should rotate around the column with the table
support bracket. If the rack binds and does not rotate, slightly
loosen the set screw in the rack collar.
2. Tighten the support lock before drilling.
TILT THE TABLE (FIG. 12A)
1. Loosen the bevel lock bolt (Fig. 12A - 1) by turning it
counterclockwise with an adjustable wrench (not included).
2. Tilt the table to the desired angle, using the bevel scale
(Fig. 12A - 2) as a basic guide.
3. Re-tighten the bevel lock bolt.
ADJUST TABLE TO BE HORIZONTAL (FIG. 12A)
1. Loosen the bevel lock bolt (Fig. 12A - 1).
2. Realign the table to the 0° setting on the bevel scale
(Fig. 12A - 2).
3. Tighten the bevel lock bolt with the adjustment wrench.
Fig. 11
Fig. 12A
14
REMOVE THE CHUCK (FIG. 10)
1. Turn the feed handles (1) to lower the chuck (2) to the lowest
position.
2. Insert the drift key (3) into the opening in the quill. Gently tap
on the wedge using a rubber mallet (4) (not included). The chuck
and arbor will drop out.
NOTE: To avoid possible damage to the drill or chuck, be prepared
to catch the chuck as it falls.
Fig. 10
1
2
3
4
1
2
1
2

 Loading...


