MAINTENANCE
CAUTION! Never use caustic agents to clean the plastic parts of the tool. Water must never come into con-
tact with the grinder. The use of any other accessories is not recommended and may result in serious injury.
5. If you must replace a wheel be sure to obtain one with a safe rated speed at least as high as the “NO LOAD” RPM
marked on your grinder’s nameplate. Replacement wheels must have a 6 inch diameter, a matching arbor size and
should be a maximum of 3/4 inch wide. Always check new wheels for cracks. Be sure the tool is unplugged before
attempting repairs and maintenance.
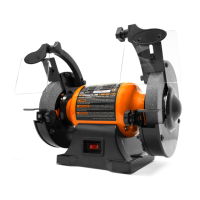
CHANGING THE GRINDING WHEEL (FIG. 4)
In normal use, grinding wheels may become cracked, grooved, rounded at the edges, chipped, out of true or loaded
with foreign material. Grinding wheels should be inspected before each use. Cracked wheels should be replaced
immediately. Any of the other conditions can be remedied with a dressing tool (not included).
To replace a grinding wheel:
1. Ensure that the machine is powered off and unplugged.
2. Using a Phillips head screwdriver and adjustable wrench, remove the three bolts and nuts from the wheel cover.
Repeat for the other side.
4. Using two 19 mm wrenches, loosen the arbor hex nut found on the outside edge of the grinding wheel. The left
side hex nut is loosened by using a clockwise wrench rotation while the right side hex nut is loosened with a coun-
terclockwise rotation.
If you are having difficulty with the two-wrench method, you may try holding one wheel while loosening the nut.
Wear gloves if you decide to use this method to avoid scraping your hand or fingers. Remove the arbor hex nut and
outer wheel flange.
5. Replace the grinding wheel with a new grinding wheel that has a speed rating higher than 3450 RPM. The outer
diameter of the wheel should be 6 inches and the arbor size should be 1/2 of an inch. Do not remove labels from
the grinding wheels.
6. Once the wheel has been replaced, re-attach the outer flange and the arbor hex nut.
Caution: Do not overtighten the nut, or use an impact driver to tighten. This can cause damage to the grinding
wheels, which could cause personal injury.
7. Replace the wheel cover and secure with the nuts and bolts. Make sure all guards, shields and work rests are
correctly positioned before operation.
POWER CORD REPLACEMENT
If replacement of the power supply cord is necessary, this must be done by an authorized service center in order to
avoid a safety hazard.
STORAGE
Store the bench grinder and the grinding wheels to prevent them from the potential hazards of moisture, contain-
ments, and other damage.
14