1
2
3
4. In normal use, grinding wheels may become cracked, grooved, rounded at the edges, chipped, out of true or
loaded with foreign material. Cracked wheels should be replaced IMMEDIATELY. While any of the other conditions
can be remedied with a dressing tool (included), new wheels sometimes require dressing to make them round.
5. If you must replace a wheel be sure to obtain one with a safe rated speed at least as high as the “NO LOAD” RPM
marked on your grinder’s nameplate. Test new wheels for cracks and maintain the existing sequence of retaining
hardware. Be sure the tool is unplugged before attempting repairs.
6. This unit has sealed lubrication within the bearings in the motor housing. No additional lubrication is required.
MAINTENANCE
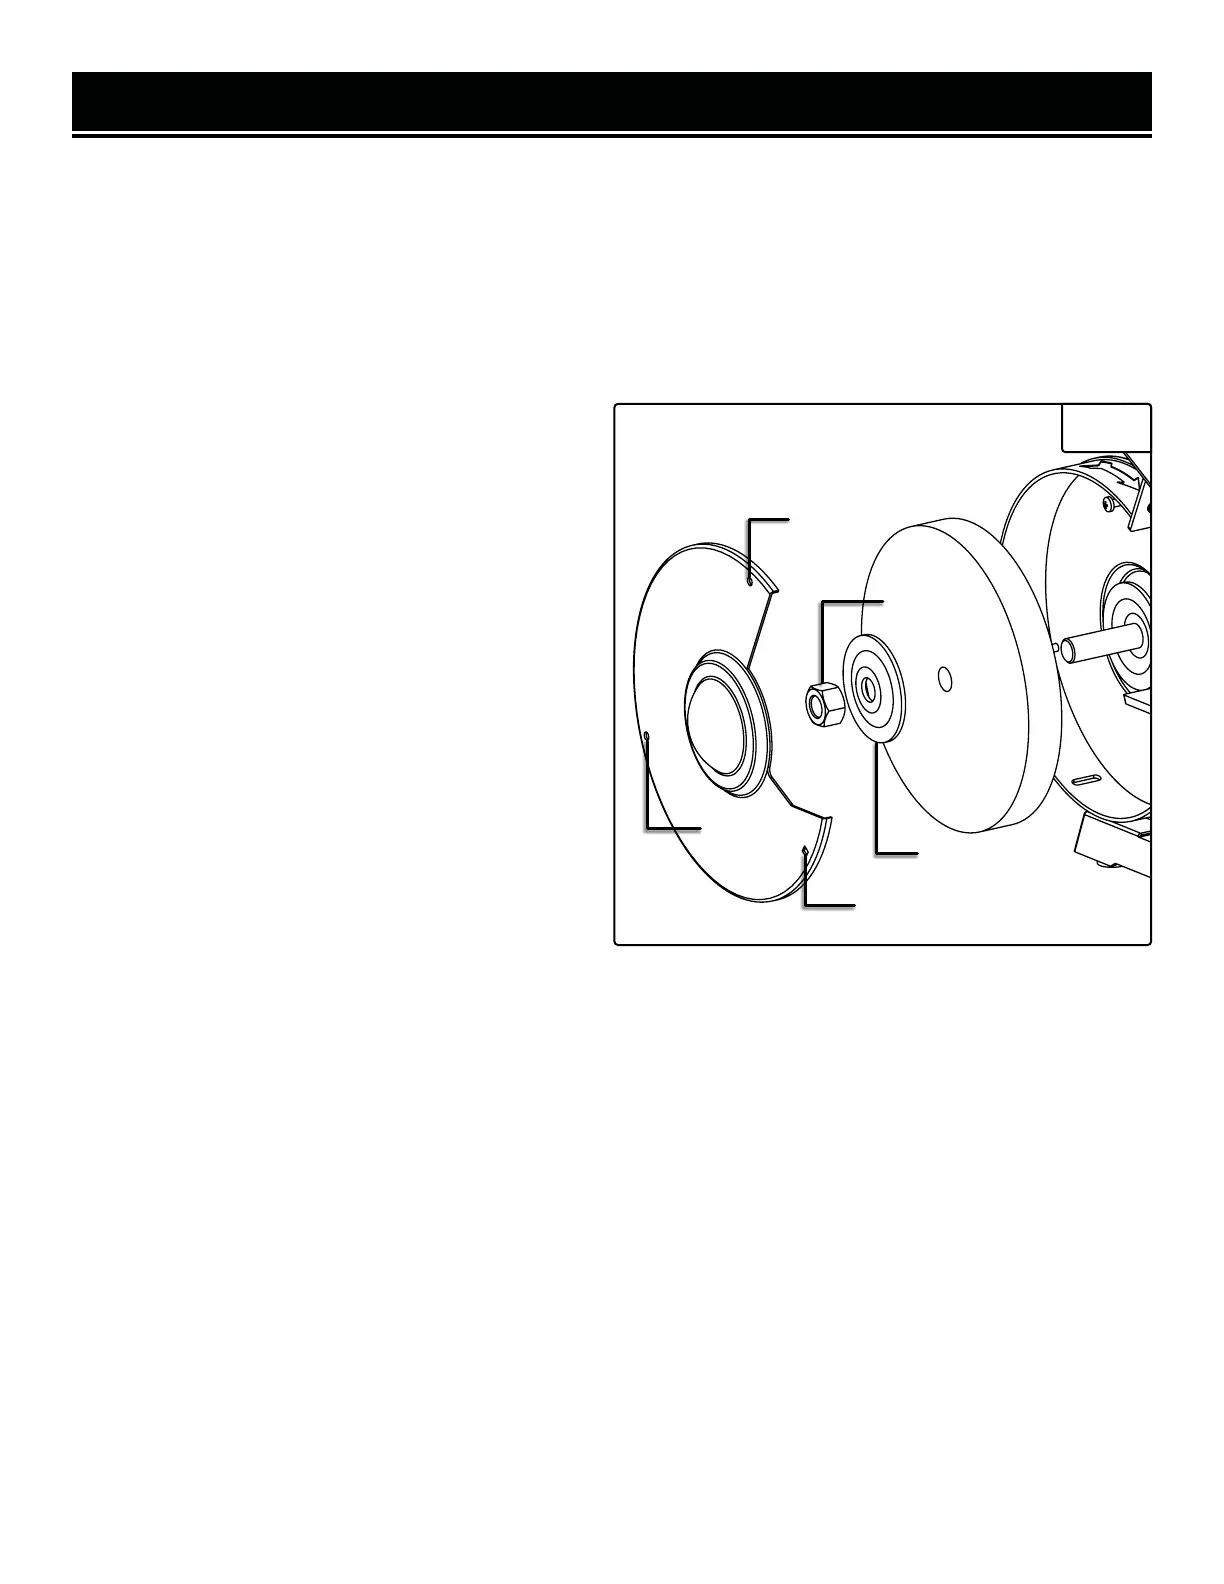
Fig. C
1
1
CHANGING THE GRINDING WHEELS
Grinding wheels should be inspected before each use.
Store the grinding wheels to prevent them from the
potential hazards of moisture, containments and other
damage.
To replace a grinding wheel:
1. Disconnect the grinder from the power supply.
2. Rotate the eye shield out of the way in order to ac-
cess the tool rest.
3. Loosen the tool rest knob and position the tool rest
away from the grinding wheel.
4. Remove the three screws (Fig. C - 1) found around
the outside of the wheel guard in order to remove the
wheel cover.
5. Using two wrenches, remove the arbor hex nut (Fig.
C - 2) found on the outside edge of the grinding wheel.
NOTE: The left side hex nut is loosened by using a
clockwise wrench rotation while the right side hex nut
is loosened with a counterclockwise rotation.
6. Remove the outer wheel flange (Fig. C - 3) and set it to the side. Now you can freely remove the old grinding
wheel.
7. Replace the abrasive wheel with a new grinding wheel rated to safely operate at a higher RPM than the max speed
of the grinder (over 3600 RPM). Make sure both the outer diameter and the arbor size of the replacement wheel
adequately meet the standards of this grinder. Do not remove labels from the grinding wheels.
8. Once the wheel has been replaced, reattach the outer flange and the arbor hex nut. Do not overtighten any flanges
or nuts, as this can dig into the abrasive wheel, creating a risk of injury.
9. Replace the wheel cover, the knobs, the tool rest and the eye shield. Make sure all guards, shields and tool rests
are correctly positioned before operation.
14
 Loading...