OFF
ON
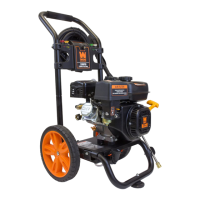
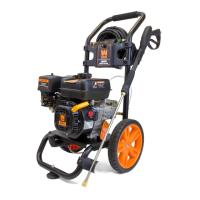
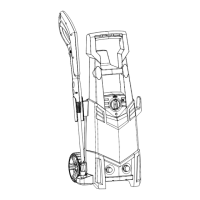
STARTING PRESSURE WASHER (FIG. 10 & 11)
1. Place pressure washer on a level surface. Turn on water.
2. Purge the system’s pump of air by releasing the safety and squeez-
ing the trigger of the spray gun. Attach lance to spray gun.
3. Turn fuel valve (Fig. 10 - 2) to the ON position.
4. Slide the choke lever (Fig. 10 - 3) to the “Choke” position.
5. Turn the engine ON/OFF switch (Fig. 10 - 1) to the “ON” position.
6. Holding the machine with your hand, pull the recoil handle (Fig.
11 - 1) slowly until resistance is felt, then pull rapidly. Squeeze the
gun trigger and release the pressure after every failed attempt to
start the pressure washer in order to reduce back pressure.
7. Let the engine run for several seconds. Then gradually slide the
choke lever (Fig. 11 - 2) to the RUN position as the engine warms up
until the choke is fully slid to the RUN position.
OPERATION
WARNING! Pulling the pull cord of the recoil starter rapidly can pull your arm towards the engine faster than
you can let go, which could result in injury.
Always relieve pressure from spray gun before pulling starter cord, including every failed attempt to start engine.
To avoid recoil, pull starter cord slowly until resistance is felt, then pull rapidly.
Fig. 10
Fig. 11
1
2
3
1
2
15
ENGINE BREAK-IN PROCEDURE
The procedure below should be followed when you receive your pressure washer in order to prolong the engine’s
service life. This procedure helps to seat the piston rings properly in the cylinder, and will reduce overall wear on
the engine.
For the first 5 hours of operation, do not hold down the trigger for more than 1 minute at a time. After holding down
the trigger for 1 minute, release the trigger and let the pressure washer run for at least 30 seconds. Then you may
pull the trigger again. After the first 5 hours of operation, you may hold down the trigger for as long as needed.
After the first 8 hours of operation, change the oil, then change it again after the first 25 hours. Refer to the Recom-
mended Maintenance Schedule on page 17 for the full maintenance schedule.
 Loading...