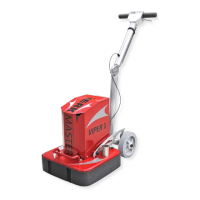
"#$%!.!!
To install and remove the pad driver on the bottom of the machine, you will need
a 9/16” (14 mm) socket wrench, a soft face mallet, and some medium-strength
thread locker (blue Loctite 243 or equivalent).
To remove the pad driver:
1. Slip the 9/16” (14 mm) socket wrench over the pad driver bolt and strike the
wrench with the soft face mallet in a counter-clockwise direction.
2. When installing a new pad driver or re-installing an existing one, apply a
generous amount of thread locker compound to the bolt and threaded drive
shaft. Insert bolt through the hole in the pad driver. Reapply thread locking
compound every time a pad driver is removed.
3. Line up the bolt to the threaded end of the shaft and start the first couple of
threads.
4. Once the bolt is engaged, make sure that the drive shaft is properly seated
within the pad driver slot before tightening the bolt all the way.
!
!
!
Failure to seat the pad driver could result in the pad driver slot being stripped out,
the threads in the shaft being stripped, the machine leaving heavy tool marks,
and the tooling overheating.
!
!
!
!!!!!!!!!!!!!!!!!!!!!!!!! !
!
=;::;K!;L!M%4NJ#O:%4!P2:D!EIKQ%4%G!:;;F2E$!3F#:%O!#EG!CF;CNP2O%!#EG!C;IE:%4CF;CNP2O%!F#Q%F2E$'!
!
!
!
 Loading...